… for Apple Final Cut Pro X

Tip #028: A Faster Way to Export – Part 2

Larry Jordan – https://LarryJordan.com

Exporting isn’t just for single files anymore.

Tip Screen Shot

Topic $TipTopic

There are two ways you can export faster:

  • Use keyboard shortcuts
  • Take advantage of background processing and export multiple clips or projects at the same time

This tip covers the second option. Tip #27 covered the first.

THE OLD WAY

In the Olde Days, we needed to wait for a project to finish exporting before we could do anything else. Then, Final Cut Pro X was released.

Final Cut was designed to both render and export in the “background.” This means that anytime you are not playing a clip in the Browser or the timeline, FCP X will render or export whatever needs to be rendered or exported.

There’s nothing you need to do to “enable” this – but you can take advantage of it.

THE NEW WAY

Let’s say you want to export four projects that the client just approved.

  • Select them in the Browser.
  • Choose File > Share. Notice that this menu now says: Share 4 Clips [ or Projects]

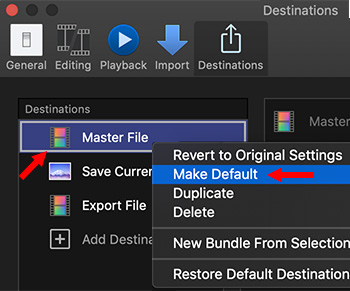
In the Export > Settings window, you will need to apply the same export settings to all the selected items, but the good news is that with one menu choice – or keyboard shortcut – you can export multiple files at the same time.


Please rate the helpfulness of this tip.

Click on a star to rate it!

… for Adobe Premiere Pro CC

Tip #083: Float a Panel in It’s Own Window

Larry Jordan – https://LarryJordan.com

“Floating a panel” means that it appears in it’s own window.

Tip Screen Shot

Topic $TipTopic

Any panel can be “un-docked” and float in its own window above the standard Premiere interface. This is especially useful for information you want to keep a close eye on – such as the timecode display.

There are three ways to undock a panel:

  • Click the three horizontal bars (called the “thumb”) next to the name of an active (selected) panel and choose Undock Panel.
  • Drag the panel name outside the regular Premiere interface.
  • Select the panel from the Window menu; for example, Timecode.

In any of these three cases, the selected panel will appear in its own window, ready to be dragged wherever you need it.

EXTRA CREDIT

If you decide you don’t want the panel undocked and it came from an existing interface, choose Window > Workspaces > Reset to Saved Layout.

If the floating panel was called from the Window menu, simply close the window to put it away.


Please rate the helpfulness of this tip.

Click on a star to rate it!

… for Adobe Premiere Pro CC

Tip #040: How to Delete Premiere Preference Files

Larry Jordan – https://LarryJordan.com

Most of the time, Premiere preference files are fine. Until…

Tip Screen Shot

Topic $TipTopic

Most of the time, Premiere’s preference files don’t break. But… every so often, things in the application start to go… awry.

When that happens:

  • Quit Premiere.
  • Then, restart the application pressing Shift + Option as it launches. (Windows: Shift + Alt). You can launch from either the Dock or Applications folder.

You know you did this correctly when the Welcome screen does not display any projects.

NOTE: Deleting preferences does not delete any media or projects. However, it WILL reset any customized settings like unsaved workspaces and custom preferences.


Please rate the helpfulness of this tip.

Click on a star to rate it!

… for Adobe Premiere Pro CC

Tip #035: How to Display the Dropped Frame Indicator

Larry Jordan – https://LarryJordan.com

An essential warning when working with media.

Tip Screen Shot

Topic $TipTopic

As Tip #37 explains, dropped frames are caused when either the CPU or your storage is not fast enough to play the video in your current sequence.

Most of the time, it’s a storage problem.

But, you can’t fix a problem if you don’t know it exists and, by default, the dropped frame indicator is hidden.

Here’s how to turn it on:

  • Switch to the Editing workspace.
  • Click the Wrench (Settings) icon in the Program Monitor.
  • Check Show Dropped Frame Indicator. (It’s about 2/3 the way down the menu.)

Now, you’ll see a small green or yellow dot in the lower left corner of the Program Monitor. When this dot is green, your system is able to play current media with no problems.

When this flashes yellow, however, your system is dropping frames. This creates either stuttery or stopped playback. Either fix the problem or shift to editing proxy files.

BONUS

The Dropped Frame indicator also exists in the Source Monitor and you turn it on the same way – except you use the Wrench icon in the Source Monitor.


Please rate the helpfulness of this tip.

Click on a star to rate it!

… for Apple Final Cut Pro X

Tip #081: Create a Custom Default Transition

Larry Jordan – https://LarryJordan.com

One simple keyboard shortcut speeds things along

Tip Screen Shot

Topic $TipTopic

You may know that Cmd + T applies the default transition – a cross-dissolve – to any selected edit point or group of edit points. What you may not know is that you can change the transition assigned to this shortcut.

To change the transition, open the Transition Browser and Control-click the transition you want to make the default. Choose Make Default.

Now, when you type Cmd + T, your newly-selected transition magically applies itself in the timeline.

EXTRA CREDIT

You can apply the default transition to multiple edit points. Simply select the clips to which you want to add transition, then type Cmd + T.


Please rate the helpfulness of this tip.

Click on a star to rate it!

… for Apple Final Cut Pro X

Tip #063: Secrets of the FCP X Dock

Larry Jordan – https://LarryJordan.com

Clicking the Dock is fast – this is faster.

Tip Screen Shot

Topic $TipTopic

Final Cut’s Dock icon holds a lot of secrets – and several very nice shortcuts – if you know how to unlock them.

Control-click the Final Cut Pro X Dock icon and you’ll see:

  • A list of recently opened libraries
  • The ability to automatically start Final Cut when you log into your computer
  • And a variety of other options.

This is a very fast way to get Final Cut started and the library you need opened all at once.


Please rate the helpfulness of this tip.

Click on a star to rate it!

… for Apple Final Cut Pro X

Tip #027: A Faster Way to Export – Part 1

Larry Jordan – https://LarryJordan.com

One simple keystroke is all it takes – except, it doesn’t exist.

Tip Screen Shot

Topic $TipTopic

When you’ve finished a project and it is time to create a master file, there are two ways you can export faster: you could create a keyboard shortcut or take advantage of background processing and export multiple clips or projects at the same time

This tip covers the first option. Tip #28 covers the second.

THE OLD WAY

Normally, you select what you want to export in either the timeline or Browser, then choose File > Share > Master file. (Or the export option of your choice.)

THE NEW WAY

However, in Final Cut Pro X > Preferences > Destinations, you have the option to assign a keyboard shortcut (Cmd + E) to the export/share option of your choice.

Because I tend to create multiple versions of my projects for various different distribution channels, I always export a Master file from FCP X. However, this process works for any Destination.

Right-click (Cntrl – click) the Destination to which you want to assign this shortcut and choose Make Default.

NOTE: A keyboard shortcut can be assigned to only one destination.

Close the Preferences window and you’re done.

The next time you want to export, type Cmd + E and – Poof! – the Export Settings window appears.

Faster than a mouse!


Please rate the helpfulness of this tip.

Click on a star to rate it!

… for Random Weirdness

Tip #062: Secrets of the Audio Meters

Larry Jordan – https://LarryJordan.com

Audio meters are essential to clean audio.

Tip Screen Shot

Topic Icon

Audio meters, whether in Avid, Premiere or Final Cut, show the peak (instant) levels of your audio. But, if you know where to look, they can also tell you a lot more.

For instance:

  • Audio meters measure peak audio on the dBFS scale (deciBels Full Scale).
  • Audio meters show the absolute levels of your audio. This is unlike clips, where adjusting the “rubber band” is making a “relative” adjustment – relative to the level at which the audio was recorded.
  • The left bar represents the left audio channel. The right bar represents the right audio channel.
  • Any audio levels that exceed 0 dB on the audio meters will distort when your project is exported.
  • Audio levels are logarithmic. For every 6 dB that audio levels drop, the volume of the sound is cut in half.
  • The thin line above the green bar shows the loudest level for that clip over the last 1-2 seconds.
  • The top of the green bar represents the loudest level of the clip at that instant.

Audio meters are essential to keeping your sound clean and distortion free.


Please rate the helpfulness of this tip.

Click on a star to rate it!

… for Random Weirdness

Tip #020: 9 Ideas to Explain Media Technology

Larry Jordan – https://LarryJordan.com

Ideas to help you understand the technology used to edit media.

Tip Screen Shot

Topic Icon
There are so many different forms of media, that making choices almost becomes overwhelming. Yet, in spite of it all, we still need to create projects. Here are some thoughts to keep in mind about editing media and the storage it uses.

  • If deadlines are extremely tight AND you are not adding a lot of effects, you can edit H.264 or HEVC directly in your NLE. Otherwise, transcode all highly-compressed media into an easy-to-edit intermediate format, such as ProRes.
  • Image quality is not lost in transcoding a highly-compressed video format into ProRes.
  • If the media was shot by a camera, transcode into ProRes 422.
  • If the media was created on a computer or uses Log or Raw formats, transcode into ProRes 4444.
  • Always shoot the frame rate you need to deliver. Changing frame rates is a massive pain.
  • Save the aggravation: Use proxies to create a rough cut when using 4K, HDR or Raw media.
  • Color grading high-quality HDR media can require over 1 GB / second of data bandwidth!
  • Always have a reserve budget for more high-performance storage. You’ll need it.
  • Always allow time to test your entire workflow from capture to final output before starting production. It is much easier to find and fix problems when not staring at a looming deadline. “I didn’t have time to test!” is never a good excuse.

Yes, there are exceptions to these rules, but not in most cases.


Please rate the helpfulness of this tip.

Click on a star to rate it!

… for Random Weirdness

Tip #009: Counting Words for Voice-Over Timing

Larry Jordan – https://LarryJordan.com

Media is like poetry. Every word counts.

Tip Screen Shot

Topic Icon

The following word count timings should assist you in determining how many words will comfortably fit within a specified amount of time in a spot. This guide assumes a “normal” rate of speech (neither fast nor slow) and a basic “announcer” read.

WORD COUNT TIMINGS

SECONDS WORDS
3 seconds
7 words
5 seconds
12 words
7 seconds
17 words
10 seconds
23 words
15 seconds
35 words
30 seconds
70 words
60 seconds
140 words

NOTE: For phone numbers, each spoken number = 1 word.
(i.e., 1-877-000-0000 = 11 words)


Please rate the helpfulness of this tip.

Click on a star to rate it!