… for Apple Final Cut Pro X

Tip #055: When to Pick Optimized or Native Media

Larry Jordan – https://LarryJordan.com

Picking the wrong option will slow things down.

Tip Screen Shot

Topic $TipTopic

Final Cut supports a variety of media for editing, not just codecs, but native, optimized and proxy media. Which should you choose? Here’s a simple guide.

NATIVE MEDIA

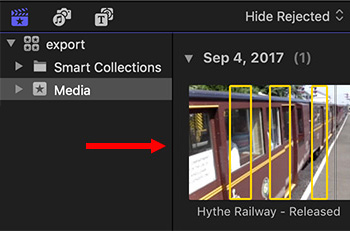
Native media is what your camera shoots.

Use native media in your edit when you are in a hurry, don’t need to apply a lot of effects or transitions, or when working with high-end log or HDR media.

OPTIMIZED MEDIA

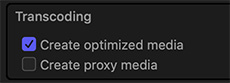
Optimized media is native media that Final Cut transcodes in the background to ProRes 422; most often using the Transcoding options in the Media Import window.

Use optimized media in your edit for projects that have lots of effects, were recorded using very compressed camera formats such as H.264 or HEVC, require lots of exports for client review, require extensive color grading.

PROXY MEDIA

There’s a belief among some editors that editing proxies is somehow “weak.” Actually, virtually every film ever edited was created using proxy files – except they were called “work prints.”

Proxies are smaller files, great for creating rough cuts where you are concentrating on telling stories, because they don’t require as much storage, and you can easily switch from proxy to optimized/native media – retaining all effects – at the click of a button.

Use proxy files in your edit when storage space is tight, you need to edit on an older/slower system or when you are working with large frame size files (4K and above).

When you are ready to color grade and output, switch back to optimized/native.

SUMMARY

Optimized files are faster and more efficient to edit and, in the case of highly compressed native files, yield better color grading, gradients and effects. But they take up more space. Most of the time, the trade-off is worth it.


Please rate the helpfulness of this tip.

Click on a star to rate it!

… for Random Weirdness

Tip #098: What’s the Best Way to Repair the Boot Disk?

Larry Jordan – https://LarryJordan.com

Not all repairs work the same – this is better.

Tip Screen Shot

Topic $TipTopic

A common question, when it comes time to maintain your computer system, is whether it really makes a difference to switch to Recovery mode to repair a hard disk. There are two answers:

  • No, if it is an external disk
  • Yes, if it’s the boot disk

WHY?

While we can repair an external drive at any time, we really can’t repair the boot disk when it is running AS the boot disk. By definition, all the OS files need to be open and active and we can’t repair an open, running file. Disk Utility compensates for this, but it can’t do a complete repair.

By launching into Recovery mode, we are booting from a completely different part of the hard drive, using totally different files. This allows Disk Utility to fully repair everything on the main boot disk – Macintosh HD – without interference.

EXTRA CREDIT

To launch into Recovery Mode, restart your Mac while pressing Cmd + R. Startup will take longer, but, when complete, you’ll be able to run First Aid from Disk Utility. I try to do this once a month or so.


Please rate the helpfulness of this tip.

Click on a star to rate it!

… for Random Weirdness

Tip #072: Where Should You Store Media

Larry Jordan – https://LarryJordan.com

Internal or external storage. Which is best?

Tip Screen Shot

Topic $TipTopic

As much as we obsess about our computers, storage is much more important to media editors. When it comes to planning your storage and media, there are two essential questions you need to ask:

  • How much capacity do you need?
  • How much speed do you need?

Most current computers – and all Macs – use high-speed SSDs for their internal boot drives. These provide blazing speed but very limited storage capacity.

So, as you are thinking about where to store media, consider this:

  • If you have a small project, using the internal SSD is fine.
  • If you have a large project, or need to move it between computers or editors, external storage is better because it is more flexible.
  • For best results, store cache files (and Libraries in FCP X) on the internal boot drive or your fastest external storage.
  • SSDs are about four times faster than spinning media (traditional hard disks), but spinning media holds more and is much cheaper.
  • A single spinning hard disk is fine for HD, but not fast enough for 4K or HDR,
  • RAIDs are preferred for massive projects, like one-hour shows or features, large frame sizes, HDR, or faster frame rates. They hold more and transfer data much faster than a single drive.
  • Don’t store media on any gear connected via USB 1, 2, or 3 Gen 1. It won’t be fast enough. Howver, you can use these devices for backups and longer-term archiving.
  • Servers are fine for storing and accessing media, but they won’t be as fast as locally-attached storage.
  • In general, if you are getting dropped frame errors, it means your storage is too slow to support the media you are editing. Invest in faster storage.

Please rate the helpfulness of this tip.

Click on a star to rate it!

… for Random Weirdness

Tip #023: Eight Tips to Help You Pick the Right Gear

Larry Jordan – https://LarryJordan.com

Let these help you plan for your next computer.

Tip Screen Shot

Topic $TipTopic

I’ve spent a lot of time researching and writing about how to plan your next computer purchase for media editing. Here are eight guidelines to help you plan your next editing system:

  • The tighter the deadlines, the more you should spend for both computer and storage. Faster is worth the money.
  • 16 – 32 GB of RAM is sufficient for almost all video editing.
  • Premiere editors should spend a bit more for a faster CPU.
  • Final Cut editors should spend a bit more for a faster GPU.
  • If you can afford it, get an i7 or i9 CPU.
  • Budget to spend as much for storage as you do for the computer. I know, you don’t want to, but at some point you’ll need to.
  • As you move to 4K, HDR or Raw media editing, you’ll need to migrate to external SSD or RAID drives. I know, you don’t want to, but at some point you’ll need to – and sooner than you expect.
  • Larger computer screen sizes are better, because editing interfaces are complex. Large screens make the interface and media easier to see.

Please rate the helpfulness of this tip.

Click on a star to rate it!

… for Adobe Premiere Pro CC

Tip #094: Premiere and ProRes

Larry Jordan – https://LarryJordan.com

Premiere now supports ProRes

Tip Screen Shot

Topic $TipTopic

If you are looking for a good intermediate codec to transcode highly-compressed media (such as H.264, AVCHD, or HEVC) into something easier to edit, Premiere now supports all flavors of ProRes on both Mac and Windows.

The first version of Premiere to support ProRes on Windows was 13.02. (ProRes on the Mac has been supported for a long time.) And the latest release of Premiere (Fall, 2019) has improved ProRes handling on both Mac and Windows.


Please rate the helpfulness of this tip.

Click on a star to rate it!

… for Adobe Premiere Pro CC

Tip #041: Optimizing Premiere Transition Preferences

Larry Jordan – https://LarryJordan.com

Premiere’s defaults aren’t bad. But they aren’t very good, either.

Tip Screen Shot

Topic $TipTopic

Preferences are exactly that – YOUR preferences on how the software should work. This means that you can set your preferences however you want. But, as a starting point to your own modifications, let me share some of my preferences with you. Use or modify these in whatever ways seem good to you.

Preferences > Timeline

The hidden “gotcha” with the transition settings are that they use frames to determine durations. Which is fine – until your frame rates change. At which point, all these durations need to change as well.

  • Video. I prefer transitional dissolves that last 2/3 of a second; a one-second transition just hangs on screen for too long. However, I also shoot mostly 60 fps material. So I change this to 40 frames (40/60 = 2/3).
  • Audio Transition. Most of the time, I like a 1/4 second fade-up, while for fade-outs, I prefer about one second.  Sadly, Premiere only allows me to pick one so I generally leave this at the default.
  • Still image. Here’s a cool tip. If you are building a still image montage set to music, figure out the duration between beats, then import all your stills to match that duration. This means you can edit stills into the timeline without setting an In or an Out.
  • Timeline Playback Auto-Scrolling. It takes more CPU power, but Smooth Scroll looks nicer. Use Page Scroll on slower systems, as it uses less CPU overhead.
  • Timeline mouse scrolling. Vertical allows you to quickly scroll up in projects that use many stacked clips. Most of my edits are five tracks or less, so I change this to Horizontal, so I can quickly move around the timeline.

Please rate the helpfulness of this tip.

Click on a star to rate it!

… for Adobe Premiere Pro CC

Tip #007: Magic Markers

Larry Jordan – https://LarryJordan.com

Five Marker Tricks That Help You Get Organized

Tip Screen Shot

Topic $TipTopic

To add a marker, position the playhead in the timeline where you want to locate a marker and type M. This adds a Cue marker at the position of the playhead.

  • Shift + M jumps the playhead to the next marker
  • Shift + Cmd + M (Windows: Shift + Cntrl + M) jumps the playhead to the previous marker.
  • Option + M deletes the selected marker.

To convert a marker to a range marker, double-click the marker icon, then give it a duration.

Once you create a marker press – / [forward slash] – this selects the marker name in the Marker panel so you can quickly rename the marker. If the Marker panel is not open, press – / – twice.

EXTRA CREDIT

The default marker name can be changed in Preferences > Markers & Metadata


Please rate the helpfulness of this tip.

Click on a star to rate it!

… for Apple Final Cut Pro X

Tip #089: Create Subclips Using Keywords

Larry Jordan – https://LarryJordan.com

Subclips are defined sections within large clips. And, they are easy to create in FCP X.

Tip Screen Shot

Topic $TipTopic

Keywords provide more and better ways to find clips, true. But… they also allow us to create subclips. Here’s how.

In the Browser, select a range within a clip either by dragging with the skimmer or playhead, or setting an In (shortcut: I) and Out (shortcut: O).

With that range selected, create a keyword (shortcut: Cmd + K) and give it a name.

NOTE: Use whatever name makes the most sense to you, but shorter is better.

Now, when you click that keyword, only the selected section shows up as a subclip in the Browser.

EXTRA CREDIT

In this screen shot, the top image shows the selected range. After a keyword is created (“Key Reveal”), selecting that keyword displays only the portion of the original clip that was selected.

Cool.


Please rate the helpfulness of this tip.

Click on a star to rate it!

… for Apple Final Cut Pro X

Tip #074: Automatic Keywords Using Finder Tags

Larry Jordan – https://LarryJordan.com

A Fast Way to Organize Media Before You Import

Tip Screen Shot

Topic $TipTopic

Finder tags are the next step beyond changing the color of a file or folder: They allow a greater amount of customization and can be used, when importing media into Final Cut Pro, to create keywords automatically.

Right-click (Control-click) any file in the Finder and choose Tags.

The Finder ships with seven color tags. You can use these or create your own; for example, Interviews, B-roll, Scene 23, etc.).

Once a tag has been created, you can assign it to as many other clips as you want. Tags allow you to organize clips using the Finder before importing them into Final Cut.

In the Finder you can find files using tags. In Final Cut, when you import a file and select From Finder Tags in the Media Import window, FCP X will assign a keyword to match each Finder tag. These, then, work the same as any other keyword.

Think of it as automatic file organization.

Cool.


Please rate the helpfulness of this tip.

Click on a star to rate it!

… for Apple Final Cut Pro X

Tip #018: Export Multiple Segments or Clips at Once

Larry Jordan – https://LarryJordan.com

A hidden trick that makes exporting multiple segments even faster.

Tip Screen Shot

Topic $TipTopic

While it’s true that you can only have one In and Out in the timeline, that is NOT true for the Browser. Clips in the Browser support selecting and exporting as many segments as you want.

To select more than one section in a clip, drag to set the In and Out for the first section, then press the Command key and drag to set as many additional sections as you want!

NOTE: To delete a selected range in the Browser, select it, then type Option + X.

With the ranges you want to export selected, choose File > Share and note that this menu now displays the number of segments you have selected.

BONUS

You can also use this technique to select and export multiple clips in the Browser, not just segments inside a single clip. As well, you can use this technique to select and edit multiple clips or segments into the timeline at once.


Please rate the helpfulness of this tip.

Click on a star to rate it!