… for Random Weirdness

Tip #547: 6 Tips to Better Foregrounds

Larry Jordan – LarryJordan.com

Shoot wide and stay low.

Image courtesy of Pexels.com.

Topic $TipTopic

This article, written by Nigel Danson, first appeared in PetaPixel.com. This is an excerpt.

I love shooting foregrounds in my big vista landscapes but it has taken quite a while to find out the things that work well and what doesn’t. I still don’t think I have mastered it but really enjoy the challenge of going out and finding a powerful foreground. In this article, I wanted to share the things that I believe have the biggest impact on creating great shots like this.

So, how do I go about finding and shooting foregrounds?

Point Your Camera Down

When using a wide-angle lens and shooting foregrounds it is really important to point the camera down. I like shooting vertically and getting right over the top of the subject like this image.

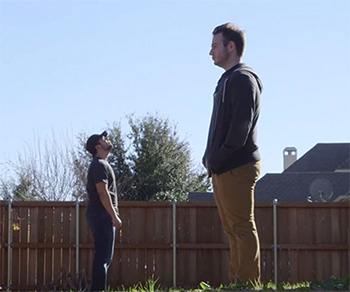
Consider the Height That You Shoot At

Shooting at different heights has a huge impact on the outcome of a scene. It also helps with connecting the foreground and distance.

Larry adds: The lower the height of the camera, the more you emphasize the foreground.

Start with Simple Foregrounds

Like most things in photography, simplicity is best. I think that is even more important in the foreground as you tend to read an image from the bottom up.

Think About Patterns

Patterns look great in foregrounds. Look for repeating patterns in the grass, rocks, sand or whatever you are shooting.

Find Something Special

My favorite type of foregrounds are the most powerful ones where you have something a little bit special. It may be some foliage or a rock that stands out. Be careful about the surroundings and make sure there are no distractions.

Midground Matters

Connect the foreground to the distance. As I have already mentioned the height you shoot at can make a big difference. Think about the foreground connection through the mid-ground to the distance.

EXTRA CREDIT

The link at the top of this tip has images and a video that illustrate these points.


Please rate the helpfulness of this tip.

Click on a star to rate it!

… for Random Weirdness

Tip #545: 10 Quick Tips to Spot Fake Gear

Larry Jordan – LarryJordan.com

If the quality is missing the gear is probably fake.

Topic $TipTopic

This article, written by Caleb Ward, first appeared in PremiumBeat.com. This is an excerpt.

Not sure if that equipment is legit? Does that deal feel too good to be true? Avoid getting scammed and learn to spot counterfeit camera gear with these ten quick tips, provided by Canon.

1. Look for Misspellings

Misspellings, whether intentional or unintentional, are an immediate sign that your equipment is fake. Give your equipment a quick look. If there’s something misspelled, it’s a fake.

2. Where Are You Buying It From?

Buying from a reputable seller is everything. Look for reviews and ratings regarding your seller. The following video posted by Fstoppers shows us that even items purchased on Amazon can be fake.

3. Instruction Manuals

Fake equipment almost always comes by itself in a box. So, if there’s a printed out manual included in the box, it’s a good sign that the product is real. This also applies to equipment purchased online. Sure… someone could probably fake a manual, but scammers likely won’t make the effort.

4. Look for a Warranty

Almost every piece of new equipment comes with a one year warranty included in its box. If a warranty isn’t in the box, you can bet your lens it’s a fake. It’s also important to note that boxes are easy to fake. Just because your equipment is in official-looking boxes doesn’t make it legit.

5. Serial Numbers

Most professional equipment comes with a serial number located somewhere on the exterior. If your piece of equipment doesn’t come with a serial number, then there is a good chance that it’s fake.

6. Does it Fit?

Official equipment such as lenses, adapters, and rigs will be incredibly snug. If you hear things moving around when you lightly shake your equipment, there’s a problem. This is especially true when buying camera lenses or adapters. Good adapters should fit lens mounts perfectly with no slippage.

7. “Too Good to Be True” Prices Usually Are

The online camera market is incredibly competitive, so it’s no surprise that online stores are always trying to undercut each other in terms of price. However, if you find a piece of equipment for half the normal retail cost, it’s probably a fake or, even worse, an empty box!

8. Holograms

Most of the popular camera manufacturing brands have “official” stickers that feature holograms. These stickers are hard to replicate, so they’re great indicators of official equipment.

9. Clear Printing

Printed information on genuine equipment is almost always incredibly sharp and easy-to-read. Counterfeit equipment, on the other hand, tends to be lower in quality – including written content. You won’t see illegible text on official equipment.

10. Test the Equipment

Test the gear! If you’re buying a piece of camera equipment in person, you should always test the gear before you buy. If the seller won’t let you test the camera – that should be a huge red flag. Even if you’re wanting to buy your equipment online, it’s good practice to go to your local camera store and test the camera to make sure it is a good fit for you.

EXTRA CREDIT

The link at the top of this tip includes a video from Canon on how to spot fake gear.


Please rate the helpfulness of this tip.

Click on a star to rate it!

… for Random Weirdness

Tip #544: 7 Tips for Better Shooting

Larry Jordan – LarryJordan.com

7 Tips to improve your shooting, from Caleb Pike.

Image courtesy of Pexels.com.
Slate your shots. Labeling makes them easier to find in the edit.

Topic $TipTopic

This article, based on a video by Caleb Pike, first appeared in PremiumBeat.com. This is an excerpt.

Here are the tips that Caleb goes through in the video:

1. Transitional Shots

Utilizing transition shots gives the editor the ability to move from scene to scene without using harsh cuts. As Caleb points out you can find very creative ways to develop and film transition shots without the use of “artificial crossovers and fades”.

2. Slate Your Shots

Metadata is pretty important to an editor. It not only helps you, the director, to keep everything organized on set, but it also helps the editor in post. On any film shoot you’re going to go through several takes of multiple scenes, so by slating and cataloging each slate you’ve already begun the metadata collection and organizing for your editor.

3. Overlap Your Shots

Overlapping shots can make editing easier and its gives the editor more options to work with. To do this you want to film specific actions and tasks in several angles, and you want to be sure and film the action from beginning to end in each take. Total pro move.

4. Get It On Film

When shooting interviews or filming a narrative sequence begin rolling before you say “action”, this way you can gather auditory information about the scene or you can ask metadata questions to your interview subjects. Such questions for your subjects would include asking their name, spelling of their name and title. Having this information in audio form can greatly help your editor when setting up interview titles and or just labeling the metadata.

5. B-Roll

As Caleb says, “B-Roll, B-Roll, B-Roll, B-Roll. You can never have enough B-Roll….it doesn’t matter how important it is or whether you’ll actually use it. I’ve always been taught that, “It’s better to have it than not.”

6. Practice A Lot

You can go to school for years to learn the fundamentals of filmmaking, but if you don’t get out there and practice then you’ll never improve as a shooter or editor. So, use any open time you can and begin filming anything you can think of to practice shooting and editing.

7. Keep The Tone In Mind

Know your story. Know what it’s about and the tone you want to set through the visuals. This is extremely important as the tone will most often dictate how the transitions and b-roll will work.

EXTRA CREDIT

The link at the top takes you to a video where Caleb explains this tips in more detail.


Please rate the helpfulness of this tip.

Click on a star to rate it!

… for Apple Motion

Tip #555: Create Custom Curve Sets in Motion

Larry Jordan – LarryJordan.com

Custom Curve Sets allow us to see just the parameters we want.

A Custom Curve Set, showing parameter settings for Position, Scale and Opacity.

Topic $TipTopic

This tip originally appeared as an Apple KnowledgeBase article. This is an excerpt. In Tip #550, we illustrated how to access the default curve set in Apple Motion to see which settings have been modified or animated. However, we can also create our own custom curve set.

In the screen shot, I created a new curve set, then added Position, Scale and Opacity settings to it. This allows me to see just the changes to those key settings for the selected elements for the duration of the Motion project.

In addition to using the built-in curve set views, you can make and manage your own view using the last two options in the Show Curve Set pop-up menu: New Curve Set and Manage Curve Sets. As you create and store custom parameter sets, they appear in the Show Curve Set pop-up menu (at the top of the parameter list in the Keyframe Editor), allowing you to switch between them. Deleting, duplicating, and modifying custom sets is done in the Manage Curve Sets dialog (accessible from the Show Curve Set pop-up menu).

To create a custom curve set:

  • In the Keyframe Editor in Motion, click the Show Curve Set pop-up menu, then choose New Curve Set.
  • In the dialog that appears, enter a name for the set, then click OK.
  • After you create a curve set, you can choose it from the Show Curve Set pop-up menu.

To add parameters to a custom curve set do one of the following:

  • After you create a custom curve set, drag a parameter name from any pane in the Inspector into the Keyframe Editor parameter list.
  • In the Inspector, click the Animation menu for the parameter, then choose Show in Keyframe Editor.
  • The Animation menu (a down arrow) remains hidden until you position the pointer over the far-right side of the parameter row you want to modify.
  • The parameter is added to the custom curve set.

To remove a parameter, drag it out of the list.

EXTRA CREDIT

To delete, duplicate or manage the display order of custom curve sets, select Manage Curve Sets from the Cuve menu.


Please rate the helpfulness of this tip.

Click on a star to rate it!

… for Apple Motion

Tip #550: Find Animated Settings in Motion – Fast!

Larry Jordan – LarryJordan.com

This menu is located in the top left corner of the Keyframe Editor.

The Curve menu in the top left corner of the Keyframe Editor. The pop-up menu is outlined in white.

Topic $TipTopic

As projects get more complex, tracking which elements are animated and how they are animated gets tricky. Fortunately, Motion has a menu option that quickly allows you to see any modified settings or keyframes applied to a selected element.

With your project open, display the Keyframe Editor (shortcut: Cmd + 8). Next, select the element with the settings you want to review.

Then, in the top left corner, click the Animated menu. Here, you have several options:

  • All. Shows all settings for the selected element, whether modified or note.
  • Animated. Settings which have keyframes applied.
  • Modified. Setting which were changed from their defaults, whether or not keyframes were applied.

Other options limit the settings that are displayed to minimize visual clutter.

EXTRA CREDIT

Tip #555 illustrates how to create custom curve sets, so you see exactly the settings you need.


Please rate the helpfulness of this tip.

Click on a star to rate it!

… for Apple Motion

Tip #537: Add Curves to Keyframes

Larry Jordan – LarryJordan.com

Right-click any keyframe to reveal playback options.

Right-click a keyframe to display a hidden menu of keyframe options.

Topic $TipTopic

Apple Motion keyframes have a lot of flexibility in their playback options, if you know where to look. Here’s a quick tip to discover the secret.

When you apply keyframes to a clip, they will appear in the Keyframe section of the timeline, in the lower right portion of the interface.

NOTE: To display or hide the Keyframe Editor, type Cmd + 8.

Right-click (or Control-click) any keyframe to reveal a hidden menu.

Some of these options are:

  • Ease In slows movement going into a keyframe.
  • Ease Out slows movements leaving a keyframe
  • Ease Both accelerates and decelerates movement.
  • To change the shape of a curve, drag the white dot – called a “Bezier control point.”
  • Lock prevents a keyframe from being changed.
  • Disable turns off a keyframe, without removing it.

Please rate the helpfulness of this tip.

Click on a star to rate it!

… for Visual Effects

Tip #556: Blend Modes in Brief

Larry Jordan – LarryJordan.com

Blend modes create textures.

Blend mode options in Photoshop.
Blend modes combine textures between clips. They are found in all modern NLEs, like this list from Photoshop.

Topic $TipTopic

Iain Anderson, at MacProVideo, wrote this up in more detail. But I liked his summary of blend modes, which I have modified from his article.

Blend modes allow us to combine textures, and sometimes colors, between clips or elements that are stacked vertically on top of each other.

Whether you are in Photoshop or Premiere, Final Cut or Motion, blend modes work the same way. These are arithmetical expressions, with nothing to adjust. You either like the effect or you don’t.

NOTE: If you don’t like the effect, tweak either the gray-scale or color value of the top clip and the results will change.

All these settings should be applied to the top clip. It will be the only clip that changes. Here’s what the settings mean.

  • Normal. This leaves the top clip’s image unaltered
  • Subtract, Darken, Multiply, Color Burn, and Linear Burn. These combine clips based upon darker grayscale values. For example, the top clip will darken clips below it. Multiply usually works best for adding darker areas.

NOTE: If nothing changes when you apply this setting, your top clip is too light. Darken it.

  • Add, Lighten, Screen, Color Dodge, and Linear Dodge. These combine textures between clips based upon lighter grayscale values. Screen usually works best for adding bright elements like sparks and flame.

IMPORTANT: Avoid using Add. It creates highlights that exceed legal white values. Screen does not.

  • Overlay, Soft Light, Hard Light, Vivid Light, Linear Light, Pin Light, and Hard Mix. These combine textures based on mid-tone grayscale values, often in a way that increases contrast. Overlay usually works best, though more often these days, I find myself using Soft Light.

NOTE: For better results, reduce opacity and play with the grayscale settings.

  • Difference and Exclusion. These mess with color values to create very hallucinogenic effects. What’s happening is that color values in the top clip are mathematically removed from the clips below in slightly different ways. Also useful for spotting the difference between two clips.
  • Stencil Alpha and Stencil Luma. These insert the background image into the foreground image. Use Stencil Alpha, provided the foreground has an alpha channel. If it doesn’t, use Stencil Luma, but the results may not be as good.
  • Silhouette Alpha and Silhouette Luma. These cut a hole into the background image based upon the foreground image shape. Again, use Silhouette Alpha if the foreground image has an alpha channel.
  • Behind. This displays the clips below the current effect. It is used when you are also using Stencil Alpha to insert one image into another.

The bottom choices will vary by application, and are covered in the Help files.


Please rate the helpfulness of this tip.

Click on a star to rate it!

… for Visual Effects

Tip #552: 8 Tips to Improve VFX Shots

Larry Jordan – LarryJordan.com

Think about what you are shooting and how to match it to the background.

Topic $TipTopic

This tip, presenting by Brad Hamilton, first appeared in a YouTube video. This is a summary of his video.

Here are Brad’s eight tips to improve your VFX shooting:

  1. Study reference images of the effect you are trying to recreate.
  2. Color correct the element you are adding to match the live action plate
  3. Match the sharpness of the VFX elements you are adding to that of the live action plate you shot.
  4. Match the amount of grain in the added element to the amount of grain in the live action shot.
  5. Utilize practical special effects during the filming process.
  6. Use lens flares/glare to promote realism and hide flaws in your composite.
  7. Make sure the lighting of the 3D world matches the live action shot.
  8. Create realistic 3D materials by adding scratches, dirt, grime, glossiness, rust, roughness, bumps, and so on.

EXTRA CREDIT

Click the link at the top of this tip to watch the video.


Please rate the helpfulness of this tip.

Click on a star to rate it!

… for Visual Effects

Tip #551: 5 Easy In-Camera Effects

Larry Jordan – LarryJordan.com

Some very cool effects are very easy to do in-camera.

This is an example of forced perspective.

Topic $TipTopic

This article, written by Ryan Connolly at Film Riot, first appeared in PremiumBeat.com. This is an excerpt. Here are five easy in-camera effects you can do yourself.

1. Forced Perspective

Forced perspective is a technique that uses spacing and distance to make objects appear larger or smaller in relation to other objects.

2. Lower Shutter Speed

Using a lower shutter speed is generally done for two reasons. The first: because the location is dark and you need to let in more light. The second is to create motion blur to make the action seem more fluid.

3. Faster Shutter Speed

A faster shutter speed is utilized extensively by professional sport filmmakers. Because of the high shutter speed, you can essentially “freeze” a moment. When using this in conjunction with camera movement, the action seemingly becomes more violent. This technique works great in combat sequences.

4. Lens Whacking

Lens whacking is done by detaching the lens from the mount and then holding it close enough to allow the sensor to still gain an image. The result is very surreal and ethereal.

5. Lens Flare

Lens flare is the natural effect of non-image forming light entering the lens and hitting the sensor, creating the characteristic streak of light.

EXTRA CREDIT

Visit the link at the top of this tip to see a video illustrating all these techniques.


Please rate the helpfulness of this tip.

Click on a star to rate it!

… for Adobe Premiere Pro CC

Tip #564: Master a Linked Selection

Larry Jordan – LarryJordan.com

Linked selections keep audio and video in sync.

An enabled Linked Selection button in the top left of the Premiere timeline.

Topic $TipTopic

Most of the time, linking is a good thing. Except, ah, when it isn’t. Here’s a description of what it is and two ways to unlink a clip.

Most of the time, when we import a media clip, the audio and video come in together, in sync and ready to work. However, there are times where you may not want both. Perhaps you recorded audio using the camera mic and need to use audio recorded on a boom mic instead.

You could drag the audio volume of the clip to zero. But, that takes time. It would be faster to just delete the audio clip. But, every time you select the audio, the video gets selected as well.

However, the Linked Selection button shown in the screen shot, which is in the top left of the timeline, allows you to unlink the audio from the video. When this button is blue, synced clips are linked. When it is white, you are able to select the audio of a synced clip without selecting the video.

At which point, you can move or delete it.

EXTRA CREDIT

Except…. it is SUCH a hassle grabbing the mouse, dragging it all the way up to the top of the timeline and clicking it.

If only there was the option to select just one side of a clip. An option that allows us to choose just the video, or just the audio…

Smile… Well, there is. Press the Option key when clicking a synced clip and you’ll only select the side of the clip you clicked on.

NOTE: Windows users need to use the Alt key, but “Alt” is a lot harder to work into a joke.


Please rate the helpfulness of this tip.

Click on a star to rate it!