… for Codecs & Media

Tip #590: What is a Proxy File?

 Larry Jordan – LarryJordan.com

Proxy files allow editing on slower systems, using less storage.

Topic $TipTopic

Proxy files are designed to be smaller, easy-to-edit media files when compared to camera native. But what does “easy-to-edit” and “smaller” actually mean?

EASY TO EDIT

There are two ways to compress video:

  • GOP (also called “inter-frame compression”) compresses images in groups. This creates very small file sizes, but requires more CPU performance to edit because the computer needs to deconstruct each group before it can edit a specific frame.
  • I-frame (also called “intra-frame compression”) compresses each frame individually. This creates larger files, but even slower systems can edit them smoothly because each frame is immediately available for editing.

All proxy files use I-frame compression, which decreases the load on the CPU and speeds editing.

SMALLER

Proxy files are 1/4 the resolution of the camera native media, which decreases the load on storage system capacity and bandwidth. For example, a proxy file for a 1920 x 1080 frame is only 960 x 540 pixels. This reduces storage bandwidth by 75%.

However, this reduced resolution also means that proxy files should not be used for final output because they don’t have the full resolution of the master file.

SUMMARY

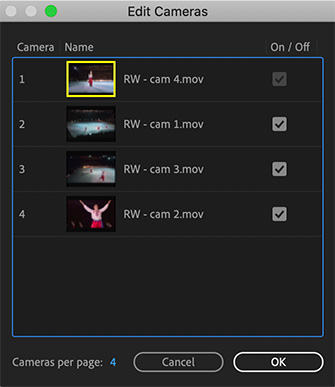
Both Premiere and Final Cut support seamless proxy editing, which is recommended for larger frame sizes and multicam editing. Then, for final output, switch from the proxy to high-quality files to get the best images from your project.


Please rate the helpfulness of this tip.

Click on a star to rate it!

… for Codecs & Media

Tip #589: Pick the Right Version of ProRes

 Larry Jordan – LarryJordan.com

I recommend ProRes 422 for camera media and ProRes 4444 for computer media.

The Apple ProRes logo.

Topic $TipTopic

Apple provides this description of the six different versions of ProRes:

Apple ProRes 4444 XQ: The highest-quality version of ProRes for 4:4:4:4 image sources (including alpha channels), with a very high data rate to preserve the detail in high-dynamic-range imagery generated by today’s highest-quality digital image sensors.

Apple ProRes 4444: An extremely high-quality version of ProRes for 4:4:4:4 image sources (including alpha channels). This codec features full-resolution, mastering-quality 4:4:4:4 RGBA color and visual fidelity that is perceptually indistinguishable from the original material. Apple ProRes 4444 is a high-quality solution for storing and exchanging motion graphics and composites, with excellent multi-generation performance and a mathematically lossless alpha channel up to 16 bits.

NOTE: Apple ProRes 4444 XQ and Apple ProRes 4444 are ideal for the exchange of motion graphics media because they are virtually lossless, and are the only ProRes codecs that support alpha channels.

Apple ProRes 422 HQ: A higher-data-rate version of Apple ProRes 422 that preserves visual quality at the same high level as Apple ProRes 4444, but for 4:2:2 image sources.

Apple ProRes 422: A high-quality compressed codec offering nearly all the benefits of Apple ProRes 422 HQ, but at 66 percent of the data rate for even better multistream, real-time editing performance.

Apple ProRes 422 LT: A more highly compressed codec than Apple ProRes 422, with roughly 70 percent of the data rate and 30 percent smaller file sizes. This codec is perfect for environments where storage capacity and data rate are at a premium.

Apple ProRes 422 Proxy: An even more highly compressed codec than Apple ProRes 422 LT, intended for use in offline workflows that require low data rates but full-resolution video.

My general recommendation is to use ProRes 422 for all images shot on a camera (except RAW formats), and ProRes 4444 for all media converted from RAW or Log or media generated on a computer.

EXTRA CREDIT

Here’s an Apple White Paper that explains ProRes in more detail.


Please rate the helpfulness of this tip.

Click on a star to rate it!

… for Codecs & Media

Tip #588: What is ProRes?

Larry Jordan – LarryJordan.com

ProRes is a good choice for capture, editing and master files.

The Apple ProRes logo.

Topic $TipTopic

Apple ProRes codecs provide a combination of multistream, real-time editing performance, impressive image quality, and reduced storage rates. ProRes codecs take full advantage of multicore processing and feature fast, reduced-resolution decoding modes. All ProRes codecs support any frame size (including SD, HD, 2K, 4K, 5K, and larger) at full resolution. The data rates vary based on codec type, image content, frame size, and frame rate.

As a variable bit rate (VBR) codec technology, ProRes uses fewer bits on simple frames that would not benefit from encoding at a higher data rate. All ProRes codecs are frame-independent (or “intra-frame”) codecs, meaning that each frame is encoded and decoded independently of any other frame. This technique provides the greatest editing performance and flexibility.

A variety of cameras can now capture and record a wider gamut of
color values when working in log or raw formats. You can preserve a wider color gamut by recording with the ProRes LOG setting on certain cameras such as the ARRI ALEXA or transcoding from the RED® camera’s REDCODE® RAW format. This results in deeper colors and more detail, with richer red and green areas of the image.

EXTRA CREDIT

Here’s an Apple White Paper that explains ProRes in more detail.

The table of file sizes, at the end, are invaluable in planning storage requirements.


Please rate the helpfulness of this tip.

Click on a star to rate it!

… for Adobe Premiere Pro CC

Tip #587: Easier Multicam Storytelling

Larry Jordan – LarryJordan.com

Editing a multicam in groups helps focus on different parts of your story.

This Page menu appears when there are more camera angles than can appear in the Multicamera Monitor.

Topic $TipTopic

When editing multicam sequences in Premiere, we have the option of specifying how many camera streams we want to display during the edit.

In Tip #586, we learned about the Edit Cameras window. At the bottom of this window, we can choose the number of cameras to display during the edit itself. (The default is four.)

The majority of multicam edits are four cameras or less, which means, most of the time, we don’t need to change this. Still, there are two reasons why you might want to:

  • If you have a large computer monitor and more than four cameras, increasing this allows you to see more cameras onscreen at one time.
  • Decreasing the number of cameras you view at once allows you to concentrate on editing cameras in groups – for example, first edit wide shots for coverage, then go back and edit close-ups for emphasis. Since there is no limit to the number of times you can edit a multicam sequence, editing a sequence in multiple passes allows you to focus on different elements of your story.

The Page menu, shown in the screen shot, allows you to quickly switch between the different groups of cameras in both the Source Monitor and Program panels.


Please rate the helpfulness of this tip.

Click on a star to rate it!

… for Adobe Premiere Pro CC

Tip #586: Reorganize Multicam Sequences

Larry Jordan – LarryJordan.com

Cameras are arranged in the order they were selected.

The Edit Camera window in Adobe Premiere Pro CC.

Topic $TipTopic

There’s a hidden menu in Premiere that allows you to edit and reorganize multicam clips. After creating a multicam sequence, open it in the Source Monitor by double-clicking.

Click the Wrench icon in the lower right corner of the Source Monitor and choose Edit Cameras; near the bottom.

This displays the Edit Camera window:

  • Drag camera names to reorder them. (They are initially organized based upon the order in which they were selected.)
  • Uncheck On/Off to disable the display of a clip, without removing it from the sequence.
  • Change Cameras per page to increase the number of camera angles displayed when you are editing the multicam sequence.
  • When clips are organized to your satisfaction, click OK.

Please rate the helpfulness of this tip.

Click on a star to rate it!

… for Adobe Premiere Pro CC

Tip #575: Work Faster with Pancakes in Premiere Pro

 Larry Jordan – LarryJordan.com

Whichever sequence is highlighted in blue is the active sequence.

Two sequences stacked in the same Premiere timeline.

Topic $TipTopic

This article, written by Jason Boone, first appeared in PremiumBeat.com. This is an excerpt.

Pancake Timeline was a term first coined by Vashi Nedomansky, ACE, of Vashi Visuals. The method derives its name from the vertical stacking of timelines within the interface. Stacking timelines not only speeds your workflow, but will also help you keep a bird’s-eye view on your work.

The pancake technique isn’t just for pulling good takes from raw footage. Let’s say, for example, you’re creating a demo reel. You open up multiple Premiere Projects at the same time, pancaking three to four timelines from varying projects. Then, you can quickly shuttle through numerous source sequences to pull clips for your reel. This technique will also be quite useful for sporting event highlights. Whatever the case, pancaking timelines is a powerful technique to add to your Premiere Pro tool belt.

Here’s a closer look at how to use this technique to quickly sort through a project’s raw footage.

  1. Prepare the sequences, as normal.
  2. Open both sequences into the timeline.
  3. Grab the tab of whichever sequence you want on top and drag it, inside the frame of the Timeline panel, until the top of the timeline panel turns purple, then release it.
  4. Edit from one timeline to the next. We can now easily bring clips from one sequence to the other, either via drag-and-drop or performing insert and/or overwrite edits.

NOTE: This process is identical to modifying workspaces by dragging panels around, except this time, rather than moving panels, we are moving sequences.


Please rate the helpfulness of this tip.

Click on a star to rate it!

… for Apple Final Cut Pro X

Tip #585: Hide Jump Cuts with Flow

Larry Jordan – LarryJordan.com

For best results, don’t change the duration of the transition.

The Flow transition is located in the Dissolves category.

Topic $TipTopic

The best way to hide a jump cut is using B-roll or a cutaway. However, when you don’t have those options, the Flow transition in Final Cut can bail you out of a tricky situation. Here’s how.

The Flow transition is relatively new in Final Cut. What it does is use Optical Flow technology to create new frames that blend the Out of the out-going clip into the In of the in-coming clip.

In doing so, it converts a jarring jump cut into a fast, smooth, 6-frame dissolve.

To apply, drag Flow from Transitions > Dissolves onto the edit point containing the jump cut.

EXTRA CREDIT

According to the Final Cut Pro X Help:

  • Use the Flow transition with the default duration only. Any other duration will generate unexpected results.
  • The Flow transition duration is always set at 6 frames regardless of the duration set in the Editing pane of Final Cut Pro preferences.
  • The Flow transition is disabled (treated as a standard dissolve) when you apply it to a generator or still image.

Please rate the helpfulness of this tip.

Click on a star to rate it!

… for Apple Final Cut Pro X

Tip #570: 3 Ways to Create Split Screens in FCP X

Larry Jordan – LarryJordan.com

The key is to stack clips vertically, then scale and crop as needed.

A freeform split screen, courtesy of MotionArray.com.

Topic $TipTopic

This article first appeared in MotionArray.com. This is an excerpt.

Split screen videos can be a fun stylistic choice for a variety of video types, but they also allow you to display more information on-screen than a single clip. With split screens, you can create engaging motion graphics videos with just a little keyframing. In this tutorial, we are going to show you a variety of methods for creating dynamic split screen videos in Final Cut Pro X.

A split screen effect works by layering the footage and changing the shape and size of your video clips, so they are displayed alongside one another. Because of this, It’s helpful to know the layout you want to achieve so you can work out the sizes to make each video.

Option 1: Vertical & Horizontal Splits

Vertical and horizontal split screens are when the screen is divided into two sections, displaying a different clip on each side. For both of these types of split screen layouts, you can use the same method, but just change different cropping settings. For a vertical video, change the left and right crop controls. For horizontal, change the top and bottom crop controls.

Option 2: Multiple Video Splits

To create multiple splits, you can use the vertical/horizontal method above, but you’ll need to add more layers. Creating split screens with more than 2 layers of video can become a little complicated, especially if you want to be precise about your placement.

Option 3: Freeform Splits

Another style of split screen often used in music videos and motion graphics videos is the freehand split screen. Rather than neatly laid out in equal sizes, the freeform style consists of videos arranged in whichever way you want. It will take a bit of playing around to get right, but it’s worth it!

EXTRA CREDIT

The article, linked at the top, has details and videos illustrating how to create and animate each of these effects.


Please rate the helpfulness of this tip.

Click on a star to rate it!

… for Random Weirdness

Tip #580: The History of Storyboards

Larry Jordan – LarryJordan.com

Storyboards are designed to help plan the story before production starts.

Image source: https://www.flickr.com/photos/tmray02/1440415101/
A storyboard for “The Radio Adventures of Dr. Floyd” episode #408 drawn by Tom Ray.

Topic $TipTopic

A storyboard is a graphic organizer that consists of illustrations or images displayed in sequence for the purpose of pre-visualizing a motion picture, animation, motion graphic or interactive media sequence. The storyboarding process, in the form it is known today, was developed at Walt Disney Productions during the early 1930s, after several years of similar processes being in use at Walt Disney and other animation studios.

The first storyboards at Disney evolved from comic book-like “story sketches” created in the 1920s to illustrate concepts for animated cartoon short subjects such as Plane Crazy and Steamboat Willie, and within a few years the idea spread to other studios.

Many large budget silent films were storyboarded, but most of this material has been lost during the reduction of the studio archives during the 1970s and 1980s. Special effects pioneer Georges Méliès is known to have been among the first filmmakers to use storyboards and pre-production art to visualize planned effects.

Disney credited animator Webb Smith with creating the idea of drawing scenes on separate sheets of paper and pinning them up on a bulletin board to tell a story in sequence, thus creating the first storyboard. Furthermore, it was Disney who first recognized the necessity for studios to maintain a separate “story department” with specialized storyboard artists (that is, a new occupation distinct from animators), as he had realized that audiences would not watch a film unless its story gave them a reason to care about the characters.

Gone with the Wind (1939) was one of the first live-action films to be completely storyboarded.

EXTRA CREDIT

Here’s a Wikipedia article to learn more.


Please rate the helpfulness of this tip.

Click on a star to rate it!

… for Random Weirdness

Tip #569: Tips for Buying Used Lenses

Larry Jordan – LarryJordan.com

Used lens are affordable, but be careful.

Lens image courtesy of pexels.com

Topic $TipTopic

This article, written by Caleb Ward, first appeared in PremiumBeat.com. This is an excerpt.

Used lenses provide a cost-effective way to get quality equipment, but know what to look for before you buy.

1. Look at the Focal Length

Lenses are broken up into two categories, prime & zoom. Prime lenses don’t zoom ‘in and out’ but typically let in more light than zoom lenses. They have a fixed focal length.

2. Check the Aperture Number

A good rule of thumb is: the lower the f-stop number the ‘better’ the lens.

3. Check the General Condition

Are there visible signs of use? It isn’t a perfect way to tell if a lens shoots great but it will let you know if the previous owner took care of the lens.

4. Shake the lens

On any lens you will hear a little noise when you shake it, but do you hear anything that sounds extra loose? Listen for screws or broken plastic pieces on the inside as these might be indicators of an unseen problem.

5. Shine a Flashlight Through the Back

Can you see any dust or scratches? If so you will probably have to send in your lens to get repaired which can get really expensive.

6. Does the Focus and Zoom Wheel Turn Smoothly?

Difficulty zooming or focusing can mean the gears on the inside of your lens are messed up…and there isn’t a lot you can do about that.

7. Are the Aperture Blades Closing Correctly?

You will need to connect the lens to a camera to test the aperture blades. It is imperative that they are in good working order. Do they all form a perfectly symmetrical shape when closed? Do they open up all the way?

8. Try the Lens!

Most camera shops will allow you to test a lens on your own personal camera. Put the lens on and shoot some pictures. Zoom into the image and check for vignetting or chromatic aberrations.

9. Ask about a Warranty and Return Policy

Be careful when buying on an online auction site like eBay. Lenses sold “as-is” should signal a big red flag.

10. Know the Seller

Tried and true retailers are the best companies to purchase used lenses from. Not only will they likely have a great return policy but they probably won’t sell sketchy lenses.

EXTRA CREDIT

The source of these tips – Karl Taylor – has posted a video at the link at the top of this tip. Watch it to learn more.


Please rate the helpfulness of this tip.

Click on a star to rate it!