… for Random Weirdness

Tip #861: NewTek Launches Training Site

Larry Jordan – LarryJordan.com

new classes provide training and, if needed, certification.

NewTek University logo.

Topic $TipTopic

Last week, NewTek announced exclusive learning and certification opportunities through NewTek University. NewTek University courses range from operating guides to classes on selling NewTek solutions.

All learning materials are available online and on-demand, connecting users with an unparalleled learning opportunity no matter their location or time zone. New team members can be brought right up to speed in no time with new content being added to the existing library throughout the rest of 2020.

Class fees start at $895 and exams at $249. Free sample classes are avaliable. All courses are available 24/7 online on-demand.

For more information visit: here.


Please rate the helpfulness of this tip.

Click on a star to rate it!

… for Apple Motion

Tip #860: Transform vs. Transform 3D

Larry Jordan – LarryJordan.com

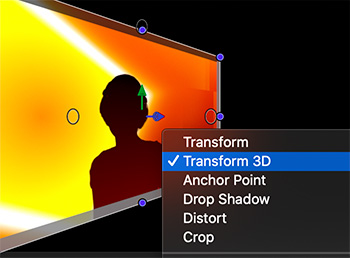
This menu option is faster than selecting a layer, selecting the tool, then modifying the image.

Control-click any image in Motion’s Viewer to display this menu.

Topic $TipTopic

Control-click an image displayed in Motion’s Viewer and an interesting menu presents itself. The top two choices are: Transform and Transform 3D. What do they do?

Select Transform and position dots appear around the edges of the image. As well, the Arrow (Select) tool is activated.

This option means you can position, scale and rotate an image… in 2D.

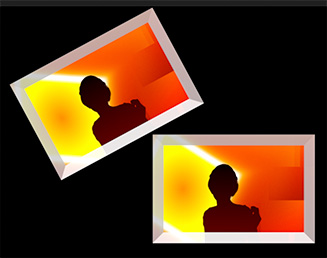
Select Transform 3D and not only do the position dots appear, but the 3D controls are displayed in the center of the image, and the 3D Transform tool is selected.

This option means you can position, scale and rotate an image in 3D.

This menu option is faster than selecting a layer, then selecting the tool, then modifying the image.


Please rate the helpfulness of this tip.

Click on a star to rate it!

… for Apple Motion

Tip #859: What is a Clone Layer?

Larry Jordan – LarryJordan.com

Clones inherit filters and masks, but not position or behaviors.

A master file, top, and its clone. Filters are inherited, position and rotation are not.

Topic $TipTopic

Control-click any element in Motion’s Viewer and you’ll see the option to “Make a Clone Layer.” What is a clone layer?

Normally, when you duplicate a layer (Shortcut: Cmd + D), there is no relationship between the original and the duplicate.

However, with a clone layer (Shortcut: K), changes made to filters and masks in the source layer propagate to the clones. Creating clone layers improves project playback and rendering performance.

NOTE: Behaviors don’t propagate to clone layers unless the behavior affects a filter or mask in the source layer.

You can create a clone layer using the shortcut, or Control-clicking an element in the Layers or Viewer panels, or choose Object > Make Clone Layer.

A clone layer is created and appears in the canvas on top of the original layer. In the Layers list, the clone layer appears with the default name “Clone Layer.” A clone layer icon appears next to the name.

NOTE: With the exception of Frame Blending, you can modify clone layers independently of the source layer.


Please rate the helpfulness of this tip.

Click on a star to rate it!

… for Apple Motion

Tip #858: A Faster Way to Configure a New Project

Larry Jordan – LarryJordan.com

“Import as Project” can be a big time-saver when you need to add effects to a clip.

The “Import as Project” button on the Project Browser screen.

Topic $TipTopic

Hidden in plain sight, “Import as Project” imports a movie file, then configures a project around it. This can be a big time-saver when you need to add effects to a clip. Here’s how it works.

  • Start Motion.
  • Then, from the Project Browser (which is what that opening screen is called), click Import as Project in the lower left corner. (See screen shot.)
  • This opens a standard file picker window, for you to select a file to work on.
  • Motion then imports that file, creates a new project to match the specs of the video file and adds the clip to the Layers panel.

This is a very fast technique when you need to add effects to a clip, such as green screen, motion tracking, or modify its visual look.


Please rate the helpfulness of this tip.

Click on a star to rate it!

… for Visual Effects

Tip #869: 5 DIY In-Camera Stylized Effects

Larry Jordan – LarryJordan.com

Not all effects require computers – these can all be created in-camera.

(Image courtesy DIYPhotography.net.)

Topic $TipTopic

There are plenty of ways to edit your videos and enhance them in post. But, there are also many tricks that help you do it in-camera. In this video, Jakob Owens of The Buff Nerds shares five simple ways that will let you add interesting effects to your videos as you film them.

Jakob uses these techniques for music videos, but you’ll find them handy for other types of video work as well.

  1. Split Diopter
  2. Prisms
  3. Hollywood Black Magic filter
  4. Kaleidoscope filter
  5. Wine Glass

Here’s the link to the full tutorial, along with videos and explanations, from DIYPhotography.net.


Please rate the helpfulness of this tip.

Click on a star to rate it!

… for Visual Effects

Tip #868: Lighting Effects for Better Backgrounds

Larry Jordan – LarryJordan.com

Lighting effects can add color, texture and control where the eye looks in an image.

The top is the source image. The bottom is the same image with lighting effects applied.

Topic $TipTopic

Built into Photoshop is a very capable lighting effect generator. This is particularly useful when you need to convert a stock footage image into a background plate for a green-screen key, then match it to the lighting needed for your story. Here are two tutorials on how this works.

NOTE: Background plates are still images, used behind green-screen keys, to give the actors an environment to act in. As long as the camera doesn’t more, these can be completely believable. Hollywood has used these for years.

Written by Colin Smith, for Photoshop Cafe, these two tutorials illustrate how to use Lighting Effects to simulate real lighting. The first adds colored gels in Photoshop and the second re-lights a scene and adds texture.

Here’s the link to the complete tutorial.


Please rate the helpfulness of this tip.

Click on a star to rate it!

… for Visual Effects

Tip #867: Four Tips to Improve VFX Compositing

Larry Jordan – LarryJordan.com

The trick with any composite is to make all elements look related.

(Image courtesy of pexels.com.)

Topic $TipTopic In his YouTube video, Javert Valbarr provides tips to improve compositing for visual effects. Here’s a summary.

  1. Look out for your black and white levels when adding elements. You want the elements you’re bringing in to look like a part of the scene and to belong to the same world. Keep composted elements within the range of lightest and darkest values of the original footage, or change them to meet in the middle. This can be fixed by applying LUTs and changing the color space of video elements.
  2. Use selective blurring to draw attention to the most important areas of your shot. This can be done using color gradient effects.
  3. Match the grain/quality of your footage and composited elements. You may need to add grain to composited elements to create the illusion that they belong to the story world. When adding grain or noise, make sure to match the color of the added grain to the color of the original grain. Conversely, you may need to sharpen composited elements to match your footage.
  4. Don’t forget that color grading has a large impact on the final look of the composited image. The final step can and will change your image! 

Here’s the link to his video.


Please rate the helpfulness of this tip.

Click on a star to rate it!

… for Codecs & Media

Tip #866: A Better Way to Upscale Media

Larry Jordan – LarryJordan.com

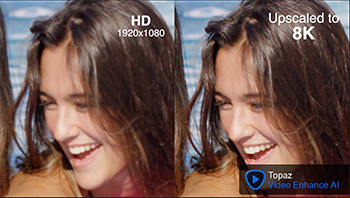
I haven’t used this software, but the demos are stunning.

(Image courtesy of TopazLabs.com.)

Topic $TipTopic

Normally, up-rezing standard definition media to HD – or beyond – is an exercise in blurry pixels.

However, Topaz Labs has invented Video Enhance AI. This software is trained on thousands of videos and combining information from multiple input video frames, it will enlarge and enhance your footage up to 8K resolution with true details and motion consistency.

I have not used this software, which runs on both Windows and Mac, however the demos on their website are stunning.

Render speeds vary based upon your hardware and GPU, however Topaz Labs reports “On a PC with Nvidia GTX 1080, when converting a video from HD to 8K, it typically takes 2-3 seconds for each frame. If you upscale a video from SD to HD, it will take about 0.4 seconds for each frame.”

The software supports: .avi, .flv, .m1v, .mkv, .mov, .mp4, .mpg, .mpeg, .webm, and .wmv for video. As well as .png, .tif, and .tiff for still images.

Available for purchase at $199.99, which, personally, I prefer to a subscription, a free trial is also available.

Here’s the link to learn more.

Thanks to Jean Detheux for this tip.


Please rate the helpfulness of this tip.

Click on a star to rate it!

… for Codecs & Media

Tip #865: What is HDMI?

Larry Jordan – LarryJordan.com

HDMI is an uncompressed audio and video standard for connecting devices.

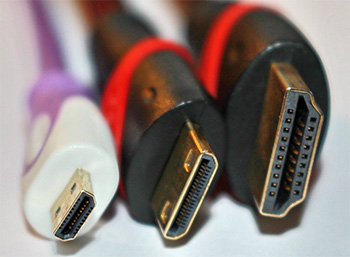
Three types of HDMI connectors: Type D (Micro), Type C (Mini) and Type A (from left to right).

Topic $TipTopic

We’ve used it for years, but what, exactly, is HDMI? At its simplest, HDMI is a standard used to connect high-definition video devices.

More specifically, HDMI (High-Definition Multimedia Interface) is a proprietary audio/video interface for transmitting uncompressed video data and compressed or uncompressed digital audio data from an HDMI-compliant source device, such as a display controller, to a compatible computer monitor, video projector, digital television, or digital audio device. HDMI is a digital replacement for analog video standards.

NOTE: See the use of “uncompressed” in the preceeding paragraph. HDMI may be easy to use, but it provides the highest possible quality.

Several versions of HDMI have been developed and deployed since the initial release of the technology in 2003, but all use the same cable and connector. In addition to improved audio and video capacity, performance, resolution and color spaces, newer versions have optional advanced features such as 3D, Ethernet data connection, and CEC extensions.

The challenge remains for HDMI to keep up with the constant growth in media technology, specifically larger frame sizes and faster frame rates.

As you’ll read in Tip #863, the latest version of HDMI seeks to take our computers and TVs “to infinity … and beyond.”

Here’s a Wikipedia article to learn more.


Please rate the helpfulness of this tip.

Click on a star to rate it!

… for Codecs & Media

Tip #863: What HDMI 2.1 Means for 8K and HDR

Larry Jordan – LarryJordan.com

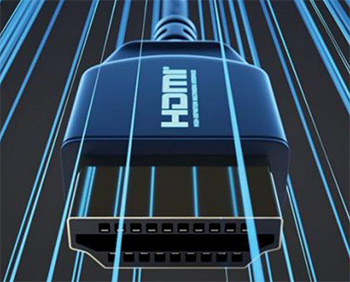
The new HDMI standard supports future image quality growth.

Image courtesy of TV Technology.

Topic $TipTopic

The folks at TV Technology released an article on “What HDMI 2.1 Could Mean for 8K, HDR” This is an excerpt.

James Carter and Henry St. Leger write:

What is HDMI 2.1? The new standard for HDMI was confirmed back in November, 2017, but has yet to trickle down into mass-market television hardware. When it does, though, it will mark a big step for both the AV industry and home viewers wanting to get the most of their TV series, films, broadcast, and games consoles.

When High Definition Multimedia Interface (or HDMI) first arrived on the scene, everyone rejoiced at no longer having to use bulky SCART connectors, or those confusing component video cables, ever again. Instead, HDMI offered high definition video with a connector that was just a little bigger than a standard USB plug.

…The headline feature here is support for 8K content at 60 fps, but there are also a number of minor features that add up to a much more capable standard such as support for Variable Refresh Rates, Dynamic HDR, and Quick Media Switching, which should make it faster than ever to change between the devices attached to your television.

Here’s the link to the full article.


Please rate the helpfulness of this tip.

Click on a star to rate it!