… for Adobe Premiere Pro CC
Tip #1665: Align Titles in Premiere Pro
Larry Jordan – LarryJordan.com
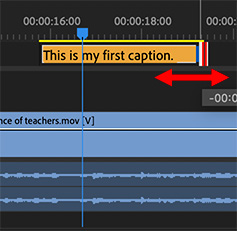
Select just one text clip in the timeline to use these.

Here are some intriguing icons in the Essential Graphics panel that can simplify aligning text (even though two of them are wrong).
- After creating a text clip in the Timeline using the Text tool, select the clip.
- If you haven’t already, switch to the Graphics workspace.
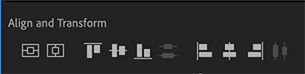
- Click Edit in the Essential Graphics panel. The icons illustrated in the screen shot appear about 1/3 the way down.
- Click the left icon to center a clip vertically (even though the icon indicates it centers horizontally).
- Click the second-from-left icon to center a clip horizontally (even though the icon indicates it centers vertically)
- The next three icons move a clip to the top, center or bottom of the frame. The problem with using these is that they don’t take Safe Zones into consideration, which means you would need to manually move the text inside Action Safe, at a minimum.
NOTE: The center option in this group is the same as clicking the far left icon.
- The three icons on the right move a clip to left, center or right side of the frame. Also, like the middle three icons, these icons do not take Safe Zones into consideration, which means you need to move the text inside Action Safe manually.
NOTE: The center option in this group is the same as clicking the second-from-the-left icon.
EXTRA CREDIT
These icons are nice, but because they don’t allow for Safe Zones, I find myself not using them very often.
Also, these won’t work if multiple text clips are selected; which means that you can’t use these to quickly align several clips at once.