Tip #1541: Create Shapes Filled with Video
… for Apple Final Cut Pro X
Tip #1541: Create Shapes Filled with Video
Larry Jordan – LarryJordan.com
This nested compound clip effect is also good for filling logos with moving video.

OK, this is tricky, but worth trying. Here’s how to create a shape in Photoshop, fill it with moving video in Final Cut, then place it over a background.
In Photoshop:
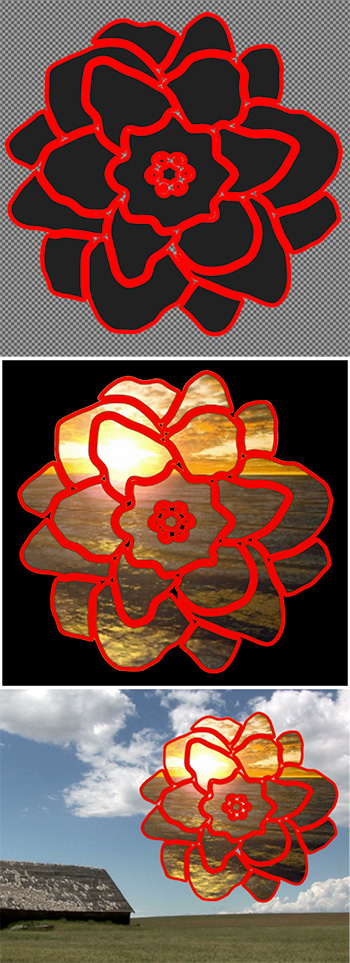
- Select the custom shape tool, then, from the menubar at the top, pick a shape you like. (The top screen shot shows a flower image.)
- Make the background layer transparent.
- Save the image as a PNG or PSD.
In Final Cut:
- Create a new project.
- Put the video you want to insert into the shape into the Primary storyline.
- Stack the shape above it.
- Select the shape and apply Video Inspector > Blend Mode > Stencil Alpha. The shape fills with the video.
- Select both shape and video and choose File > New > Compound clip. Give this any name you like.
- Place the shape, again, on top of the compound clip in the timeline.
- Select the top shape and apply Effects > Keying > Keyer. It should automatically knock out the black background, leaving the red lines on top of the image from the compound clip. (Illustrated in the middle screen shot.)
- Select both the new shape and the compound clip and choose File > New > Compound clip. (Yup, a nested compound clip!) Give this any name you like.
- Stack that nested compound clip on top of the video you want to appear in the background (The barn, in the bottom screen shot.)
Done.
EXTRA CREDIT
This trick works with logos, text, custom shapes – the possibilities are endless.
Leave a Reply
Want to join the discussion?Feel free to contribute!