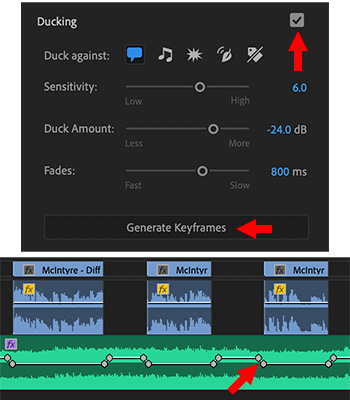
… for Adobe Premiere Pro CC
Tip #910: Vibrance vs. Saturation
Larry Jordan – LarryJordan.com
Vibrance also prevents over-saturation of highlights or shadows.

Ever wonder what the difference is between “vibrance” and “saturation?” Well, for video, the difference is significant.
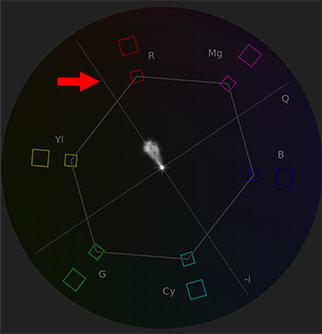
SATURATION
Saturation uniformly increases the amount of all colors in an image, regardless of how saturated they already are. This can result in over-saturating (clipping) certain colors, or skin tones. This tends to make skin tones look too orange and unnatural.
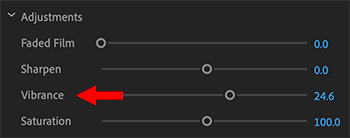
VIBRANCE
Vibrance is a “smart-tool” which increases the amount of the more muted (less saturated) colors without adjusting the well-saturated colors. (Think of this as an audio limiter filter applied to saturation; soft passages are boosted, without changing the louder passages.) Vibrance also prevents skin tones from becoming overly saturated and unnatural.
Vibrance becomes especially helpful in not over-saturating highlights or shadows.
EXTRA CREDIT
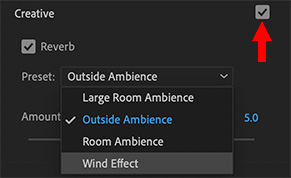
The Vibrance setting is located in Lumetri Color > Creative.