… for Adobe Premiere Pro CC

Tip #094: Premiere and ProRes

Larry Jordan – https://LarryJordan.com

Premiere now supports ProRes

Tip Screen Shot

Topic $TipTopic

If you are looking for a good intermediate codec to transcode highly-compressed media (such as H.264, AVCHD, or HEVC) into something easier to edit, Premiere now supports all flavors of ProRes on both Mac and Windows.

The first version of Premiere to support ProRes on Windows was 13.02. (ProRes on the Mac has been supported for a long time.) And the latest release of Premiere (Fall, 2019) has improved ProRes handling on both Mac and Windows.


Please rate the helpfulness of this tip.

Click on a star to rate it!

… for Adobe Premiere Pro CC

Tip #114: Optimize Your Content with Auto-Frame

Larry Jordan – https://LarryJordan.com

New Feature in Fall 2019 Release

Tip Screen Shot

Topic $TipTopic

New in the Fall, 2019, release of Adobe Premiere, Auto Reframe “can be applied to individual clips as an effect or to whole sequences. Auto Reframe identifies the action in your video to ensure that what’s important stays within the output frame. When you are applying Auto Reframe, you can adjust the sensitivity of the algorithm, depending on the amount of motion within your footage. You can further refine the results by adjusting the keyframes after Auto Reframe has worked its magic.” (Adobe blog)

We’ll have more on this feature in coming weeks.


Please rate the helpfulness of this tip.

Click on a star to rate it!

… for Adobe Premiere Pro CC

Tip #115: Finally! Gain Worth Talking About.

Larry Jordan – https://LarryJordan.com

New Feature in Fall 2019 Release

Tip Screen Shot

Topic $TipTopic

The range for audio gain for clips in Premiere has expanded to +15 dB.

With higher bit rates for digital audio captured by modern cameras and recorders, signal levels can have more variation, without the problems inherent to analog media like tape.

Increasing maximum audio gain from +6 dB to +15 dB means you can increase clip volume without additional amplification effects, making the workflow simpler, more precise, and bringing Premiere Pro in line with audio levels in Adobe Audition.

Gain can be adjusted by dragging the volume line in an audio clip, or by adjusting levels in Effect Controls.


Please rate the helpfulness of this tip.

Click on a star to rate it!

… for Adobe Premiere Pro CC

Tip #116: Premiere Now Exports HDR-10 Media.

Larry Jordan – https://LarryJordan.com

New Feature in Fall 2019 Release

Tip Screen Shot

Topic $TipTopic

Editors can now export HDR content with HDR10 metadata to ensure projects look their best on HDR-enabled displays. Adjusting variables, such as display color primaries and luminance in a the HDR10 export dialog, allows you to deliver content that adapts your images for the display device.

Output settings are controlled in the Export dialog. (These also apply to Adobe Media Encoder.)

We’ll cover this feature more in future weeks.


Please rate the helpfulness of this tip.

Click on a star to rate it!

… for Adobe Premiere Pro CC

Tip #032: What’s A Cache?

Larry Jordan – https://LarryJordan.com

Cache files are work files that need some periodic attention.

Tip Screen Shot

Topic $TipTopic

Just as when you are working on a math problem and you have a separate piece of paper to help with the intermediate steps, so also does Premiere. These are called “cache files,” or work files, because they are stored (cached) while you are working on your project.

These work files are generally not viewable by us, just as your personal notes may only make sense to you. But they are nonetheless essential.

While necessary, these don’t need to be retained after a project is done. In fact, it’s a good idea to clean all cache files on a regular basis; say, a couple of times a month or so. (If Premiere needs these files again in the future, it will rebuild them. So, there’s no risk of deleting something you actually need.)

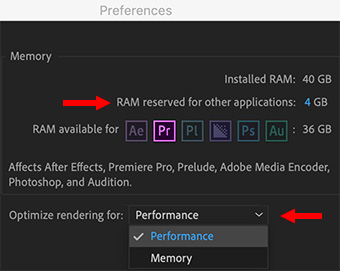
Preferences > Media Cache

You can change the location of where cache files are stored. Where possible, I recommend storing them in a different location from your media files. Using your internal storage is often a good place, because these files benefit from the extra speed an internal device provides and you can erase the files when you are done.

Make a point to delete unused files every month or so, to regain storage space. Also, there is never a reason to archive cache files.

On my system, I also automatically delete cache files older than 90 days.

BONUS

I make a point to rename my cache file folder so I know what’s inside. This isn’t necessary, but I find it helpful; for example, “Premiere Cache Files.”


Please rate the helpfulness of this tip.

Click on a star to rate it!

… for Adobe Premiere Pro CC

Tip #045: Preview Faster

Larry Jordan – https://LarryJordan.com

In this case, it’s OK – and fast! – to “play around.”

Tip Screen Shot

Topic $TipTopic

This is a very fast way to preview a transition.

Using the arrow keys, position the playhead on the transition you want to preview.

Press Shift + K.

Instantly, the playhead backs up a few seconds, plays through the position of the playhead, then stops a few seconds afterward.

EXTRA CREDIT

You can set how far back or forward the playhead moves with this shortcut using Preferences > Playback:

  • Preroll. Sets how far back the playhead starts.
  • Postroll. Sets how for past the playhead position the playback ends.

By increasing these durations you can use this technique to preview short segments, not just transitions.


Please rate the helpfulness of this tip.

Click on a star to rate it!

… for Adobe Premiere Pro CC

Tip #049: Customize Monitor Buttons

Larry Jordan – https://LarryJordan.com

Missing your favorite button. It isn’t gone – it’s hiding.

Tip Screen Shot

Topic $TipTopic

One of the goals for the Premiere development team over the last couple of years was cleaning up the interface to make it less cluttered. This meant making buttons disappear.

However, if one of those missing buttons was your favorite, don’t despair – they aren’t lost, just moved to a hidden part of the interface.

To unlock it, click the Plus icon in the lower right corner of either the Program or Source monitor (they each have an icon). This displays the Button Editor.

Hover over a button to see a description of what it does.

If you want it, drag it from the Button Editor into the button bar below it. (You can shuffle buttons in the button bar however you want.)

When you are done dragging:

  • Click OK to save your new button layout.
  • Click Cancel to remove your changes.
  • Click Reset Layout to restore the layout to its original setting.

EXTRA CREDIT

The Source and Program monitors can each have their own custom button layouts.


Please rate the helpfulness of this tip.

Click on a star to rate it!

… for Adobe Premiere Pro CC

Tip #043: Optimize Premiere Preferences for Performance

Larry Jordan – https://LarryJordan.com

Five Settings That Can Speed Your System

Tip Screen Shot

Topic $TipTopic

Most of the time, you alter Premiere’s preference settings to suit your, ah, preferences. However, there are five preferences that also affect performance.

Preferences > Media

  • Growing Files. A growing file is a special media file that can be edited while it is still being recorded; think sports highlights. When checked, every 60 seconds Premiere will check your hard disk for changes. If nothing is changing, all you are doing is slowing down your system. My recommendation is to uncheck this.

Preferences > Memoryy

  • RAM reserved for… Keep this low. On my system, I set this to 4 GB. The remaining RAM is reserved and shared between Adobe apps. Once you quit, this RAM is released back to the OS.
  • Optimize rendering for…. If you have 32 GB RAM or more, change this to Performance.

Preferences > Playback

  • Enable Mercury Transmit. Uncheck this UNLESS you are driving a video, not computer, monitor (say via HTML or 3rd-party interface box). Mercury Transmit is how Premiere outputs video to a video monitor. If all you are using are computer monitors, you can turn this off.

File > New Project Settings

  • Renderer. This determines how Premiere generates render files. On recent Macs set this to Metal; and, shortly, Metal 2. On Windows set this to OpenCL. This enables hardware acceleration for effects, rendering and export.

Please rate the helpfulness of this tip.

Click on a star to rate it!

… for Adobe Premiere Pro CC

Tip #060: Set vs Scale to Timeline

Larry Jordan – https://LarryJordan.com

This setting has a major impact on imported still image scaling and quality.

Tip Screen Shot

Topic $TipTopic

If all your still images precisely match the frame size of your project, all is good. But, when they don’t, this preference makes a big difference.

First, some background. All digital images are bitmapped. This means that, while you can make them smaller with no problem, you can’t scale them larger than 100%. If you do, the image gets increasingly blurry.

So, if you want to preserve image quality, it is critical for you to know when an image exceeds 100% size. The problem is that a default preference setting for Premiere makes this impossible.

Here’s the setting to watch in Preferences > Media: Default Media Scaling.

  • Set to Frame Size. This is the default setting. It automatically scales the imported image to fit in the frame AND sets Effect Controls > Motion > Scale to 100%, regardless of the original size of the image.
  • Scale to Frame Size. This automatically scales the imported image AND adjusts Motion > Scale to reflect the amount of the change.

The second option, which is not the default, allows you to see how much an image was resized and, if you scale it larger, it is easy to see when scaling exceeds 100%. This prevents you from unknowingly damaging image quality.


Please rate the helpfulness of this tip.

Click on a star to rate it!

… for Adobe Premiere Pro CC

Tip #064: Secrets of Premiere’s Dock Icon

Larry Jordan – https://LarryJordan.com

Lurking, hidden, in the Dock are helpful options for Premiere.

Tip Screen Shot

Topic $TipTopic

Hidden in the Dock icon for Premiere are several options that you may find useful. There are two ways to access them:

  • Control-click the Dock icon
  • Click and hold the Dock icon

Control-clicking is faster but you need to remember to press the Control key.

Either way, here you’ll find options to:

  • Open Premiere when you first log into your computer
  • Keep its icon in the Dock
  • Hide everything else EXCEPT for Premiere
  • Force quit the application if it starts misbehaving

Nice to know the Dock, too, has it’s secrets.


Please rate the helpfulness of this tip.

Click on a star to rate it!