… for Apple Motion

Tip #1365: Change Reflection Settings

Larry Jordan – LarryJordan.com

Reflection settings allow reflections to more closely model reality.

Reflection settings and their results (bottom). Rectangle shows the reflecting object.

Topic $TipTopic

By default, Motion does not allow one object – such as text – to reflect off another object. Not only can you change this, you can also modify the reflections themselves.

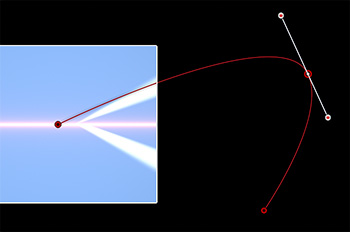
First, to create a reflection, you need to create a source object – say some text – then a second object for that text to reflect from.

NOTE: This is identical to a mirror. Your face needs to reflect off something in order for you to see it.

It is beyond the scope of these tips to describe all the different ways we can create a reflection in Motion. However, once that reflection exists on the reflecting object – generally a black rectangle placed near the text – you have several formatting options.

In the screen shot, I colored some text blue and added a black rectangle under it to catch the reflection.

Then:

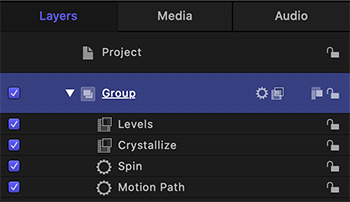
  • Select the background rectangle.
  • Check (enable) Inspector > Properties > Reflections.
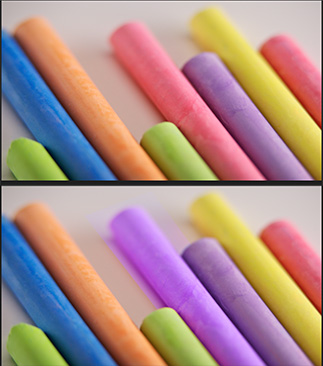
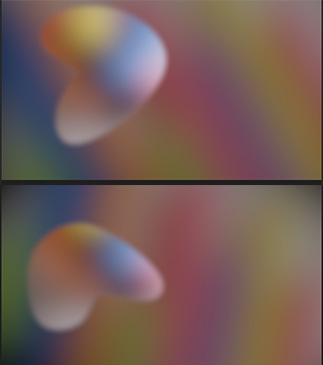
  • Blur softens the edges of the reflection.
  • Falloff shades that part of the reflection that is farther from the source to provide the illusion of distance.

NOTE: Blend Mode can be left to Normal most of the time. I didn’t see a difference when using Screen.


Please rate the helpfulness of this tip.

Click on a star to rate it!

… for Apple Motion

Tip #1341: Add Texture to a 3D Object

Larry Jordan – LarryJordan.com

Stencil Luma maps texture from one layer to a 3D object, while preserving its shape.

Properties settings (top), Layers panel and finished result.

Topic $TipTopic

Motion doesn’t support texture mapping on objects, BUT, there’s a clever work-around you can use for 3D objects that delivers a similar result.

For this example, I took a 3D object – the bowl – and applied a texture and color to it. Here’s how:

  • Add Library > 3D Objects > Bowl to the Viewer.
  • Add a texture from Library > Content > Particle Images > Antique.
  • Apply Filters > Color > Colorize to Antique and change the color mapped to white to a darker brick red.

NOTE: The middle of the screen shot shows how elements were stacked.

  • Select the bowl and apply Inspector > Properties > Blend mode > Stencil Luma.

NOTE: Stencil Alpha replaces the bowl with the background. Stencil Luma combines the shading of the bowl with the texture of the background, allowing the bowl to retain its shape while acquiring a new texture and color.


Please rate the helpfulness of this tip.

Click on a star to rate it!

… for Apple Motion

Tip #1342: Two Channel Blur Tricks

Larry Jordan – LarryJordan.com

Channel blur allows blurring individual color channels.

Channel blur settings (top) and the results applied to a 3D bowl.

Topic $TipTopic

In Tip # 1341 we learned how to apply a texture to a 3D object. In this tip, I’ll show you an intriguing way make that texture more believable.

  • Follow the instructions in Tip #1341, then, remove (or uncheck) the Colorize filter applied to Antique.
  • With Antique still selected, apply Filters > Blur > Channel Blur.
  • Based on the settings in the screen shot, disable all colors except for Green, then boost the Blur amount to the end of the slider; 64 in this example.

What Channel Blur does is blur the red, green, or blue channels without blurring any others. The detail in most images is carried in the green channel. By blurring just the green, we get that lovely green “glaze” on the 3D bowl, without losing the highlights that give the bowl its shape.

EXTRA CREDIT

Channel blur is also a quick way to reduce the visibility of skin blemishes. While not as powerful as a dedicated plug-in, blurring the green channel will make faces glow and hide any skin problems.


Please rate the helpfulness of this tip.

Click on a star to rate it!

… for Apple Motion

Tip #1343: Change Direction During Movement

Larry Jordan – LarryJordan.com

A Motion path moves an object. Snap Alignment controls which way it faces.

A curved path for an element (bottom) and the two behaviors that make it possible.

Topic $TipTopic

Normally, when you create a motion path, an object will follow that path. However, if you add a curve, sometimes you want the object to change its direction as it moves around the curve. This is similar to how a car points in a different direction as it goes around a curve. Here’s how.

  • Add the element to the Layers panel that you want to move.
  • Apply Behaviors > Basic Motion > Motion path.
  • Double-click in the middle of the red line and drag to create a curve.

NOTE: You can adjust the shape of the curve by dragging one of the white Bezier control points.

  • Select the element in the Layers panel and apply Behaviors > Basic Motion > Snap Alignment to Motion. (The default settings are fine.)

Now, as the element travels along the motion path, it will change direction as it travels around a curve.

Cool!


Please rate the helpfulness of this tip.

Click on a star to rate it!

… for Apple Motion

Tip #1315: Maximize Image Gray-scale

Larry Jordan – LarryJordan.com

Even without scopes, we can safely adjust images using Levels.

The Levels Histogram, with red arrows showing the edges where the black and white sliders can be dragged.

Topic $TipTopic

One of the missing features in Motion that bothers me the most is a lack of video scopes. Granted, many effects don’t require them, but, far too often, we need to know whether the images we are creating are “broadcast legal” or not.

Still, we can still maximize the quality of our images without relying on scopes using Levels.

  • Select the image you want to adjust.
  • Apply Filters > Color > Levels.
  • Display the Levels settings in Inspector > Filters.

That “humpy” thing in the gray box represents the gray-scale values of every pixel in the image to which the Levels filter is applied. Black on the left, white on the right and gray in the middle.

There are five sliders below that histogram. The three we care the most about are on top.

To maximize the gray-scale values in an image, drag the left (black) slider to the right until it just touches where the histogram ramps up. Then, drag the right slider (white) until it just touches where the histogram ramps down.

NOTE: What this does is stretch the grayscale values of the image across the full grayscale range. This tends to make images look richer with a brighter “pop” in the highlights. The KEY is to not drag the sliders into the “humpy” part. Dragging in too far causes lost detail in either the shadows or highlights.

Finally, drag the middle slider (mid-tones) until the image looks “right” to you. Most of the time, I tend to darken mid-tones.

EXTRA CREDIT

Even without scopes, as long as the black and white sliders stay at the edge of the “humpy” part of the histogram, you’ll retain all image detail while still providing a rich, vibrant image.

I should also point out that, sometimes, you don’t want richness. For example, a foggy day has no highlights or shadows – just midtones.


Please rate the helpfulness of this tip.

Click on a star to rate it!

… for Apple Motion

Tip #1316: Change the Color of a Single Object

Larry Jordan – LarryJordan.com

Secondary color changes are a common tool to create colors that better tell our story.

Source image (top) , color-changed chalk using a secondary correction (bottom).

Topic $TipTopic

Look closely at this screen shot. What’s the difference between these two images…? Yup, the pink chalk at the top changed color. Here’s how.

A “secondary color correction” is one where a portion of the frame changes color, without affecting the rest of the image.

NOTE: Unlike chroma-key, which makes a color transparent, color replacement keeps all the image grayscale for texture and only alters the color.

  • Select the element containing the object whose color you want to change.
  • Apply Filters > Hue/Saturation Curves.
  • Click the gray eyedropper for Hue vs. Hue. (A blue eyedropper means it is active.) This creates three dots on the color line. The left and right dot indicate the range of the selection.
  • Drag the center dot up or down until you are happy with the color on screen. (For example, in the screen shot, both the chalk and its shadow/reflection are altered.)

Done.

EXTRA CREDIT

Many times, these color changes will spill to other parts of the image. To prevent that, duplicate the image, remove any filters, then draw a Bezier mask loosely around the object in the top-most layer.

This is what I did for the image in the screen shot.


Please rate the helpfulness of this tip.

Click on a star to rate it!

… for Apple Motion

Tip #1317: An Example of a B-spline Mask

Larry Jordan – LarryJordan.com

The B-spline mask tool is great when you DON’T want sharp edges.

A morphing blob shape, composed of two still images of colored chalk.

Topic $TipTopic

Most of the time, when we need a mask, we’ll use the Bezier tool, because it creates very flexible, highly-precise masks. So, I wondered, when should we use the B-spline mask tool?

The B-spline tool creates “blobs,” masks which have no sharp edges. It reminded me of the Blob generator in Final Cut.

So, I set out to create my own blob and discovered the very interesting effect you see in the screen shot.

Process:

  • Add Chalk 03 to a layer
  • Apply Behaviors > Spin to rotate slowly
  • Apply Filters > Blur > Gaussian Blur
  • Manually enter an Amount of 700, to make it REALLY blurry
  • Add Chalk 02 on a higher layer
  • Apply Filters > Blur > Gaussian Blur
  • Manually enter an Amount of 700
  • Use the B-spline mask tool to create a blob of this upper layer, then add as much feathering as possible
  • Finally, add keyframes to different B-spline control points so that the shape of the blob animates/morphs over time

Cool.

EXTRA CREDIT

There’s lots of other effects you can add to change the look of this effect. Feel free to play as much as you want.


Please rate the helpfulness of this tip.

Click on a star to rate it!

… for Apple Motion

Tip #1303: Add a Curve to a Motion Path

Larry Jordan – LarryJordan.com

There are multiple ways to add curves to motion paths.

Double-click a motion path line, then drag to create a curve.

Topic $TipTopic

All motion paths in Motion are straight lines. However, adding a curve is easy. Here’s how.

PEN or PAINTBRUSH TOOL

  • When drawing a line with either the Pen or Paintbrush tool, drag when setting a corner. This changes the corner from a sharp edge to a curve.

MOTION PATH

  • Double-click anywhere on the red motion path line to set a control point.
  • Drag the control point to create a curve.
  • Drag one or both of the white control handles to change the shape of the curve.

A CONTROL POINT

  • Control-click an existing corner in a motion path line. From the popup menu, change it from Linear to Smooth to add a curve.
  • Change from Smooth to Linear to change a curve to a corner.

Please rate the helpfulness of this tip.

Click on a star to rate it!

… for Apple Motion

Tip #1304: Secret 3D View Control

Larry Jordan – LarryJordan.com

This is a fast and interactive way to change the view in the Viewer.

Default 3D screen control (top). Roll over it to change to an expanded controller (bottom).

Topic $TipTopic

When you switch to 3D space in Motion, an innocuous control, illustrated at the top of the screen shot, appears.

I’ve happily ignored this for years.

But, if you hover your mouse over it, the control expands into a multi-purpose screen controller (bottom of screen shot).

  • Click one of the outside boxes to switch between Top, Bottom, Left, Right, or Back views.
  • Click the edge of the center box itself to switch to Perspective View.
  • Click the center of the box to switch to Front View.
  • Type Control + A to switch back to Active Camera view.

There are keyboard shortcuts for these, but clicking the controller creates a very cool effect.


Please rate the helpfulness of this tip.

Click on a star to rate it!

… for Apple Motion

Tip #1305: Groups Do More Than Organize

Larry Jordan – LarryJordan.com

Use Groups to animate or modify multiple elements at once.

A Group with both Filters and Behaviors applied to it.

Topic $TipTopic

A group, in Apple Motion, is a folder that holds elements, behaviors and filters. But a Group does more than simply hold stuff.

Every Motion project requires at least one group, where we store all the elements in a project. At a minimum, we can use one, or more, groups to store and organize our elements. For example, I often organize groups as:

  • Text
  • Foreground
  • Mid-ground
  • Background

NOTE: The stacking order of groups makes a difference. Foreground is on top, background is on the bottom.

But, what makes groups much more than simple organizational tools is that we can apply behaviors and effects to a group. These settings then affect all the elements contained in that group. This is a great way to animate multiple elements at once.

EXTRA CREDIT

Select a group, then go to Inspector > Properties to change Transform, Blending or Drop Shadow settings, the same as if we were adjusting an individual element.


Please rate the helpfulness of this tip.

Click on a star to rate it!