… for Random Weirdness

Tip #1344: Which to Shoot – 4K or 1080p?

Larry Jordan – LarryJordan.com

4K may be “everywhere,” but, often, shooting 1080p makes more sense.

(Image courtesy of Pexels.com.)

Topic $TipTopic

This article, written by Charles Yeager, first appeared in PremiumBeat.com. This is a summary.

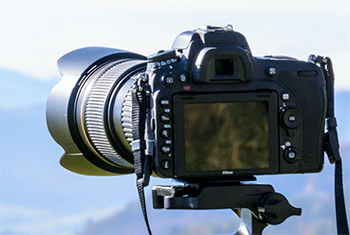
It is 2021, and nearly every new consumer and professional camera has the ability to film in 4K (even action cameras and phones!). So, this poses a question, “Should anybody be filming in 1080p anymore?” The short answer is—absolutely. But why? Let’s dive into the pros and cons for filming in 4K versus 1080p.

Pros for Filming in 4K

  • More Resolution, More Creativity
  • Color Grading and Keying
  • More Pixel Data
  • Online Compression Benefits

Pros for Filming in 1080p

  • Faster Editing
  • Less Storage Needed
  • Faster Video Uploads
  • Common Resolution
  • Faster Streaming
  • Perfect for Vlogs or Creators Starting Out
  • Focus More on Composition

Story Above Everything

Video resolution certainly matters when it comes to factors like editing speed or details visible in a scene. Ultimately, though, the most important thing is going to be the story you tell. You’ve probably heard this time and time again. However, the story really is all that matters for most casual viewers.

EXTRA CREDIT

This article includes more details, links and example videos.


Please rate the helpfulness of this tip.

Click on a star to rate it!

… for Visual Effects

Tip #1348: Moviola Training on Visual Effects

Larry Jordan – LarryJordan.com

Moviola has video training on all aspects of filmmaking.

Screen grab from the Moviola training on green-screen keying.

Topic $TipTopic

Moviola.com has a series of nine, free, online video courses on creating visual effects. Each lesson is deeply condensed to get you up to speed on the topic quickly. Subjects include:

  • Shooting Visual Effects
  • Node-based Compositing
  • Sky Replacement
  • Tracking
  • Rotoscoping
  • Adding CG Elements to a Scene
  • Green-screen Fundamentals
  • Keying Green-screen
  • 3D Fundamentals

Each video runs 15 – 30 minutes and features lots of examples.

Here’s the link.


Please rate the helpfulness of this tip.

Click on a star to rate it!

… for Codecs & Media

Tip #1332: Spectra: High-Quality, Cloud Video

Larry Jordan – LarryJordan.com

Spectra: High-performance, streaming virtual media encoder.

The Spectra logo.

Topic $TipTopic

Last week, Streambox introduced Spectra, a high-performance streaming virtual media encoder.

Spectra can simultaneously deliver high-quality, low-latency stream to multiple remote collaborators anywhere in the world. This means that editors accessing media in the Cloud are no longer limited to low-res proxy images.

For example, the editor or colorist can now view a live, color accurate video/audio stream in the edit suite (or even at home), which provides the same level of confidence they enjoy when working on traditional, in-house systems.

Spectra also works as a plug-in for Avid Media Composer systems. A free trial is available.

Here’s the link for more information.


Please rate the helpfulness of this tip.

Click on a star to rate it!

… for Codecs & Media

Tip #1336: Export Stills – Which Codec?

Larry Jordan – LarryJordan.com

Not all still formats are the same. When in doubt, use PNG or TIFF.

Still image export choices in Adobe Premiere.

Topic $TipTopic

All NLEs support exporting a still frame from a project. But, given all the choices, which format should you choose?

Premiere provides six options:

  • DPX
  • JPEG
  • OpenEXR
  • PNG
  • Targa
  • TIFF

Final Cut offers:

  • DPX
  • JPEG
  • OpenEXR
  • Photoshop file
  • PNG
  • TIFF

DPX, OpenEXR and Targa files are specialized image formats that most applications can’t open. Only use these if you know that the app you are moving the exported still into supports them.

Photoshop, PNG and TIFF are all uncompressed formats. These provide the highest quality export and are best used when moving stills from one high-quality application to another. All three formats support images with alpha channels, though TIFF or Photoshop would be preferred because not all apps support alpha channels in PNG files.

JPEG is a compressed format, best used when sending images to the web.

EXTRA CREDIT

Personally, I export PNGs as most of my stills require extra editing in Photoshop before the final compression into JPEG to post to the web.


Please rate the helpfulness of this tip.

Click on a star to rate it!

… for Random Weirdness

Tip #1268: Revolutionary Sound Design and Mixing

Larry Jordan – LarryJordan.com

Learn about revolutionary sound design technology for audio mixes.

(Image courtesy of Pexels.com.)

Topic $TipTopic

This article, written by Jeffrey Reeser, first appeared in NoFilmSchool.com. This is a summary.

This article highlights two interviews with sound design leaders:

  • Kami Asgar
  • Jessica Parks
  • Walter Murch

As a sound designer (Asgar) and as a post executive (Parks), their collective resume touches on everything from Apocalypto to Grandma’s Boy to Venom.

Parks has recently shifted her focus from supervisor to hands-on sound design, and we talk about how it’s never too late to pivot on your career path and find the thing you love doing wherever you are in life. We also talk about the new revolutionary technology that will democratize the ability to mix sound on a professional level… and why the literal size of your ear matters.

NoFilmSchool also has an interview with sound design master Walter Murch.


Please rate the helpfulness of this tip.

Click on a star to rate it!

… for Adobe Premiere Pro CC

Tip #1264: Where Premiere Stores Metadata?

Larry Jordan – LarryJordan.com

Metadata is great – but search is limited only to clips currently open in Premiere.

The Metadata panel in Adobe Premiere Pro.

Topic $TipTopic

You spend all this time entering labels and other metadata for the clips in your project. Where does Premiere store this data and can you use it again?

A great strength of Premiere is the extensive metadata (labeling) support inside every project. For example, select a clip, or group of clips. Switch to the Metadata panel and add labels for the selected clips. Finally, go to the Project panel and search for any of the terms you entered.

NOTE: A good option for adding metadata is to use the Dublin core fields. Learn more here.

This search is extremely fast and covers all manually-entered metatdata. So, whenever you need a clip, you can quickly search for it using the relevant metadata.

The bad news is that you can’t access this data outside of Premiere because this metadata is only stored inside each Premiere project. If a project isn’t open or if you try to use the Finder to find a clip, all this metadata is hidden.

One ray of hope is that if you drag a clip from one project to another inside Premiere, all its metadata travels with it.

EXTRA CREDIT

This inability to find clips based on metadata stored in Premiere is one of the key reasons asset management software exists. With a MAM, you enter the metadata into the MAM and can then search for files and transfer them with their metadata into different Premiere projects quickly and easily.


Please rate the helpfulness of this tip.

Click on a star to rate it!

… for Codecs & Media

Tip #1274: Where a QuickTime Movie Stores Timecode

Larry Jordan – LarryJordan.com

Timecode is a separate track stored inside the QuickTime movie container.

A typical timecode display.

Topic $TipTopic

We often think of a QuickTime movie as a file. But, it actually isn’t. It’s a container for multiple files – each of which can be different.

Timecode tracks, which are stored inside the QuickTime container, store external timecode information, such as SMPTE timecode. QuickTime provides a timecode media handler that interprets the data in these tracks to track each frame of video.

A movie’s timecode is stored in a timecode track. Timecode tracks contain:

  • Source identification information (this identifies the source; for example, a given videotape or digital file)
  • Timecode format information (this specifies the characteristics of the timecode and how to interpret the timecode information)
  • Frame numbers (these allow QuickTime to map from a given movie time, in terms of QuickTime time values, to its corresponding timecode value)

Apple has defined the information that is stored in the track in a manner that is independent of any specific timecode standard. The format of this information is sufficiently flexible to accommodate all known timecode standards, including SMPTE timecoding.

In essence, you can think of the timecode media handler as providing a link between the digital QuickTime-specific timing information and the original analog timing information from the source material.


Please rate the helpfulness of this tip.

Click on a star to rate it!

… for Codecs & Media

Tip #1275: How an AVCHD Folder is Organized

Larry Jordan – LarryJordan.com

The best way to handle AVCHD is to transcode it.

Typical AVCHD directory structure (Image courtesy of Vector15.com).

Topic $TipTopic

AVCHD (Advanced Video Coding High Definition) is a format for digital recording and playback of high-definition video developed jointly by Sony and Panasonic. An AVCHD file is actually not a single video file, but a hierarchical file structure derived from the file structure you would find on a Blu-ray disc, containing multiple video clips.

On OSX, the AVCHD folder is automatically viewed as a package (aka bundle). If you are not familiar with packages on OSX, a package is a file system folder that is normally displayed in the Finder as if it were a single file. A package can contain hundreds of other folders and files and such. An iPhoto Library is a package, for example. In addition, OSX further treats the BDMV folder as a package as well.

The problem is that macOS does not handle AVCHD files well, including limited QuickTime support, inability to rename the files in the AVCHD bundle, and extracting just the file you want to access.

Instead, it is better to simply copy the ENTIRE AVCHD folder to your hard disk, open it into your NLE and import just the clips you need for your edit.

Ideally, it would also be good to transcode that original AVCHD media (which uses the H.264 codec) into something easier to edit, such as ProRes 422.

Here’s an article from Vector15.com that describes AVCHD in more detail.


Please rate the helpfulness of this tip.

Click on a star to rate it!

… for Apple Motion

Tip #1175: Apple Updates Motion to v5.5

Larry Jordan – LarryJordan.com

Apple updates Motion to support Big Sur and the switch to Apple silicon.

The spiffy new Motion 5.5. logo.

Topic $TipTopic

Last week, Apple updated Motion to version 5.5 to support macOS Big Sur, along with the upcoming switch to Apple silicon.

Even more, the app got a spiffy new icon! (See screen shot.) In addition to support for Apple silicon, the Motion 5.5 update includes:

  • Export HLG high-dynamic-range projects with Dolby Vision 8.4 metadata for optimized playback on Apple devices.
  • Improves stability when clicking in an empty canvas on on a Mac Pro with two AMD Radeon Pro Vega II Duo GPUs and a Blackmagic eGPU Pro.
  • Improves stability when manipulating groups of keyframes selected across multiple parameters.
  • Improves stability using the Stroke filter when selecting a stroke type in the HUD.
  • Fixes an issue in which the Poke filter center is offset from the onscreen control.
  • Improves stability when deleting layers after removing a marker.
  • Includes built-in support for Avid DNxHR® and Avid DNxHD® decoding and playback.

NOTE: Here’s a link to the Motion Release Notes from Apple.


Please rate the helpfulness of this tip.

Click on a star to rate it!

… for Codecs & Media

Tip #1174: Apple Updates Compressor to v4.5

Larry Jordan – LarryJordan.com

Apple updates Compressor to support Bug Sur and Apple silicon.

The spiffy new Compressor 4.5 logo.

Topic $TipTopic

Last Thursday, Apple updated Compressor to version 4.5. The update was principally to support Big Sur and the upcoming switch to Apple silicon.

However, the app also got a new icon (see screen shot), along with a rounder version number – 4.5 – plus a variety of bug fixes, including:

  • Export HLG high-dynamic-range projects with Dolby Vision 8.4 metadata for optimized playback on Apple devices.
  • Fixes an issue where audio sync could drift when changing the frame rate of a clip.
  • Fixes an issue where creating a BluRay disc from a DV-PAL source would fail.
  • Includes built-in support for Avid DNxHR® and Avid DNxHD® decoding and playback.

NOTE: Here is a link to the complete Compressor Release Notes from Apple.


Please rate the helpfulness of this tip.

Click on a star to rate it!