… for Random Weirdness

Tip #729: 4 Top-Quality Prime Lenses Less than $1K

Larry Jordan – LarryJordan.com

Prime lenses are faster, crisper and less expensive than zooms.

Sigma 35mm f/1.4 DG HSM Art Lens (Image courtesy of Sigma.)

Topic $TipTopic

This article, written by Logan Baker, first appeared in PremiumBeat.com. This is an excerpt.

Capture beautiful images with these high-quality, low-cost prime lenses. Let’s look at some prime lenses that land in the high-quality/low-price sweet spot, all of them available right now for under $1,000.

  • Rokinon Cine 35mm T1.5 Cine DS Lens. Rokinon Cine series lenses might be the best deal in the industry right now. Each lens is fast, sharp, and priced to move, and pulling focus is about as smooth as it can be for glass this size.
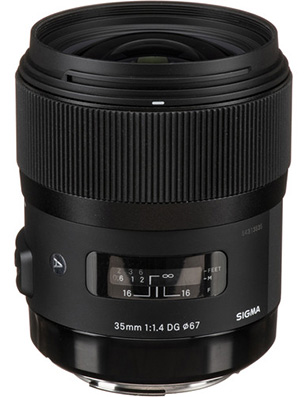
  • Sigma 35mm f/1.4 DG HSM Art Lens. These lenses have skyrocketed in popularity over the past three years or so — and for good reason. First of all, they’re built like tanks and have a brag-worthy super-sharp 1.4 aperture. Plus, decent auto-focus capabilities make them a solid choice for filmmaking and photography.
  • SLR Magic MicroPrime CINE 25mm T1.5. If I was allowed only one word to describe this lens and, really, the entire line of SLR Magic lenses, that word would be underrated. For the price, the lenses are superb. Even if you take the price out of the equation, these lenses are superb.
  • Rokinon 14mm f2.8 ED AS IF UMC Series. This lens is the cheapest option on this list. Frankly, it’s also the simplest. And it’s 100% worthy of a spot in your filmmaking bag. It’s super wide and super sharp.

EXTRA CREDIT

In the link at the top are more details and videos illustrating each lens.


Please rate the helpfulness of this tip.

Click on a star to rate it!

… for Random Weirdness

Tip #688: Using a Split-Field Diopter

Larry Jordan – LarryJordan.com

A split-field diopter is a filter that directly alters the focus within your shot.

A split-field diopter lens. (Image courtesy of Hoya.)

Topic $TipTopic

This article, written by Anthony Najera, first appeared in PremiumBeat.com. This is an excerpt. The split-field diopter is a practical lens attachment that can add an unusual and visually exciting effect to your movie. Here’s what you need to know.

A split-field diopter is a partial lens that you attach to the front of your camera’s lens. It’s a partial lens because it only has glass covering half of the lens space. Essentially, it’s a filter that will directly alter the focus within your shot.

The split-field diopter lets you to focus on a subject (or object) positioned close to the camera on one side of the frame while also focusing on a more distant subject positioned on the other side of the frame. It allows a shot to have two planes of focus rather than one, making the foreground (captured through the diopter) and background (captured through the uncovered half of your camera’s lens) both appear equally clear.

For instance, instead of having to rely on a rack focus between a nearby subject and a distant subject, the split-field diopter keeps both near and distant focal planes sharply in focus at the same time. This can create a split-screen effect, but it happens in camera instead of in post.

Additionally, the split-field diopter can be a great alternative when you’re looking for deep depth of field. Ordinarily, to achieve a deep focus range, you’d need to stop-down the aperture quite a bit (f/16+), but this requires a ton of light and can be very difficult to do indoors. With a split-field diopter, you can create the illusion of deep focus, even with a wide aperture.

EXTRA CREDIT

The PremiumBeat article has more details and several examples of the diopter in use. The link is at the top of this tip.


Please rate the helpfulness of this tip.

Click on a star to rate it!

… for Adobe Premiere Pro CC

Tip #686: Optimize Your Premiere Pro System

Larry Jordan – LarryJordan.com

The four keys are: memory, storage, graphics and CPU.

Topic $TipTopic

This tip originally appeared as an Adobe Support article. This is an excerpt.

The four key variables for a great video production system are memory, storage, graphics, and your processor. Here are tips from Adobe on how to optimize your system.

  • Memory. Professional video workflows rely on system memory. A good video editing workstation should have at least 32GB of memory— and as much as 128GB.
  • Storage/hard drives. Fast storage is critical for video production. Use solid-state NVMe or SSD storage. Unless you have a fast RAID array, spinning disks generally do not offer sufficient speed for HD and 4K video production.
  • Graphics. The GPU is used for onscreen rendering and export, priority areas for video production. Premiere Pro is engineered to take advantage of the GPU. After Effects is also GPU-optimized. Graphics card with at least 4GB of memory (VRAM). (Optional) Multiple GPUs, including eGPUs, can be used to speed up rendering and export.
  • Processor/GPU. For CPUs, clock speed matters more for After Effects. Multiple cores have more impact for Premiere Pro. The sweet spot for running both applications is a fast CPU with 8 cores. Core i7 or Core i9 Intel processors or AMD equivalents are strongly recommended. Fast clock speed at least 3.2 GHz, or higher.

EXTRA CREDIT

Thinking of upgrades? Here’s where Adobe suggests you spend your money, in priority, for Premiere Pro:

  1. More RAM — up to 128GB if your motherboard supports it.
  2. A faster GPU (or additional GPUs) for faster rendering and export
  3. Faster (or more) NVMe or SSD drives
  4. Faster CPU

Please rate the helpfulness of this tip.

Click on a star to rate it!

… for Adobe Premiere Pro CC

Tip #684: System Compatibility Report

Larry Jordan – LarryJordan.com

Having performance problems? Check the System Compatibility Report.

The System Compatibility Report in Premiere Pro.

Topic $TipTopic

Have you ever wondered if your hardware is fighting Premier Pro? The System Compatibility Report holds the answers.

To display the report, choose Help > System Compatibility Report. This displays any hardware compatibility issues between your system and Adobe’s software.


Please rate the helpfulness of this tip.

Click on a star to rate it!

… for Random Weirdness

Tip #659: Build Your Own Raspberry (Pi) Computer

Larry Jordan – LarryJordan.com

A fully-functional computer that costs less than $50

The Raspberry Pi Foundation’s official case is a classic. Image via Raspberry Pi Foundation.

Topic $TipTopic

This article, written by Alejandro Medellin, first appeared in PremiumBeat.com. This is an excerpt.

The Raspberry Pi is a fully-functional computer that costs less than $50. In fact, you can get one for $10. Designed over a decade ago, in England, by the Raspberry Pi Foundation, this tiny computer has been at the heart of many enthusiast projects. In fact, there are a couple of RasPis on the International Space Station, which are used from Earth by children learning to code.

While the device is used by many schools and educators to teach children to code, it’s much more than an educational tool — it’s a tiny workhorse. For instance, the RasPi Zero, which is the smallest and least powerful version, is now being used in new ventilators to combat the shortage of the life-saving device during the COVID-19 pandemic.

There are three models:

  • The Powerhouse: Raspberry Pi 4 Model B. The Raspberry Pi Foundation’s latest release, the RasPi 4 Model B, is the most powerful iteration of the Raspberry Pi to date. It comes in either one, two, or four gigabytes of memory (RAM). The RasPi 4 starts at $35, but the 4GB version sells for around $55.
  • An Oldie, But Goodie: Raspberry Pi 3 Model B+. Despite its age, the RasPi 3 Model B+ is still powerful in its own right, and more affordable. For more straightforward projects, or ones on a tight budget that don’t require many computing resources.
  • Tiny, But Fierce: Raspberry Pi Zero W. If the RasPi 4 Model B is the size of a credit card, then the RasPi Zero W is roughly the size of a stick of gum, and yet, it packs quite the punch. Starting at only $10, this smaller computer is ideal for experimentation.

Before you can use the RasPi, you’ll have to download an operating system onto a MicroSD card; you can access it on Windows or Mac. Alternatively, you can buy a MicroSD card that comes pre-loaded with NOOBS — i.e., new out of the box software — which includes several operating systems to choose from. You can also download NOOBS onto a MicroSD card and then choose your OS.

Raspberry Pis can be used to create network-attached storage, media players, even simple desktop editing. Plus, for long days with nothing to do, these are amazing tools for hobbyist.


Please rate the helpfulness of this tip.

Click on a star to rate it!

… for Codecs & Media

Tip #646: When Does Video Compression Use the GPU?

Larry Jordan – LarryJordan.com

Most editing codecs use the GPU, most web codecs do not.

Topic $TipTopic

One of the never-ending debates is how to configure the “best” computer. While this question is unanswerable in general, when it comes to video compression, here’s what you need to know.

CPUs, in general, provide linear calculations – one calculation after the other.

GPUs, in contrast, provide parallel calculations – multiple calculations occurring at the same time.

  • GOP-based codecs benefit most from linear – CPU – calculations due to the structure of the GOP. If you need to create H.264 materials, the faster the CPU, the faster compression will complete.
  • I-frame codecs, on the other hand, benefit from the GPU because different frames can be calculated at the same time, then stitched together for the final movie.

This ability of I-frame codecs to use the GPU to accelerate render and export speeds is one of the reasons they are recommended for editing.


Please rate the helpfulness of this tip.

Click on a star to rate it!

… for Random Weirdness

Tip #630: 5 Tips About iPhone Gimbals

Larry Jordan – LarryJordan.com

Stabilizers compensate for side-to-side movements, but you need to walk gently.

Image courtesy of DJI.
A DJI Ronin-S camera stabilizer.

Topic $TipTopic

This article, written by Rubidium Wu, first appeared in PremiumBeat.com. This is an excerpt.

Here’s a look at the capabilities of an iPhone gimbal and how to incorporate it into your next project.

  1. Get Smooth Footage. The iPhone X (and above) have powerful stabilization built into their video modes. This smoothes out bumps and judder by itself.
  2. A Certain Kind of Shake. The three-axis motors in a gimbal eliminate the shake that comes from humans made of soft, pliable material — like muscle. They don’t eliminate the up-and-down movement that comes from walking. We don’t usually notice this movement because our brain cancels it out. However, it shows up in footage — gimbal or not.
  3. Different Levels. The most basic iPhone gimbal simply stabilizes the footage. More sophisticated versions give power to the camera, connect via Bluetooth, and use their own apps to shoot footage and communicate with the iPhone.
  4. Varying Models. Newer phones won’t fit in some older gimbals because each one is designed for a specific iPhone and the position of its camera. The wide-angle lens on the iPhone 11 Pro is so wide, it catches the arm of some older gimbals in its field of view.
  5. Live Dangerously. Most gimbals need a case-less iPhone for a proper fit. That means that when you’re doing the most adventurous things with your phone, it’s the most vulnerable. Be sure you have everything backed-up (and possibly insured) before you do anything too extreme.

Please rate the helpfulness of this tip.

Click on a star to rate it!

… for Random Weirdness

Tip #617: Benefits of a Tilt/ShiftLens

Larry Jordan – LarryJordan.com

Tilt/shift lenses modify depth of field, perspective and focus.

The two modes of a Tilt/Shift lens: tilting (top) and shifting.

Topic $TipTopic

Traditional lenses project a circular image onto a rectangular sensor to create an image. Normally, that circular image is fixed in its location to the sensor. However, a tilt-shift lens allows us to modify where that circular image lands in relation to the sensor.

By tilting the lens, you change the center of that imaging circle, which can straighten the lines that appear to converge in the distance. The camera body remains in the same position, but the tilt shift adjusts the lens’ perspective. That makes tilt shift lenses a big help for architectural photography. Walls that are straight may actually look crooked because of the lens’ perspective; tilt shift lenses can change that perspective, making those walls straight again.

Tilt shift lenses also allow for greater control over an image’s depth of field. Traditionally, anything the same distance from the camera as the subject will appear in focus—that’s because those objects lie on the same focal plane. On a normal lens, the focal plane is parallel to the camera. Tilt the lens, and the focal plane tilts as well, becoming a diagonal line, instead of one that’s parallel to the camera. This creates the appearance of a much deeper depth of field than shooting a traditional lens at the same aperture. With the focal plane as a diagonal, it’s possible to have two objects that are parallel to one another, with one item in focus and another not.

EXTRA CREDIT

These lenses are also great for shooting panoramic shots. Here’s an illustrated blog, plus a tutorial video from CreativeLive that showcases tilt-shift lenses.


Please rate the helpfulness of this tip.

Click on a star to rate it!

… for Random Weirdness

Tip #598: How to Set Up a Live Streaming Studio

Larry Jordan – LarryJordan.com

The best first step is to get a good microphone.

A screen shot from Curtis Judd’s streaming webinar.

Topic $TipTopic

As we look to move our studios to our homes and start live streaming, it is useful to get a guide on what gear to use and how to use it.

Curtis Judd has an interesting and informative YouTube video where he walks through all the equipment he uses to create live streams for YouTube.

Here’s the link.

EXTRA CREDIT

This is an article I wrote on the gear the Digital Production Buzz used to create our live streaming audio podcasts. Here’s the link.


Please rate the helpfulness of this tip.

Click on a star to rate it!

… for Random Weirdness

Tip #584: 5 Tips When Picking an HDR Monitor

Larry Jordan – LarryJordan.com

Tips to keep in mind when picking a monitor.

Apple Pro Display XDR, courtesy of Apple.

Topic $TipTopic

These tips, written by Scharon Harding, first appeared in Creative Planet Network. This is a summary.

When picking an HDR monitor, these should be your top considerations:

  • Brighter is better. HDR monitors can get much brighter than SDR ones. If you’re a general user, opt for a monitor that’s VESA-certified for at least DisplayHDR 500 (a minimum max brightness of 500 nits with HDR media), while gamers will probably want DisplayHDR 600 or greater. Creative professionals like video editors should get at least DisplayHDR 1000.
  • Backlight dimming type is crucial. If you go for DisplayHDR 500 or higher, you’ll know you have at least edge-lit dimming. And when it comes to FALD (full array local dimming) or edge-lit dimming, more zones are better
  • The more DCI-P3 coverage, the better, but be careful to check color accuracy.
  • As usual, higher contrast ratios are best. High contrast is an area where HDR displays shine over their SDR counterparts.
  • HDR10 is the only HDR format Windows users need (unless they plan to hook their display up to something like a Blu-ray player).

EXTRA CREDIT

Tom’s Hardware has developed a guide on how to choose the best HDR monitor. Here’s the link to learn more.


Please rate the helpfulness of this tip.

Click on a star to rate it!