… for Random Weirdness

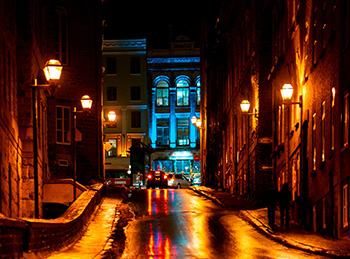
Tip #443: Shooting Night-time Car Scenes

Keep shots tight and the background murky.

Image courtesy of pexels.com.
Blurry, dark backgrounds can imply just about anything.

Topic $TipTopic

This article, written by Logan Baker, first appeared in PremiumBeat.com. This is an excerpt of a conversation with the Coen brothers.

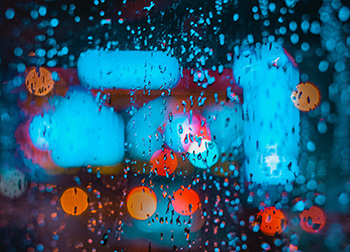
Shooting night-time car scenes can be tricky when working with a micro-budget. Fortunately, there are a few key techniques that can help you pull it off without leaving the garage.

For dialogue between the two characters that takes place while driving a car at night, consider shooting in your garage. Keep your depth of field shallow — put the focus on the actors while having the background out of focus. By doing this, it allows you to keep a level of vagueness to what’s really going on behind-the-scenes.

To further mask the unwanted backdrop of your garage or driveway, have a friend point a hose towards the windshield to create “rain.”

Purchase some cheap individual accent lights from Home Depot and place them inside the car to eliminate the need to set up a complicated lighting rig around the exterior (a rig that might actually show reflections). Consider having a grip or production assistant sit in the back of the car, moving one of the small lights up and down on the actor’s side to give the appearance of streetlights passing by.


Please rate the helpfulness of this tip.

Click on a star to rate it!

… for Random Weirdness

Tip #422: 4 Tips to Researching Your Topic

Larry Jordan – LarryJordan.com

All documentaries benefit from as much research as possible.

Research is essential to any documentary. (Image courtesy of Pexels.com.)

Topic $TipTopic

This article, written by Tanner Shinnick, first appeared in PremiumBeat. This is an excerpt.

Research is essential to any documentary. Strong research ensures a successful and captivating documentary film. Here are some resources to consider as you research your own projects.

Academic Research Papers.
Academic research papers are wonderful tools for documentarians. Chances are that there are academic research papers out there about your topic. A simple Google search or thumbing through references on Wikipedia can uncover many of them.

Larry adds: Recently, I’ve started using Bookends as a research and bibliography database. It can be very helpful in finding and organizing academic sources.

Newspapers.
I find newspapers extremely valuable documentary research resource. If the paper you’re looking for isn’t digitized, you could always visit the publication’s local library where you can view the slides or microfilm.

First-Hand Accounts.
Research interviews can uncover a lot of information about a subject or topic. By simply allotting time to chat with key subjects about a topic, you can uncover valuable information that may not be available online or in books.

Archival Footage or Photos.
AStrong research ensures a successful and captivating documentary film.rchival footage or photos can provide contextual visual information to your film.Here are some resources to consider.


Please rate the helpfulness of this tip.

Click on a star to rate it!

… for Random Weirdness

Tip #423: 7 Reasons to Add Narration

Larry Jordan – LarryJordan.com

Narration adds power, speeds action and consolidates back-story.

Narration adds power, speeds action and consolidates back-story. (Image courtesy of pexels.com.)

Topic $TipTopic

This article, written by Jourdan Aldredge, first appeared in PremiumBeat. This is an excerpt.

For filmmakers, narration is truly a powerful tool — voice-over narration helps us understand what we’re seeing. Regardless of where you are in production, here are seven reasons you should consider using voice-over narration in your project.

  • Beef Up Your Narrative. Adding narration can be a great way to beef up your narrative to turn a section from a weakness into a strength.
  • Accelerate Exposition. Set things up much more quickly than otherwise possible.
  • Add Depth to a Character.
  • Lay Out the Broad Strokes. Especially with sequels, this helps jump start the action by quickly filling in the back-story.
  • Make Your Film More Active.
  • Add Humor to Your Scenes. Similar to making films more active, adding voice-over narration can also add more humor to your scenes.
  • Raise Issues of Reliability. If you are looking to add narration to your project, it’s also worth considering making it less than reliable. An unreliable narrator can cause a very drastic thematic response when the truth is revealed to the audience.

Please rate the helpfulness of this tip.

Click on a star to rate it!

… for Random Weirdness

Tip #424: 3 Tips for Lighting Different Skin tones

Larry Jordan – LarryJordan.com

Different skin tones require changes to our lighting.

Image courtesy of Pexels.com.

Topic $TipTopic

This article, wriiten by Rubidium Wu, first appeared in PremiumBeat. This is an excerpt.

Lighting different skin tones in the same scene is really tough. Here are some tricks to consider.

If the talents’ skin tones are different, but not radically so, you can usually get away with placing the darker skinned person closer to the key light, keeping the light close to the talent. Because of the inverse square law, exposure falls off quickly when it’s near a source of light, then more slowly as it gets further away.

Zones of Light. By bringing in a flag or cutter close to the actor so that more of the key hits the darker skinned actor than the lighter skinned actor, you effectively create two zones of lighting — one brighter than the other. The actors will need to stay on their marks, if they’re to be correctly lit.

Negative Lighting. If you’re outdoors, or utilizing some other source of bright light, you can use exposure for the darker skin, and use scrims or negative fill to take light away from the brighter skin. This is a trick also used by corporate headshot photographers who want to stop white shirts from being overexposed. They put a double net scrim (which takes away a stop of light) on its own C-stand (or light stand), and use it to shade the bright area. If the scrim is close enough to the light, it won’t create a visible shadow in the shot.

Fill. It’s no good to light just one side of your talent’s face. You also need to light the darker side so that it doesn’t fall off into dark shadow.
The fill light doesn’t need to be as big as the key, it just needs to be more controlled. I’ve had the most success using a 1×1 or 2×1 with a 45 degree grid. This means you can aim it at just the location you want, and it should fill only the area you need lighter. You may have to pan the light away so that no light is hitting the lighter skin, and you may also need to add more negative fill off camera so that the light, once it’s lit your desired area, doesn’t bounce everywhere and bring up the levels over the whole room.


Please rate the helpfulness of this tip.

Click on a star to rate it!

… for Random Weirdness

Tip #419: Shooting Exteriors at Night

Larry Jordan – LarryJordan.com

Think outside the box for night lighting

Shiny streets at night. (Image courtesy of Pexels.com)

Topic $TipTopic

This article, written by Noam Kroll, first appeared in PremiumBeat.com. This is an excerpt.

The nighttime exterior shot is one of the greatest challenges for filmmakers on a budget. Nighttime exteriors typically require a ton of powerful lights (and generators) to illuminate your scene, which naturally poses a problem if your budget is limited. This is especially the case for wide shots where there is such an expansive area that needs to be lit.

That said, one of the best and most effective tricks of the trade in this type of situation is very simple: water. For years filmmakers have been using water on streets, sidewalks, asphalts, etc. to create a more reflective surface. By evenly spraying the concrete surfaces in your shot, you’re able to brighten up your scene drastically.

Many filmmakers prefer the look of shiny streets at night.


Please rate the helpfulness of this tip.

Click on a star to rate it!

… for Random Weirdness

Tip #420: Shoot Better Vertical Video

Larry Jordan – LarryJordan.com

Vertical video is becoming an ever-more popular deliverable.

Topic $TipTopic

This article, written by Rubidium Wu, first appeared in PremiumBeat.com. This is an excerpt.

“Vertical” and “Cinematic” are two words that don’t belong together. But, all too often, we need to convert a 16:9 masterpiece into a 9:16 deliverable. How?

You have three options:

  1. The Post Method. In post-production, the video editor creates a 608 x 1080 center cut of the final production. The problem is that the framing feels claustrophobic and much of the image gets lost.
  2. Flip the Camera. A better solution is to flip the camera 90° and record a second take. This provides better framing, but requires more storage and more time spent editing, since you now have two separate programs to cut. This also assumes you get the same performance from your actors for each version.
  3. Stacked cameras. If you don’t have time for re-takes, you’ll need two cameras operating at the same time.

    If you don’t want to (or can’t) do additional takes, you’ll need to record horizontal and vertical versions simultaneously. This could mean having a second camera right next to your A camera that’s showing vertically, or to attach another camera to the main camera and roll on both at the same time.

    The best practice is to add another camera person to do the operating, and to sync the second camera via timecode so that the editor can edit both as one.

    Since clients are often reluctant to foot the bill for the extra manpower, attaching a camera to the side of the A camera’s cage works pretty well, if the operator doesn’t have to focus it during a shot and can keep the settings unified.

There’s no perfect solution, but at least you have options because vertical video will be with us for a long, long time.


Please rate the helpfulness of this tip.

Click on a star to rate it!

… for Random Weirdness

Tip #421: Improve Your Filmmaking Creativity

Larry Jordan – LarryJordan.com

It isn’t your gear, it’s your mind.

Creativity means allowing your mind to wander.

Topic $TipTopic

This article first appeared in TolTips.com. This is an excerpt.

It’s not your gear, but your creativity that will set you apart. Consider these ideas:

  1. Let your mind drift. Boredom is often associated with a loss of productivity but it actually allows the mind to drift, and opens up new forms of input and understanding. Ideas usually don’t come up when your mind is busy.
  2. Follow other creators. Use them to find inspiration. let yourself be influenced, but not copy, story-telling, editing techniques, framing…
  3. Do some research. The more you know about your theme, the higher the chance of finding a nice angle to tell your story.
  4. Challenge yourself. Creativity is the ability to create something unusual. Don’t rest on your laurels. Challenge yourself, go out of your comfort zone.
  5. Be open-minded. Concepts are meant to change through their development. So, remember that it’s better to waste a few hours on a silly idea than waste a potential great idea.

Please rate the helpfulness of this tip.

Click on a star to rate it!

… for Random Weirdness

Tip #368: 12 Tips for Better Locations

Larry Jordan – LarryJordan.com

Think About Your Location Before You Start Shooting

Image Courtesy of www.pexels.com.

Topic $TipTopic

This article, written by Lewis McGregor, first appeared in PremiumBeat. This is an excerpt.

Picking the right location can make all the difference for your film. Here is a list of 12 tips to consider, from The Guerrilla Film Makers Pocketbook, when trying to find the right location on a budget.

  1. Shooting on location can be a significant advantage, as you will have to do minimal set work, merely dressing.
  2. Space can be a major problem, as even the biggest of rooms will become sardine-like with a full crew.
  3. Shooting outdoors can be a problem, as there is no way to control the weather.
  4. Always try and get permission to shoot wherever you intend to be. Sometimes, if you do foresee problems, it is best to dash in, shoot, and get out as quick as possible. If someone turns up to find out what is happening, try and get them interested and involved, and claim complete ignorance.
  5. Getting to and from difficult locations can be very costly in terms of time. One-hour traveling is one hour less shooting.
  6. Use movement orders. This is a piece of paper with a photocopied map (the route picked out with highlighter pen), explicit directions, and mobile phone numbers for those who get lost.
  7. Facilities for the crew on location can be a problem. Your crew needs a place to eat and sit, as well as a toilet. You can’t ask your star to squat in the bushes.
  8. Closing down streets is difficult. The police will be as helpful as they can, but they have crimes to stop and don’t relish the thought of holding the hand of a new producer.
  9. When choosing a location, don’t forget the sound.
  10. Film crews trash locations. Clean up after yourself, leave muddy boots outside, ban smoking inside, etc.. Remember, you may need to return to the location if there is a problem.
  11. Think creatively. Many locations can double for several different parts of your story. This will minimize the time you waste moving between places.
  12. Beware of the cool location that is impossible to either light or get cameras into. Buildings with big windows cause lighting problems, turrets with narrow stairwells are tough for carrying kits, and anywhere in big cities will cost you in simply parking alone.

Please rate the helpfulness of this tip.

Click on a star to rate it!

… for Random Weirdness

Tip #372: 5 Prep Tips for Directing Commercials

Larry Jordan – LarryJordan.com

The Better Your Prep, the Better the Shoot

Image courtesy of www.pexels.com.

Topic $TipTopic

This article, written by Tanner Shinnick, first appeared in PremiumBeat. This is an excerpt.

Acquaint Yourself with the Client’s Business

One of the first and most important things you can do as a director is to understand how your client makes money. As important as how they make money is also who they make money from — their target demographic.

Visit Their Social Media Accounts

These resource gives you a quick overview of what their previous advertising efforts were and the general tone they’re trying to achieve for their brand.

Make a Music Playlist

For any spot I do, I make a playlist that reflects the mood and tone we’re trying to achieve for that spot. Then, I listen to that playlist while I’m doing any sort of prep for that shoot.

Reference Commercials

I love to pull from and watch as many reference commercials as possible. The best part is that these reference commercials can really help illustrate to your client the tone you’re trying to achieve.

Find Inspiration in Photography

Photography has only one frame, while we (as filmmakers) have twenty-four frames per second. Photography typically motivates my mood, wardrobe, and locations for any spot I do.


Please rate the helpfulness of this tip.

Click on a star to rate it!

… for Random Weirdness

Tip #395: 4 Cameras Hacks That Save Time

Larry Jordan – LarryJordan.com

Four cool tips to get great shots on a budget.

Image courtesy of www.pexels.com.

Topic $TipTopic

This article first appeared in MotionArray. This is an excerpt. Here are four camera hacks that allow you to craft great effects without spending more than five bucks for each tip.

Use a Neck Strap

With your strap around your neck, push your camera away from you until the strap goes tight. Remember to keep that tension as you go through your motion. This will help to get rid of any jitters that your hands create when free-holding the camera. Your goal isn’t necessarily to get your shot perfect, but to get it to the point where it’s way smoother and free of jitter and rolling shutter.

Fishing Wire

Tape clear fishing line going exactly vertical over your lens when you shoot in front of an intense, concentrated light source. The result is an anamorphic-style, deliberate lens flare!

Rubber Band

If your tripod doesn’t have a nice fluid head, wrap one end of the rubber band around your tripod handle and hold the other end. You’ll control the movement of the tripod head by holding and pulling on the rubber band instead of grabbing and moving it with your hand. Much smoother.

Blanket Drag

Wheelchairs are great for dolly shots, but if you don’t have one handy, an old blanket is a great alternative to a wheelchair. Simply have your camera operator sit or lie down on the blanket, then get a second pair of hands to drag them across the floor. The result is surprisingly smooth footage. The blanket acts as a muffler to the movement, so you get super smooth, professional-looking footage.


Please rate the helpfulness of this tip.

Click on a star to rate it!