High-end compositing tools exist to solve tricky problems with edges.
(Image courtesy of Pexels.com.)
Both Adobe Premiere Pro and Apple Final Cut Pro X include powerful chroma-keyers. When should you consider using something even stronger?
The challenge with any key is precisely defining an edge. Yes, the background needs to be evenly lit and actors should not wear green in front of a green background. But, by now, most of us understand that.
Most of the time, finding the edge isn’t that hard. But, I can easily think of five situations to use more powerful compositing (keying) software:
Loose or blowing hair and other fuzzy edges
Translucency between foreground and background
Reflections of the composited background with the foreground
Tracking between foreground and background
Working with 3D composites
What software should you consider if your NLE isn’t enough?
https://www.theinsidetips.com/wp-content/uploads/2019/09/Tips-Logo-700x150.jpg00Larry Jordanhttps://www.theinsidetips.com/wp-content/uploads/2019/09/Tips-Logo-700x150.jpgLarry Jordan2020-12-09 01:30:002020-12-05 11:24:44Tip #1234: When to Use a More Powerful Chroma-Keyer
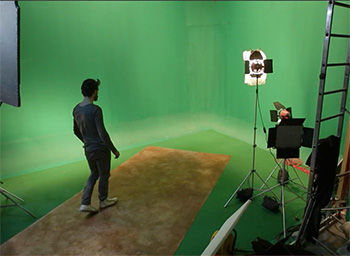
Motion tracking is an essential skill, especially designed for moving elements.
(Image courtesy of SchoolofMotion.com)
This article, written by Johnathan Paul, first appeared in SchoolofMotion.com. This is a summary.
Motion tracking, in its simplest form, is the process of tracking the movement of an object within a piece of footage. Once you’ve collected this track data from the selected point, you then apply it to another element or object. The results of applying this data are that your element or object now matches the movement of your footage.
What can you use motion tracking for?
Stabilize motion by utilizing tracking data.
Add elements such as text or solids to a composition.
Insert 3D objects into 2D footage.
Apply effects or color grading techniques.
Replace screens on a TV, Computer, or mobile device.
What types of motion tracking is there in After Effects?
Single-Point Tracking
Two-Point Tracking
Corner Pin Tracking
Planar Tracking
Spline Tracking
3D Camera Tracking
Tracking is a crucial technique to learn as a motion designer or visual effects artist. You’ll end up using this technique much more than you think, and for a wide variety of reasons.
The article has videos that illustrate each of the six types of motion tracking, along with different software to accomplish it.
Please rate the helpfulness of this tip.
Click on a star to rate it!
https://www.theinsidetips.com/wp-content/uploads/2019/09/Tips-Logo-700x150.jpg00Larry Jordanhttps://www.theinsidetips.com/wp-content/uploads/2019/09/Tips-Logo-700x150.jpgLarry Jordan2020-12-09 01:30:002020-12-09 01:30:00Tip #1235: 6 Ways to Motion Track in After Effects
The Inside Tips encourages reader-contributed tips. Please share yours with us.
We don’t know what we don’t know until we learn it from someone else.
I want to encourage you to submit a tip or two for “The Inside Tips.” We all benefit when we take the time to share what we know.
The Inside Tips for Visual Effects is a Tip Letter focused on visual effects. This is a vast topic – far more than any single person can master.
Each of us, during our career, has benefited by learning from others – sometimes in a formal setting, more often in the course of daily work.
For this reason, it would be great if you could contribute a tip or two from your own experience. The Inside Tips are read in every state in the US, as well as 50 countries around the world.
Even the “simple things” only seem simple after we learn them.
https://www.theinsidetips.com/wp-content/uploads/2019/09/Tips-Logo-700x150.jpg00Larry Jordanhttps://www.theinsidetips.com/wp-content/uploads/2019/09/Tips-Logo-700x150.jpgLarry Jordan2020-12-02 01:30:002020-11-28 10:18:06Tip #1208: I Need Your Help
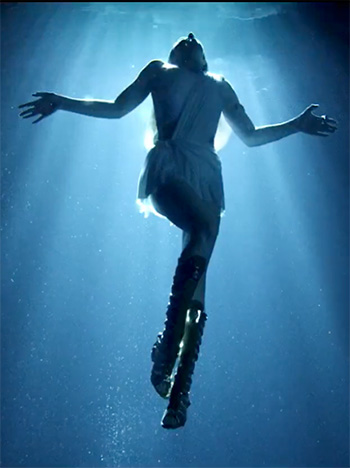
A crash-zoom rapidly zooms from one shot to the next. Here’s how to do it in post.
A crash-zoom in action. (Image courtesy of PremiumBeat.com.)
This article, written by Jason Boone, first appeared in PremiumBeat.com. This is a summary.
The crash (or snap) zoom is a cinematography technique you’ll see quite often in big-budget films. Quentin Tarantino frequently uses it to snap the viewer’s attention to specific items on screen, such as the tip of a shotgun or the blade of a Hattori Hanzo sword.
Here are the steps to create this effect in post using After Effects:
Step 1: Capture a WS and a CU
Step 2: Align the clips so the object centers match
Step 3: Animate the Crash Zoom
Step 4: Cover up the cut
Step 5: Add Camera Shake
The great thing about this technique is that you can quickly add motion graphics elements, as the Crash Zoom is already animated separate from the layers. To add an element, just parent it to the Crash Zoom and switch on the motion blur. Some anime speed lines might work nicely here as well.
EXTRA CREDIT
The article includes step-by-step instructions, along with two demo videos.
Please rate the helpfulness of this tip.
Click on a star to rate it!
https://www.theinsidetips.com/wp-content/uploads/2019/09/Tips-Logo-700x150.jpg00Larry Jordanhttps://www.theinsidetips.com/wp-content/uploads/2019/09/Tips-Logo-700x150.jpgLarry Jordan2020-12-02 01:30:002020-11-28 10:19:08Tip #1215: Create a Crash Zoom from Two Shots
The hardest step is getting started. Here’s a 10-video series that can help.
(Image courtesy of Foundry.com.)
Nuke is an industry standard compositing, editorial and review tool for single artists to full VFX houses. The hardest part of learning effects software is getting started. Foundry, the makers of Nuke, created the free “Nuke Studio for Beginners.”
This 10 video set takes just over an hour to watch and will get you started with basic editing, compositing and exporting in Nuke Studio. Designed for complete beginners and those new to Nuke, these tutorials describe the steps to make a simple project in Nuke Studio.
Nuke is different from more traditional effects packages found in most NLEs because it is node-based. As such, it takes some effort to shift our thinking into the possibilities that nodes present.
Both the tutorials and a trial version of Nuke are free. Here’s the link.
Please rate the helpfulness of this tip.
Click on a star to rate it!
https://www.theinsidetips.com/wp-content/uploads/2019/09/Tips-Logo-700x150.jpg00Larry Jordanhttps://www.theinsidetips.com/wp-content/uploads/2019/09/Tips-Logo-700x150.jpgLarry Jordan2020-11-25 01:30:002020-11-21 10:37:07Tip #1201: Get Started with Nuke
Interviews, showcases and tutorials to get you started with BorisFX Sapphire.
(Image courtesy of BorisFX.com.)
Sapphire plug-ins, published by BorisFX, let you create stunning organic looks unmatched by any host native effect tools. Key features include over 270 effects and 3000+ presets, a powerful Effect and Transition Builder, and integrated tracking and masking with the Academy Award-winning Mocha. Sapphire’s superior image quality, control, and render speed offers massive time-savings.
BorisFX has compiled a series of artist interviews and product tutorials that showcase Sapphire and provide an orientation to how it works.
OFX: Improve interoperability, reduce support and development time.
The Open Effects Association logo.
OFX. Many visual effects tools reference this – but what is it?
The OFX Image Effect Plug-in API, is an open standard for 2D visual effects or compositing plug-ins. It allows plug-ins written to the standard to work on any application that supports the standard. It is widely used for visual effects and video processing and is supported by numerous hosts, including Assimilate, Blackmagic Design, Digital Anarchy, FXHOME, NewBlueFX, RE:Vision Effects and more.
Bruno Nicoletti of The Foundry created it in 2004. The OFX API was established because each developer had its own proprietary interface, so developers at different companies couldn’t work together or share code very easily. Developers had to create their own method of porting their plug-ins into each host, which, as you can imagine, can be expensive and time-consuming.
Out of this confusion, the Open Effects Association – and OFX – was born.
Here’s an article from ToolFarm with more details on which software supports it and what plug-ins are available.
Please rate the helpfulness of this tip.
Click on a star to rate it!
https://www.theinsidetips.com/wp-content/uploads/2019/09/Tips-Logo-700x150.jpg00Larry Jordanhttps://www.theinsidetips.com/wp-content/uploads/2019/09/Tips-Logo-700x150.jpgLarry Jordan2020-11-25 01:30:002020-11-21 10:39:01Tip #1203: What is OFX?
DaVinci Resolve updates the entire app with major new features.
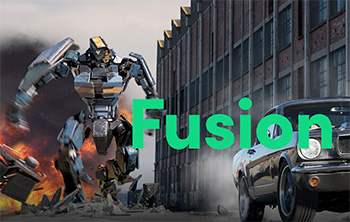
Fusion creates high-quality visual effects.
DaVinci Resolve 17 is a major new release with over 100 new features and 200 improvements! The color page features new HDR grading tools, redesigned primary controls, AI based magic mask and more.
DaVinci Resolve 17 has three major components: video editing, audio mixing and visual effects creation. The visual effects part is handled by Fusion.
NOTE: All this information is taken from the DaVinci Resolve website.
Here are some of the highlights:
Fast Effects Search and Live Preview. Finding the right effect, transition or title is faster and easier than ever! The elegant, new multi column view lets you see more and scroll less. Descriptive icons also help you quickly find what you need. Plus, you can hover scrub the mouse across any item to see a live preview in the viewer.
Keying and Compositing. New Resolve FX 3D, HSL and luma keyer plug-ins let you pull keys directly in the timeline on both the edit and cut pages. In addition, alpha channels from Resolve FX and Open FX plug-ins are now supported, as are embedded alpha channels and external matte files giving you even more compositing options.
Render in Place. The render in place command lets you generate render files for any portion of the timeline. Once rendered, you can move, edit and trim without having to re-render. Render files can be created in any format and saved wherever you want. Unlike cache files, render files are easy to manage and portable.
Compositions you create on the Fusion page can now be saved as a template and used on the edit or cut page. New animation curve modifiers can be used to automatically retime animations when you change their duration in an edit. Audio playback with waveform display makes it easier to create precisely timed animations, there are shared markers with the edit page and more.
In addition, 27 GPU accelerated Resolve [effects] have been added to the Fusion page, including the noise reduction and sharpening tools from the color page. New node view bookmarks make it easy to navigate large comps, the toolbar can be customized with your favorite tools, and vertical layouts are supported in the node editor.
Here’s the link to the Resolve 17 webpage to learn more.
Please rate the helpfulness of this tip.
Click on a star to rate it!
https://www.theinsidetips.com/wp-content/uploads/2019/09/Tips-Logo-700x150.jpg00Larry Jordanhttps://www.theinsidetips.com/wp-content/uploads/2019/09/Tips-Logo-700x150.jpgLarry Jordan2020-11-18 01:30:002020-11-14 10:44:44Tip #1176: New VFX in DaVinci Resolve 17
LiDAR is a key technology that makes AR believable.
iPhone LiDAR resolution may be better for mapping rooms, than portraits.
One of the key new features in the iPhone 12 Pro is LiDAR. Lidar stands for light detection and ranging, and has been around since the 1960’s. It uses lasers to ping off objects and return to the source of the laser, measuring distance by timing the travel, or flight, of the light pulse.
An iPhone sends waves of light pulses out in a spray of infrared dots and can measure each one with its sensor, creating a field of points that map out distances and can “mesh” the dimensions of a space and the objects in it. The light pulses are invisible to the human eye, but you could see them with a night vision camera. It works up to a range of 15 feet (5 meters).
The primary purpose of LiDAR in the iPhone is to improve augmented reality (AR) implementation. It will give apps more useful and accurate information about their surroundings, for smoother, more reliable AR. Even today, there is still a lot this technology can do, not just for augmented reality but games and shopping.
LiDAR actually has many uses across many industries. Archaeologists use it to prepare dig sites and autonomous vehicles rely on it to construct real-time 3D maps of their surroundings. LiDAR has even been used to create highly realistic and accurate maps of race tracks in video games, like Project CARS. Police speed guns also use LiDAR.
There’s an excellent article at halide.com, the developers of Halide, an iPhone camera app, that goes into much more detail showing what LiDAR can do and how it relates to AR and mapping the real world into your camera.
As the Halide authors conclude: “Photography isn’t traditionally taking photos anymore; it’s combining all the data and smarts in our devices into allowing totally new interpretations of what ‘photography’ can mean. And if you’re not excited about that, we’re at a loss!”
https://www.theinsidetips.com/wp-content/uploads/2019/09/Tips-Logo-700x150.jpg00Larry Jordanhttps://www.theinsidetips.com/wp-content/uploads/2019/09/Tips-Logo-700x150.jpgLarry Jordan2020-11-18 01:30:002020-11-14 10:46:07Tip #1185: What Does LiDAR in an iPhone 12 Do?
We may request cookies to be set on your device. We use cookies to let us know when you visit our websites, how you interact with us, to enrich your user experience, and to customize your relationship with our website.
Click on the different category headings to find out more. You can also change some of your preferences. Note that blocking some types of cookies may impact your experience on our websites and the services we are able to offer.
Essential Website Cookies
These cookies are strictly necessary to provide you with services available through our website and to use some of its features.
Because these cookies are strictly necessary to deliver the website, refuseing them will have impact how our site functions. You always can block or delete cookies by changing your browser settings and force blocking all cookies on this website. But this will always prompt you to accept/refuse cookies when revisiting our site.
We fully respect if you want to refuse cookies but to avoid asking you again and again kindly allow us to store a cookie for that. You are free to opt out any time or opt in for other cookies to get a better experience. If you refuse cookies we will remove all set cookies in our domain.
We provide you with a list of stored cookies on your computer in our domain so you can check what we stored. Due to security reasons we are not able to show or modify cookies from other domains. You can check these in your browser security settings.
Google Analytics Cookies
These cookies collect information that is used either in aggregate form to help us understand how our website is being used or how effective our marketing campaigns are, or to help us customize our website and application for you in order to enhance your experience.
If you do not want that we track your visit to our site you can disable tracking in your browser here:
Other external services
We also use different external services like Google Webfonts, Google Maps, and external Video providers. Since these providers may collect personal data like your IP address we allow you to block them here. Please be aware that this might heavily reduce the functionality and appearance of our site. Changes will take effect once you reload the page.
Google Webfont Settings:
Google Map Settings:
Google reCaptcha Settings:
Vimeo and Youtube video embeds:
Other cookies
The following cookies are also needed - You can choose if you want to allow them:
Privacy Policy
You can read about our cookies and privacy settings in detail on our Privacy Policy Page.