Share your favorite tutorial websites in the comments.
(Image courtesy of Pexels.com.)
With so many effects packages out there, and so many web sites providing tutorials, I’m curious about which tutorials or web sites you find the most helpful.
Share your favorites in the comment section below and I’ll highlight them in future Tip Letters.
Please rate the helpfulness of this tip.
Click on a star to rate it!
https://www.theinsidetips.com/wp-content/uploads/2019/09/Tips-Logo-700x150.jpg00Larry Jordanhttps://www.theinsidetips.com/wp-content/uploads/2019/09/Tips-Logo-700x150.jpgLarry Jordan2020-10-21 01:30:002020-10-16 19:24:12Tip #1106: Share Your Favorite Tutorials
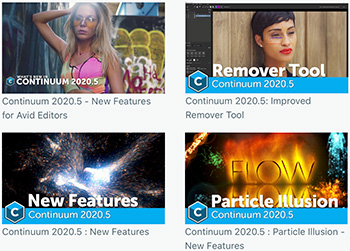
Dozens of tutorials covering all the Boris FX products.
Four of the tutorials on the Boris FX website.
I was exploring the Boris FX website and discovered a gold mine of video tutorials for 22 different host applications and spanning 23 categories, including:
https://www.theinsidetips.com/wp-content/uploads/2019/09/Tips-Logo-700x150.jpg00Larry Jordanhttps://www.theinsidetips.com/wp-content/uploads/2019/09/Tips-Logo-700x150.jpgLarry Jordan2020-10-21 01:30:002020-10-21 01:30:00Tip #1107: Boris FX Tutorials
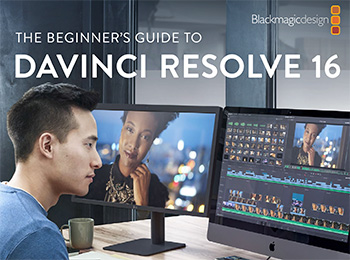
Earlier this year, Paul Saccone and Dion Scoppettolo co-authored the “Beginner’s Guide to DaVinci Resolve.” This PDF is geared for people who prefer to learn by reading, rather than watching.
Published just a few months ago, this covers all the key features of the software, including audio and effects, that you need to know to use Resolve effectively.
Paul was the Senior Director of Marketing at BMD until he left a couple of months ago to join Frame.io. Dion is a Senior Product Marketing consultant and still working with Blackmagic. Prior to Blackmagic, both Paul and Dion were part of Apple’s Final Cut Pro team.
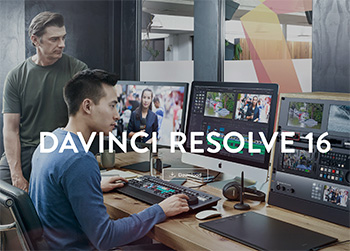
Even the free version of Resolve can create useful, high-quality projects.
Promotional image from the DaVinci Resolve website.
This article first appeared in MotionArray.com. This is a summary.
In recent years, DaVinci Resolve has steadily gained interest from professionals and hobbyists alike. Fueled by a surprisingly capable free version, and the constant addition of new features, the software is now more popular than ever. Not only will you find a complete set of user-friendly video editing tools, but there are also audio mixing and visual effects compositing workspaces!
Whether you are new to video editing or looking to jump ship from other software, this tutorial shows how to use DaVinci Resolve to get up and running fast.
The tutorial linked above covers the basics of editing in Resolve:
Step 1: Create a New Project & Import Media
Step 2: Add Trimmed Clips to the Timeline
Step 3: Add Text & Titles
Step 4: Add Transitions
Step 5: Add Effects
Step 6: Add Music & Audio
Step 7: Color Correction
Step 8: Share Your Project
Please rate the helpfulness of this tip.
Click on a star to rate it!
https://www.theinsidetips.com/wp-content/uploads/2019/09/Tips-Logo-700x150.jpg00Larry Jordanhttps://www.theinsidetips.com/wp-content/uploads/2019/09/Tips-Logo-700x150.jpgLarry Jordan2020-10-14 01:30:002020-10-14 01:30:00Tip #1087: Get Started with DaVinci Resolve 16
Once you have animation you like, be sure to turn it into a template for reuse later.
(Image courtesy of MotionArray.com.)
This article first appeared in MotionArray.com. This is a summary.
If you’ve spent some time editing with DaVinci Resolve, then you may be curious about different ways to create your own animated titles. DaVinci Resolve Fusion titles are a great way to build your own animated title sequence.
In this article, you will understand how to animate your own titles within Davinci Resolve Fusion and turn them into a template that’s easily accessible and adjustable within the edit tab. Plus, you’ll find some useful templates to get you started.
This tutorial covers:
Part 1: What is Fusion?
Part 2: How to Create an Animated Fusion Title
Part 3: Quick Tips & Hacks for Using Fusion
Part 4: 15 Awesome DaVinci Resolve Fusion Resources to Download
Free tutorials from Blackmagic that show how to use Fusion effectively.
(Image courtesy of Pexels.com.)
Built into DaVinci Resolve is a powerful effects system called Fusion.
Fusion is different from many other effects systems in that it is node-based. This requires a different way of planning and executing an effect.
To help you learn it, Blackmagic Design, the developer of DaVinci Resolve, has created a series of video tutorials that span the basics of editing to creating 3D visual effects in Fusion.
The updated Particle Editor, from Babylon.js, simplifies creating particle systems.
Images created by Patrick Ryan (left) and Gabriel Aguiar (right).
Thomas Lucchini, part of the team at Babylon.js, posted this article to Medium.com. This is a summary.
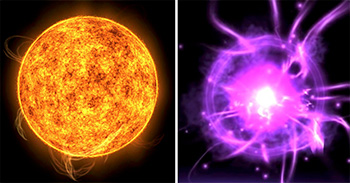
Creating effects with particle systems is a fun way to learn visual effects. This article illustrates how to create a Magic Orb, using an updated tool the Babylon.js team just released: Particle Editor.
For those completely new to Particles, particle systems are commonly used in 3D scenes to simulate phenomena like fire, smoke, or visual effects like in our demo. They uses small 2D sprites which always face the camera to give the impression of volume. A particle system is displayed with one single draw call which ensures good performance. The magic comes from the parametrization of a particle system (e.g. shape of the emission source, evolution of the speed of the particles, lifetime, color, rotation…) combined with the chosen 2D sprite.
What’s new in the Babylon.js Particle Editor is that you can now create and edit particles not only in your code but also via an Editor accessible via our Inspector. The Particle Editor is part of our efforts to simplify Babylon.js.
The article linked above goes on to provide introductory tutorials to their particle system, a step-by-step tutorial, and more. (The screen shat was created using their system.)
With GPU Particles you can have millions of particles, with noise textures you can apply custom changes to the direction of the particles, with Sub Emitters you can spawn new particles from existing ones,… and the list goes on.
Please rate the helpfulness of this tip.
Click on a star to rate it!
https://www.theinsidetips.com/wp-content/uploads/2019/09/Tips-Logo-700x150.jpg00Larry Jordanhttps://www.theinsidetips.com/wp-content/uploads/2019/09/Tips-Logo-700x150.jpgLarry Jordan2020-10-07 01:30:002020-10-03 14:24:25Tip #1065: Introduction to Particle Effects
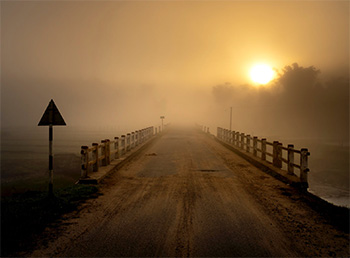
Fog and haze can help create looks, fill space, soften colors and add drama.
(Image courtesy of Pexels.com.)
This article, written by V Renée, first appeared in NoFilmSchool.com. In it, Film Riot’s Ryan Connolly shows how to use fog to help add depth to shots, diffuse light or simply create a creepy atmosphere.
There are many different ways fog can help create a specific look and set a tone for your film, but it also helps to give your scene, as Connolly says in the video, a “Spielbergian vibe,” because it not only diffuses light, but it carries the color of the light throughout the space you’re using for your scene.
The article, in addition to linking to the ten-minute Ryan Connolly video, also includes examples from:
E.T.: The Extra-Terrestrial
Jurassic Park
Lincoln
There also a discussion about the difference between fog and haze; and an inexpensive way to create them.
Fog isn’t the only way to pull off light diffusion, depth of field, or even fog effects (you could apply it in post if you really wanted to), and you may not even want the look it produces. (Maybe you’re going for the high contrast.) But, after reading this article – linked above – you can go forward with a little more understanding of just how versatile fog actually is, and use it in the future to create some awesome effects!
Please rate the helpfulness of this tip.
Click on a star to rate it!
https://www.theinsidetips.com/wp-content/uploads/2019/09/Tips-Logo-700x150.jpg00Larry Jordanhttps://www.theinsidetips.com/wp-content/uploads/2019/09/Tips-Logo-700x150.jpgLarry Jordan2020-10-07 01:30:002020-10-07 01:30:00Tip #1066: Creating Fog on Set
One of the creative joys for the Castlevania production team is designing the various demonic creatures.
(Image courtesy of Project 51 Productions and Netflix.)
Castlevania launched as a video game in 1986. In 2015 a creative partnership forged between Frederator Studios, comic book icon Warren Ellis, Project 51 Productions, Shankar Animation, Powerhouse Animation Studios, MUA Film and Netflix produced an anime inspired adaptation that debuted in July 2017 and has been renewed for a fourth season.
In this detailed article from VFXVoice.com, the production team describes how Castlevania came to NetFlix, how the show is created and discusses many of the challenges along the way.
Castlevania was always going to be 2D hand-drawn animation. Anime and the artwork of Ayami Kojima for Castlevania: Symphony of the Night were influential in deciding upon the animation style. “The early character design passes for the series were somewhat bland,” recalls producer Kevin Kolde. “Evaluating those designs and looking for a recognizable visual entry point for fans to the series, we realized that for most Castlevania fans, when they thought about the look of the game series, they probably thought about the stunning art that Ayami Kojima had created for the series over the years. Beautiful gothic women and maybe even more beautiful gothic men. We focused in on Kojima’s work and pushed the designs in that direction. All of our characters had to be beautiful. It took some iterations to get there, and somewhere I have a long email chain discussing the amount of eyelashes a character should have, but in the end I think our director and Production Designer Sam Deats really captured the essence of her work and did it in a way that that we could actually animate.”
One of the creative joys for the Castlevania production team is designing the various demonic creatures. Given the nature of the source material, there is an extensive amount of onscreen blood and severed limbs. “The show was always intended for adults.” states Kolde. “We had a brief discussion in Season 1 around the dead kid we see in the street during the night creature attack on Targoviste, but we decided it was important to show the results of Dracula’s revenge. We wanted to show the other side of a character that the audience had likely been sympathetic to up until that point.”
The entire article is worth reading for its behind-the-scenes insights on how these shows are created.
Creative teams don’ t need to be together to be successful. If they communicate.
The Oxcart Assembly logo.
Recently, Frame.io published a blog detailing how a new team of creatives – Oxcart Assembly – collaborated to create the identity package for NASA’s Launch America. As Frame describes it: This “covers the creation of NASA’s new Launch America brand by a coast-to-coast team of visionaries who enjoy pushing the limits of what’s possible—and how they overcame the boundaries of time and space by using Frame.io.”
This detailed blog covers how the team met, how they pitched NASA and won the project, how they were able to winnow 60 years of NASA video to fit into 60 seconds, and their creative approach to the project.
This is a fun article to read, with plenty of illustrations and inside insight.
Please rate the helpfulness of this tip.
Click on a star to rate it!
https://www.theinsidetips.com/wp-content/uploads/2019/09/Tips-Logo-700x150.jpg00Larry Jordanhttps://www.theinsidetips.com/wp-content/uploads/2019/09/Tips-Logo-700x150.jpgLarry Jordan2020-09-30 01:30:002020-09-30 01:30:00Tip #1034: 60 Years of NASA – in 60 Seconds
We may request cookies to be set on your device. We use cookies to let us know when you visit our websites, how you interact with us, to enrich your user experience, and to customize your relationship with our website.
Click on the different category headings to find out more. You can also change some of your preferences. Note that blocking some types of cookies may impact your experience on our websites and the services we are able to offer.
Essential Website Cookies
These cookies are strictly necessary to provide you with services available through our website and to use some of its features.
Because these cookies are strictly necessary to deliver the website, refuseing them will have impact how our site functions. You always can block or delete cookies by changing your browser settings and force blocking all cookies on this website. But this will always prompt you to accept/refuse cookies when revisiting our site.
We fully respect if you want to refuse cookies but to avoid asking you again and again kindly allow us to store a cookie for that. You are free to opt out any time or opt in for other cookies to get a better experience. If you refuse cookies we will remove all set cookies in our domain.
We provide you with a list of stored cookies on your computer in our domain so you can check what we stored. Due to security reasons we are not able to show or modify cookies from other domains. You can check these in your browser security settings.
Google Analytics Cookies
These cookies collect information that is used either in aggregate form to help us understand how our website is being used or how effective our marketing campaigns are, or to help us customize our website and application for you in order to enhance your experience.
If you do not want that we track your visit to our site you can disable tracking in your browser here:
Other external services
We also use different external services like Google Webfonts, Google Maps, and external Video providers. Since these providers may collect personal data like your IP address we allow you to block them here. Please be aware that this might heavily reduce the functionality and appearance of our site. Changes will take effect once you reload the page.
Google Webfont Settings:
Google Map Settings:
Google reCaptcha Settings:
Vimeo and Youtube video embeds:
Other cookies
The following cookies are also needed - You can choose if you want to allow them:
Privacy Policy
You can read about our cookies and privacy settings in detail on our Privacy Policy Page.