… for Visual Effects

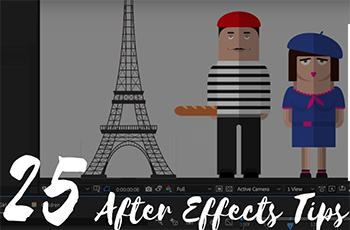
Tip #994: Top 50 After Effects Tutorials

Larry Jordan – LarryJordan.com

Short After Effects video tutorials that go from basic to advanced.

(Image courtesy of MotionArray.com.)

Topic $TipTopic

This article first appeared in CreativeBlog.com. This is a summary.

The team at CreativeBlog compiled “the best After Effects tutorials for motion graphics, animation and more. After Effects is at the core of the workflows of most VFX, motion graphics and 3D artists and animators. It offers a wide range of features, which can be used for everything from simple titles to full 3D stero compositing.

“Sorting through the vast number of tuts out there takes time, so we’ve done the hard work for you and scoured the web to find the very best After Effects tutorials around. We’ve even grouped them together in sections so it’s easy to find what you’re looking for.”

With 50 tips to choose from, here are the categories:

  1. Beginner: Get started with AE
  2. Beginner: Build your skills
  3. Intermediate: Use AE tools
  4. Intermediate: Connect other apps
  5. Intermediate: Create effects
  6. Advanced: After Effects projects

Each tutorial is illustrated with video and a short text description. Click the link at the top to learn more.


Please rate the helpfulness of this tip.

Click on a star to rate it!

… for Visual Effects

Tip #977: Create a LUT in Photoshop

Larry Jordan – LarryJordan.com

Photoshop can create LUTs that work in Premiere, Resolve or Final Cut Pro X.

Save LUT settings in Photoshop using the CUBE format.

Topic $TipTopic

LUTs are a great way to take log or RAW images and convert them into something pleasing to look at. You can even use this technique for Rec. 709 media, which we use every day in HD projects.

Here’s a technique that creates LUTs that work in Premiere, After Effects, Final Cut, Motion or DaVinci Resolve.

  • In Photoshop, import a still frame from the video that you want to create a LUT for.
  • NOTE: This image needs to retain detail in the highlights. TIFF or PNG are the best export formats to use.

  • Select the layer containing the image and choose Layer > New > Background from Layer. (This change is important.)
  • Add at least one Adjustment layers, then adjust Levels and other settings to the adjustment layer to create the look you want.
  • NOTE: Do not adjust the image, only modify the adjustment layer.

Here’s the magic part – as long as you convert the image into a background and use adjustment layers, you can take your look and convert it into a LUT which can be opened in a variety of applications.

  • In Photoshop, choose File > Export > Color Lookup Tables.
  • Give the file a description that makes sense to you. Then, and this is a KEY step, select the CUBE format. This format is required by all our NLEs.
  • Click OK, give it a name and location, then save it.
  • Switch over to your editing application and import your new custom LUT and apply it to your footage.

Done. This LUT can be used across multiple projects and multiple NLEs.

EXTRA CREDIT

Here’s an article from my website that walks you through all these steps in more detail.


Please rate the helpfulness of this tip.

Click on a star to rate it!

… for Visual Effects

Tip #978: Better Ways to Create Custom LUTs

Larry Jordan – LarryJordan.com

LUT software allows us to create looks that can’t be achieved any other way.

A red car, re-colored to blue simply by changing the LUT.

Topic $TipTopic

Tip #977 showed how to create LUTs using Photoshop. However, what if you need a radically different look for your media? That requires a 3rd-party LUT utility.

Consider 3D LUT Creator.

3D LUT Creator makes 3D LUTs that can be imported into many programs such as Adobe Photoshop, DaVinci Resolve, Adobe Premiere Pro, Final Cut Pro X, Motion, and Adobe After Effects.

Color correction in 3D LUT Creator is made by bending the grid tied to the color plane containing saturation and hue. The use of this interface allows you, in just a few clicks, to completely change the color scheme of the image or work with the desired color ranges separately.

A free trial version, and more details, are available here.

EXTRA CREDIT

LUTs don’t require rendering, making these the fastest way to change the colors in your clip.


Please rate the helpfulness of this tip.

Click on a star to rate it!

… for Visual Effects

Tip #979: Rotoscope Basics in After Effects

Larry Jordan – LarryJordan.com

Rotoscoping separates the foreground from the background.

(Rotoscoped image courtesy of MotionArray.com.)

Topic $TipTopic

This article first appeared in MotionArray.com. This is a summary.

So what is rotoscoping?

In video editing it’s the process of drawing around an object, character, or other part of your scene so that you can isolate it. Usually people will use this term when they’re talking about tracing something that’s moving and that doesn’t have a simple geometric shape.

A typical example is drawing a mask around a person so that you can separate them from the scene that they’re in. This has a huge amount of application to lots of other processes and tools inside After Effects.

But here’s the problem: When we’ve done this for the frame that we’re currently on, this is a video, and if we play our video, the mask stays exactly where it is and we’re left with a terrible looking effect! The reason a lot of people don’t like rotoscoping is because it needs to account for in every single frame in the video.

That can seem insane to some people, so here are some pointers to make the whole process a lot more manageable.

The video tutorial that accompanies this article illustrates basic rotoscoping techniques, then provides links to learn additional rotoscoping skills.


Please rate the helpfulness of this tip.

Click on a star to rate it!

… for Visual Effects

Tip #959: Draw & Annotate Live Videos

Larry Jordan – LarryJordan.com

Free tools, plus a camera, equals real-time, on-screen illustration.

(Image courtesy “Adam Savage’s Tested.”)

Topic $TipTopic

This article, written by Jack Roberts, first appeared in PremiumBeat.com. This is an excerpt.

This article provides a ten-minute video tutorial on how to use an iPad to create real-time on-screen graphics. (Think John Madden and his Telestrator.)

This video comes from Norm Chan from the Adam Savage’s Tested crew. It’s a simple and ingenious way to live draw on your screen, using tools you likely already have.

Tools Required:

  • Mac or PC
  • Webcam or DSLR/mirrorless camera connected to your computer
  • iPad or tablet with USB cable
  • OBS Studio (Free)
  • ApowerMirror (Free Trial)
  • Adobe Fresco (Free)

The steps are too detailed for a tip, but the video tutorial is quick and the results are amazing. The accompanying article also provides more details.


Please rate the helpfulness of this tip.

Click on a star to rate it!

… for Visual Effects

Tip #960: Motion Array: A Filmmaker’s Platform

Larry Jordan – LarryJordan.com

Motion Array is an all-in-one professional filmmaker’s platform.

The Motion Array logo.

Topic $TipTopic

I’ve quoted a lot of articles from Motion Array, but this time, I want to talk about Motion Array itself.

Motion Array is an all-in-one professional filmmaker’s platform, with unlimited asset downloads, exclusive Premiere Pro plug-ins, real-time video collaboration and approvals, and a video website builder all included in Motion Array memberships.

It provides an unlimited marketplace, where you can download every asset you need for a project from video templates and stock footage to photos, royalty-free music and sound effects.

It has plug-ins and templates for Adobe Premiere Pro, Apple Final Cut Pro X and DaVinci Resolve.

What I like most about it, though, are their tutorials. These cover:

  • Adobe After Effects
  • Adobe Premiere Pro
  • DaVinci Resolve
  • Apple Final Cut Pro X
  • MotionArray’s tools
  • Filmmaking
  • Motion Design
  • Post Production
  • The Business of Filmmaking
  • Video Effects
  • Royalty-Free Music

EXTRA CREDIT


Please rate the helpfulness of this tip.

Click on a star to rate it!

… for Visual Effects

Tip #961: An Overview of Mocha Pro

Larry Jordan – LarryJordan.com

With over 200 tutorials to choose from, learning Mocha is easy.

The Mocha logo.

Topic $TipTopic

Mocha Pro is is the world’s most powerful planar tracking tool for VFX and post-production. Featuring GPU-accelerated tracking and object removal, advanced masking with edge-snapping, stabilization, lens calibration, 3D camera solver, stereo 360/VR support, and more.

It does a lot, but figuring out how to use it can be a challenge.

That’s where these Mocha Pro tutorials, from BorisFX, can help. Whether you are running Mocha in Nuke, After Effects, Flame, or experimenting with the free trial, these tutorials will improve your skills.

There are almost 200 to choose from – all free.

MOCHA PRO


Please rate the helpfulness of this tip.

Click on a star to rate it!

… for Visual Effects

Tip #936: 10 Must-Know After Effects Shortcuts

Larry Jordan – LarryJordan.com

These ten shortcuts are essential for any After Effects user.

Topic $TipTopic

This article, written by Joe Frederick, first appeared in PremiumBeat.com. This is an excerpt.

These simple key combinations let you perform commands that you’d typically execute with your mouse, and while they may only save you a few seconds each time you use them, those saved seconds will add up to saved hours over the duration of a project. Here are the 10 keyboard shortcuts you should learn first.

  1. Activate Selection Tool: V
  2. Activate Hand Tool: H
  3. Reveal All Keyframed Properties: U
  4. Precompose Selected Layers: Ctrl + Shift + C
  5. Show/Hide Opacity: T
  6. Fit to Screen: Shift + /
  7. Split Layer: Cmd + Shift + D
  8. Trim Layer Out Point to Current Time: Option + ]
  9. Go Back/Forward One Frame: Command + Right/Left Arrow
  10. Stretch Keyframes: Option + Mouse Drag

EXTRA CREDIT

The article has illustrations for each shortcut, as well as a detailed description of how and when to use it.


Please rate the helpfulness of this tip.

Click on a star to rate it!

… for Visual Effects

Tip #938: 10 Essential After Effects Tricks

Larry Jordan – LarryJordan.com

After Effects is filled with many different ways to work more efficiently.

Topic $TipTopic

This article first appeared in RocketStock.com. This is an excerpt.

These 10 quick and easy After Effects tricks are essential for any motion designer!

  1. Quick Pan. Hold down the space bar and drag.
  2. Build a RAM Preview. Control + O.
  3. Duplicate layers. Command + D.
  4. Adjust Render Quality. Select the dropdown menu at the bottom of the composition panel.
  5. Export Alpha Channels. Include both RGB + Alpha in the Output Module.
  6. The “Wiggle” Expression. Add the expression wiggle(10,10) into your expression editor.
  7. Save Frames. Composition > Save Frame As > File.
  8. See All Keyframes. U.
  9. Keyframe Scaling. Hold down option and drag a selection of keyframes.
  10. The Graph Editor. With keyframes selected, hit the small graph icon in the timeline.

The article link at the top includes detailed descriptions, illustration of each shortcut and links to more After Effects tips and tutorials.


Please rate the helpfulness of this tip.

Click on a star to rate it!

… for Visual Effects

Tip #939: 25 After Effects Tips

Larry Jordan – LarryJordan.com

25 tips to turn the beginning user into a power user.

(Image courtesy of NoFilmSchool.com.)

Topic $TipTopic

This article, written by Jason Boone, first appeared in NoFilmSchool.com. This is an excerpt.

The world of motion graphics can be a bit daunting if you’re just getting started. The shortcuts listed below are geared to help you become more comfortable working in the wonderful world of Adobe After Effects. These tips and tricks focus on a wide range of topics—learn how to more efficiently navigate the workspace, work with keyframes, customize the interface, and properly handle layers.

In addition to listing the 25 tips, Jason provides details on what each does, along with a video illustrating how they are used.

The article link at the top takes you to the right spot.


Please rate the helpfulness of this tip.

Click on a star to rate it!