Tip #007: Magic Markers
… for Adobe Premiere Pro CC
Tip #007: Magic Markers
Larry Jordan – https://LarryJordan.com
Five Marker Tricks That Help You Get Organized


To add a marker, position the playhead in the timeline where you want to locate a marker and type M. This adds a Cue marker at the position of the playhead.
- Shift + M jumps the playhead to the next marker
- Shift + Cmd + M (Windows: Shift + Cntrl + M) jumps the playhead to the previous marker.
- Option + M deletes the selected marker.
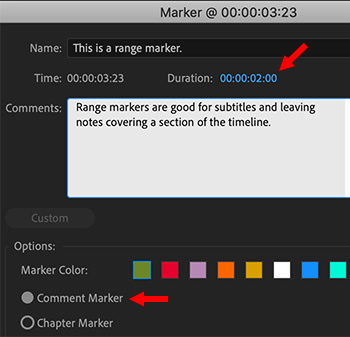
To convert a marker to a range marker, double-click the marker icon, then give it a duration.
Once you create a marker press – / [forward slash] – this selects the marker name in the Marker panel so you can quickly rename the marker. If the Marker panel is not open, press – / – twice.
EXTRA CREDIT
The default marker name can be changed in Preferences > Markers & Metadata


Larry, for MORE extra credit, you should note that if you grab a marker with your curser and press the option key, you can drag the range of the marker dynamically to any length you please (visually).
Al:
Very cool. Thanks.
Larry