Tip #1152: Tips for a Better Chroma-Key
… for Apple Final Cut Pro X
Tip #1152: Tips for a Better Chroma-Key
Larry Jordan – LarryJordan.com
If you have multiple shades of green, use multiple Sample Color areas.

Chroma-keys, also called “green-screen keys,” allow us to remove a green (or any other color, actually) background and replace it with something more interesting. What you may not know, though, is that there is a hidden tool in Final Cut that makes selecting the correct shade of green a lot easier.
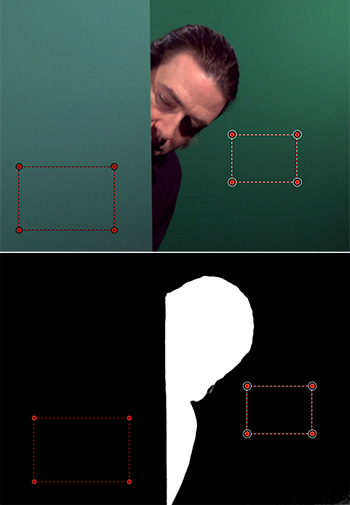
The top image in the screen shot illustrates the problem: there are two different shades of green in the background. To fix this, apply Keying > Keyer effect to the clip with a green background, then, go to the Video Inspector.
At the top of the Keyer effect are two controls:
- Sample Color. This determines what color to “remove” (i.e. make transparent).
- Edges. This helps determine where an edge is located, for those portions of an image where the edge is hard to see.
The trick, with Sample Color, is that you can apply more than one setting. For example, in the lower screen shot, one selection region was set for the foreground green, while a second was set for the background green.
What, at first, seemed like a very difficult key became easy when the second selection area was added.
While there is no limit to the number of selection areas you can add, the general rule is add as few as possible to select the color you want to make transparent.
Very helpful.