Media Codec&Media

… for Codecs & Media

Tip #100: Optimize Media for YouTube

Larry Jordan – https://LarryJordan.com

Uploading a video isn’t enough.

Tip Screen Shot

Topic $TipTopic

I was reading a blog recently by Richard Tiland about posting videos to YouTube. In it, he wrote: “Uploading your video to YouTube isn’t enough. You need to include metadata so that the site understands what your video is all about.”

His points included:

  • Optimize the title with keywords. Keep it short, but searchable.
  • Add a detailed and accurate description. Length is less important here.
  • Include a transcript to help viewers take in your content without turning up the sound.
  • Organize content using playlists. This helps both viewers and YouTube’s search algorithms.
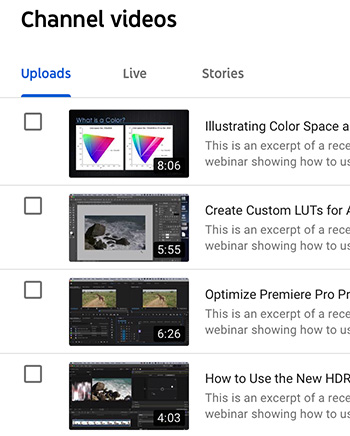
  • Create a cohesive look to improve branding. Make your videos look like they are coming from the same creative source.
  • Finally, don’t forget the Call to Action. This is the explicit behavior you want the audience to take after watching your video.

Metadata always seems intimidating somehow. But, really, all we are doing is enabling viewers to find our media faster and easier. And that is always a good thing.


Please rate the helpfulness of this tip.

Click on a star to rate it!

… for Codecs & Media

Tip #105: Why Do We Need Intermediate Codecs?

Larry Jordan – https://LarryJordan.com

Intermediate codecs simplify editing.

Tip Screen Shot

Topic $TipTopic

An “Intermediate Codec” is a video format that we use for editing. It is placed between the format shot by the camera and the format we need for final distribution. We convert between formats using “transcoding.”

There are two different reasons for using an intermediate codec:

  • To make really large files manageable
  • To make highly-compressed files easier to edit

MANAGEABILITY

For example, we often use proxy files when rough cutting 4K or larger frame sizes, or working with HDR media, simply because these source files are incredibly massive. Using a smaller intermediate codec allows us to successfully work with less storage on slower systems.

HIGHLY-COMPRESSED

Files that are optimized for editing store each image individually in the file (called an “I-frame”.). These include formats such as ProRes, DNx, and Cineform. I-frame compression means that as soon as the playhead lands on an image, it can be displayed.

I-frame files are very efficient for editing, but large.

Highly-compressed files, such as AVCHD, H.264 or HEVC, only record one image every 15 frames or so. The rest of the “images” are actually text descriptions of the changes between the source frame (“I”) and all the derivative frames (“B” and “P”). In order for the computer to display a B or P frame, it needs to go back to the I frame, then apply all those text-based change documents to calculate the frame the playhead is currently parked on.

If you are playing a clip, GOP compression is not a big deal. But, skimming clips, playing backward, jumping randomly around in a file, or multicam editing can take a while to calculate and display these images because the computer always needs to jump back to the nearest earlier I-frame and recalculate.

Transcoding to an intermediate codec means that editing, rendering and exporting will be faster by converting GOP-based encoding into I-frames.


Please rate the helpfulness of this tip.

Click on a star to rate it!