… for Random Weirdness

Tip #1123: Basic Camera Technique Tips

Larry Jordan – LarryJordan.com

The best camera operators know not just technique but understand performance.

Image courtesy of NoFilmSchool.com.

Topic $TipTopic

This article first appeared in NoFilmSchool.com. This is a summary.

If you’ve just started learning how to operate a camera, this is the video for you. Camera operator Oliver Cary, whose work includes Orange Is the New Black, John Wick: Chapter 3 – Parabellum, and Dark Waters breaks down different shooting methods and how they impact the story.

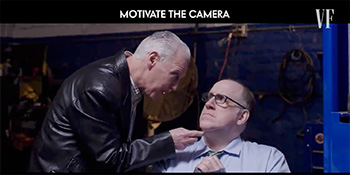
The best camera operators know not just technique but understand performance. They understand the emotional arc and subtleties of the story in each scene. And that’s key. In time, anyone can frame a shot on a tripod, but knowing why you are framing that particular shot and how it connects to the next shot and to the subtext of the story is what separates good operators from great ones.

As you progress from basic techniques and beyond, you’ll learn how to find those moments within a scene where you push the camera in or glide it through the room, because you’re connecting to the performance. That’s what’s going to make you stand out as an operator—reacting to those moments that were not rehearsed on set. Those instincts are hard to teach, so start discovering them now.

EXTRA CREDIT

The article, linked above, has a ten minute video illustrating these concepts.


Please rate the helpfulness of this tip.

Click on a star to rate it!

… for Random Weirdness

Tip #1121: 5 Hacks for Film & Video Lighting

Larry Jordan – LarryJordan.com

In an ideal world, we’d have time and money. In the real-world, we have these hacks.

(Image courtesy of MotionArray.com.)

Topic $TipTopic

This article first appeared in MotionArray.com. This is a summary.

Shooting a film or video without thinking about lighting is a recipe for disaster. Cameras don’t pick up light the same way our eyes do, so even if a scene looks to have plenty of light, the camera may not see it that way. Luckily, there are some hacks that can help you get a better shot on a budget or in a pinch. Here are 5 lighting hacks for film and video that you can try when you need a few tricks to get the job done.

  • Start With Bulbs. When shooting indoors, one of the very simplest things you can do to help your video lighting is to change the lightbulbs around you. Maybe you are shooting in a house with standard incandescent bulbs. A normal 60-watt incandescent puts out about 800 lumens of light. On the other hand, a compact fluorescent bulb in the 32-35 watt range will put out 2600 lumens, more than 3 times the amount of light. You can also get 2600 lumens out of a 25-28 watt LED light bulb. So, by simply grabbing some higher light-emitting bulbs, you can immediately make a positive impact on lighting for your film or video.
  • Bulking Up. For a very little extra cost, you can pick up a socket adaptor that will turn one regular light socket into 4. Remember that these bulb tips will not give you specific pointed light, but will enhance the overall ambient light on set. And that is the basis for a good lighting setup in most cases.
  • Reflectors. So, you have plenty of light now, but you don’t have it going in the direction you want. In a typical studio setting, you might break out a set of reflectors. Essentially any large solid surface in black or white will give you some level of reflection or shadow, but foam core board is a great solution. It’s fairly sturdy with a large surface area. It generally comes in black and white, with the white having a somewhat shiny white surface, and it’s cheap and easy to find.
  • Cheap Lamps. Getting ambient light from brighter bulbs is great, but sometimes you really need more strong directed light. After all, this is what a light kit is for. Setting up things like key, fill, and backlights won’t work with an overhead socket and bulb. But if you don’t have access or money for a lighting kit, there are lots of helpful options at the hardware store. For starters, these little clamp lamps can be very handy.
  • Diffusers. Of course, your fancy light kit will have various types of diffusers and maybe gels to work with. But we don’t have time for that. We are light-hackers. Guess what else makes a great diffuser? A bed sheet. A bed sheet will produce a similar effect to a softbox diffuser, and you probably have plenty of them laying around.

In a perfect world. we’d always have the extra lighting setup that we wanted, and all of the time and budget to make everything look perfect. But in the real world, with tight budgets, lack of access, and limited time, we have to make do with what we can get. And the reality is, there are a lot of good and cheap substitutes that will bring your lighting to a much higher level.

EXTRA CREDIT

The article, linked above, has more tips and video illustrating these concepts.


Please rate the helpfulness of this tip.

Click on a star to rate it!

… for Random Weirdness

Tip #1119: Free Hand-Painted Animated Fonts

Larry Jordan – LarryJordan.com

Free for personal use, not to be resold.

A sample of these hand-drawn fonts.

Topic $TipTopic

This article, written by Todd Blankenship, first appeared in PremiumBeat.com. These free hand-painted animated fonts were painstakingly painted frame by frame to give your titles and design a fun, energetic feel.

The more real and textural you make your designs, the more tangible and authentic they feel. Making your title slate or other motion graphic feel as if it were hand-painted (when the style fits, of course) will always catch the viewer’s eye a bit more than a standard piece of clean, sharp text.

As a bit of behind-the-scenes, to create this freebie, we printed off large sheets of two different fonts, and painted 7-8 frames of each of them on similarly-sized sheets of poster board, then scanned each frame one by one. Then, inside of After Effects, we cleaned it all up and set them in a sequence, animating each scan in succession once every two frames.

Here’s the link to download these free, hand-painted, animated fonts.


Please rate the helpfulness of this tip.

Click on a star to rate it!

… for Apple Motion

Tip #1118: What is Ease In / Ease Out?

Larry Jordan – LarryJordan.com

To give movement a more “natural” look, experiment by adding “Ease Both.”

The Speed settings for Behaviors > Basic Motion > Motion Path.

Topic $TipTopic

Most Motion effects that involve movement have a Speed setting that determines if and how the speed of that movement changes over time.

For example, the screen shot illustrates the eight options for modifying the speed of the Motion Path behavior.

  • Constant. The object’s speed remains constant for the entire duration of the effect.
  • Ease In. The object’s speed decreases as it approaches a keyframe or end of the effect.
  • Ease Out. The object’s speed increases as it leaves a keyframe or the beginning of the effect, then maintains a steady speed thereafter.
  • Ease Both. The object speeds up leaving a keyframe or the start of the effect, maintains a steady speed in the middle, then slows down as it approaches a keyframe or the end of the effect.
  • Accelerate. The object’s speed continually increases over the duration of the effect.
  • Decelerate. The object’s speed continually decreases over the duration of the effect.
  • Natural. The speed at which the object moves over the path is determined by the shape of the path. For example, if the path is a U-shape curve, the object moves faster as it moves toward the low point of the U and slower as it moves up the edges.
  • Custom. This allows setting keyframes to adjust speed over the duration of the effect.

Please rate the helpfulness of this tip.

Click on a star to rate it!

… for Apple Motion

Tip #1117: Adjustable Grid, Guides and Ruler

Larry Jordan – LarryJordan.com

Grids, Guides and Ruler are all adjustable.

Grids, guides and ruler are enabled from the View menu (top) and adjusted in Preferences > Canvas (bottom).

Topic $TipTopic

Inside the Motion Viewer are an adjustable grid, moveable guides and customizable ruler bar. Here’s how to display and adjust them.

To enable their display, select the option you want from the View menu in the top right corner of the Viewer. (Upper panel in screen shot.)

To customize how they look, go to Preferences > Canvas and tweak. (Lower panel in screen shot.)

EXTRA CREDIT

Even when displayed, these overlays will not export.


Please rate the helpfulness of this tip.

Click on a star to rate it!

… for Apple Motion

Tip #1116: A Design Thought on Depth

Larry Jordan – LarryJordan.com

Sometimes a design element can help reinforce the illusion of depth.

Here, the darkened line emphasizes the depth created by rotating the text.

Topic $TipTopic

In other tips, I used Y-axis rotation to create the illusion of depth; especially for text. However, sometimes adding a design element can help sell that illusion even more.

In the screen shot, the text was rotated 50° on the Y-axis. While this clearly creates the illusion that the text is receding into the screen, we can do more to emphasize this.

For example, in the screen shot, I added a line to reinforce this illusion in three ways:

  1. The line is rotated at 50° on the Y-axis
  2. The near edge of the line is wider than the far edge, which was done by manually dragging the control points that define the boundaries of the line to make the near edge slightly wider.
  3. The line is darker than the text above it which makes the line seem like it is “going away” from the text.

No single technique will work the same for every effect, but using graphical elements to reinforce placement of text is often much better than just using the text by itself. And I thought this was a cool example to share with you.


Please rate the helpfulness of this tip.

Click on a star to rate it!

… for Visual Effects

Tip #1127: Re:Vision Effects Wins an Emmy

Larry Jordan – LarryJordan.com

Re:Vision joins six other companies winning an Engineering Emmy.

Television Academy logo.

Topic $TipTopic

Re:Vision Effects won a Engineering Emmy for exceptional engineering development which will be announced at the Oct. 29 Emmy Awards ceremony.

According to the announcement from the Academy:

Engineering Emmys are presented to an individual, company or organization for developments in engineering that are either so extensive an improvement on existing methods or so innovative in nature that they materially affect the production, recording, transmission or reception of television. This year the Academy is recognizing nine companies and five individuals with the prestigious award.

Re:Vision Effects was honored for all of their products, however, the Academy specifically mentioned:

RE:Vision Effects introduced the industry to optical flow-based postproduction video tools via the products Twixtor®, ReelSmart Motion Blur®, RE:Flex® and others. In addition, RE:Vision Effects supplies these technologies as plug-ins to a wide range of host applications and interfaces that are already familiar to the user.

Joining Re:Vision Effects for Engineering Awards this year are:

  • Apple – for the ProRes family of codecs
  • Codex – for high-speed data migration of RAW content
  • Dan Dugan – for gain sharing automatic microphone mixing
  • Epic Games – for the Unreal Engine
  • Sound Radix – for Auto-Align Post for audio phase/time corrections
  • Bill Spitzak, Jonathan Egstad, Peter Crossley and Jerry Huxtable – for Nuke.

Here’s the press release from Re:Vision Effects.


Please rate the helpfulness of this tip.

Click on a star to rate it!

… for Visual Effects

Tip #1125: Free Red Giant Tutorials

Larry Jordan – LarryJordan.com

Red Giant makes tools, films and training to enrich the community of filmmakers and motion designers.

A sample of current tutorials on the Red Giant website.

Topic $TipTopic

Red Giant, now a part of Maxon, is an industry leader in creating software for visual effects. To help new and existing users use their programs more effectively, they have a dedicated website for tutorials covering:

  • Trapcode Suites
  • Magic Bullet Suite
  • Universe
  • VFX Suite
  • PluralEyes

The company describes itself this way on their website:

At Red Giant, we make tools, films and training to enrich the community of filmmakers and motion designers. Red Giant develops tools that make the filmmaking process faster, more secure, more accurate and just more fun. For almost 17 years, we have built software for motion design, color correction, visual effects and photography that is used for everything from major motion pictures to worldwide television programming to web production.

Here’s the link to their tutorials.


Please rate the helpfulness of this tip.

Click on a star to rate it!

… for Visual Effects

Tip #1124: Dozens of Free Cinema 4D Tutorials

Larry Jordan – LarryJordan.com

GreyScaleGorilla specializes in tutorials for Cinema4D and motion designers.

Image courtesy of GreyScaleGorilla.com.

Topic $TipTopic

GreyScaleGorilla.com is a website with dozens of free tutorials for Cinema4D artists.

Current titles include:

  • 5 Tips I Wish I Knew Before Learning Octane
  • Why Cinema 4D Artists Should Care About ACES Color
  • The Best New Features Inside Cinema 4D R21

They currently have 53 free tutorials posted to their website. Here’s the company description on their website:

For over 10 years we have made training and tools to help motion designers and 3D artists.

Our extensive library of free tutorials and Greyscalegorilla Plus subscription offering guides you through popular 3D programs like Cinema 4D, Redshift, X-Particles, and much more.

Greyscalegorilla plugins and tools are developed as must-use workflow solutions, used daily in real studio environments, on feature film titles, commercial animations, broadcast graphics, and experiential displays.

We want to give you the tools and training to help you create your best work. That’s the Greyscalegorilla way.


Please rate the helpfulness of this tip.

Click on a star to rate it!

… for Codecs & Media

Tip #1130: Not All Proxy Files are the Same

Larry Jordan – LarryJordan.com

Proxies are smaller files than camera masters, but not all proxies are equal.

Topic $TipTopic

While working on my webinar this week on Multicam Editing in Adobe Premiere Pro I started looking into proxy files. By definition, a proxy file is a smaller file than the camera native file is is derived from. But not all proxy files are created equal.

  • Final Cut Pro X, for example, defaults to ProRes Proxy for all proxy files.
  • Premiere Pro provides the choice of H.264, ProRes or Cineform. (DNx is reserved for 360° VR video.)

H.264 provides the smallest files. Based on my tests, H.264 files are about 1/10 the size of ProRes Proxy, while ProRes Proxy is about 1/10 the size of ProRes 422. But, due to the GOP-compression that H.264 uses, these files are less efficient to edit; especially on slower systems.

  • If you are looking for smooth playback and faster rendering, ProRes Proxy is a better choice.
  • If you are looking for the smallest files, for example, to transfer over the web for another editor to work on, H.264 is a better choice. Just remember that H.264 will require a newer computer with a fast CPU to edit effectively.

The webinar has more details on all of these.


Please rate the helpfulness of this tip.

Click on a star to rate it!