… for Visual Effects

Tip #1819: History & Symbolism of Paisley

Larry Jordan – LarryJordan.com

Once for the elite, paisley patterns have lasted for centuries.

The paisley “tear drop,” in blue. Image credit: Shutterstock.

Topic $TipTopic

This article, written by Kiera Coffee, first appeared in Shutterstock.com. This is a summary.

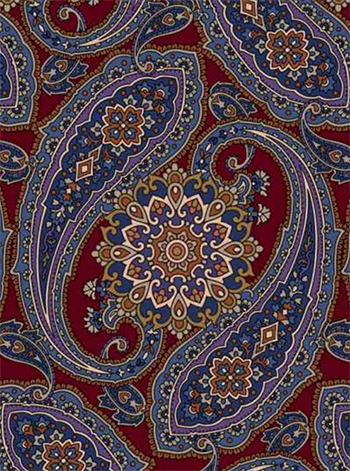
Paisley patterns can be lush with dense swirls and intricate lines or comprised of sparse shapes set on a placid background. Elaborate or understated, paisley is recognizable for the unique figure at its core. People around the world compare it to a tear drop, a flower, a pinecone, a tadpole, a seed, half of the yin yang symbol.

One of the earliest examples of paisley is found in the decorative brick work on a 9th century mosque in Afghanistan (Noh Gunbad Mosque). Much of the building is in ruins, but the fluid paisley shapes are easily recognizable as the adaptable design we know today.

The Persian word for paisley is boteh. Traditionally, boteh-jegheh (roughly meaning paisley patterns) were woven into silk or wool cloths called Termeh. Marco Polo, in 1272, passed through some of the cities where Termeh was woven and wrote about “quantities of a certain silk tissue.” His writing is thought to be about paisley fabric.

The famous East India Company was established in the 17th century, allowing imports to move from East to West—and back again—along the silk routes. Many exotic goods arrived in Europe, including (by the 18th century) paisley shawls. Britain had access to them first, and English women adored these astonishingly beautiful garments.

Because the European elite began splurging on paisley, the desire for it grew amongst less wealthy citizens, as well. Seeing this, keen mill owners worked out how to weave paisley locally, on mechanized looms. In the 1790s, paisley mills opened in a number of European cities such as Lyons, Norwich, and Vienna.

The most noteworthy mill opened in 1808, in Paisley, Scotland. This is also where the name for this paisley pattern originates. The Scottish mill became the lead producer of paisley. At its peak, well over fifty shawl manufacturers were based there, working with varying layouts and designs.

Weaving paisley shawls on machinated looms cost a fraction of what the handwoven Indian shawls did, so the price in Europe dropped precipitously as local mills flooded the market with affordable paisley. By the late 1800s, even a maid could afford a paisley shawl. This was greatly damaging for many villages in the East, whose economies had been tied to weaving paisley for two hundred years. Technology utterly outpaced their handmade looms, and livelihoods vanished.

EXTRA CREDIT

This article is filled with illustrations and more on the design and meaning of the paisley pattern.


Please rate the helpfulness of this tip.

Click on a star to rate it!

… for Visual Effects

Tip #1834: The Inside Tips Take a Hiatus

Larry Jordan – LarryJordan.com

The Inside Tips will return in September.

Photo credit: Jonas Ferlin, Pexels.com

Topic $TipTopic

The Inside Tips are taking a hiatus for the month of August. We’ll be back the first week of September with more Inside Tips.

Thanks for your readership and comments. Enjoy the rest of your summer.

Feel free to contribute some tips of your own here.


Please rate the helpfulness of this tip.

Click on a star to rate it!

… for Visual Effects

Tip #1839: Visual Effects for Low-Budget Sci-Fi

Larry Jordan – LarryJordan.com

Effects don’t have to be explosive, they just need to help carry the story.

Jonathan Wilhelmsson directing “Untitles Earth Sim 64.”

Topic $TipTopic

This article, written by Jonathan Wilhelmsson, first appeared in Motionographer.com. This is an excerpt.

My name is Jonathan; I’m a Swedish filmmaker and visual effects artist. My friends and I recently released our new short film Untitled Earth Sim 64, a sci-fi comedy about a woman faced with an existential crisis when she discovers that her universe is a simulation.

While prepping another film, I started working on different visual effects tests to design the look of the “glitches” that would feature in the film. The more I tested, the more I realized how much fun I could have with this concept. …I saw this as an opportunity to use these new ideas to make a short and sweet comedy focusing entirely on the simulation aspect (and a bit of a lighthearted exploration of existentialism).

We wanted to make something low-budget that we could get off the ground on our own, which meant we couldn’t afford any special sets, costumes, or props. Filming took place during a sweltering weekend in Gothenburg with a skeleton crew of three people behind the camera and two actors on set – British actress Karen Olrich-White and Swedish actress and pro wrestler Aya Frick. The Australian actor James Fraser joined us virtually as the voice of an alien researcher, pre-recording his lines so that we could have playback on set.

The film then went into several months of post-production.But this is where I got to use what I think is the secret superpower of low-budget filmmaking: time.

The most involved process was the visual effects work. The film consists of 73 shots in total, and 67 of those are effects shots. They range from simple sky replacements or morph cuts to the more intricate glitch effects.

My favorite shots in Untitled Earth Sim 64 are actually the ones you might not suspect to have any effects. One example that amuses me is a scene that features a CG lamppost. One day I found myself at an abandoned parking lot by the harbor and thought it would make for a great location, the only problem being that it didn’t have the lamppost that we needed.

I think all of this is an excellent example of how accessible filmmaking has become and that certain genres or types of film that have usually been reserved for bigger budget projects are becoming more and more achievable even on smaller budgets.

EXTRA CREDIT

Here’s a link to the full article, along with a behind the scenes video and lots more details.


Please rate the helpfulness of this tip.

Click on a star to rate it!

… for Visual Effects

Tip #1809: After Effects Gets a Whole Lot Faster

Larry Jordan – LarryJordan.com

Making After Effects faster is a key goal for Adobe.

Image Credit: Adobe

Topic $TipTopic

Last week, Adobe released a new beta version of After Effects that emphasizes speed. Here are key excerpts from the Adobe press release, written by Sean Jenkin.

Since we released Multi Frame Rendering for export in March, the team has been very busy making more of After Effects faster by using all the cores in your system.

Faster previews & better monitoring

Multi-Frame Rendering for Previews accelerates your creative process by taking advantage of your system’s CPU cores when previewing your compositions. With Dynamic Composition Analysis, After Effects looks at every aspect of your hardware — V-RAM, RAM, cores — and makes intelligent choices on how to render your designs based on your composition and computer configuration.

To super-charge your creativity further, we recently added Speculative Preview which helps you work faster even when you’re not working. While After Effects is idle — like when you’ve stopped to admire your beautiful design, check your email, or get coffee — your composition (and any pre-comps in that comp) will automatically render in the background meaning your designs are ready when you’re ready for them to play back.

Faster exporting & notifications

When it comes to rendering your compositions — especially to H.264 — Multi-Frame Rendering export from Adobe Media Encoder makes the most of your time at work by rendering multiple compositions in the background while you’re still working on others.

A long-requested feature is here at last as well. Render Queue Notifications gives you precious time back in your day, allowing you to confidently walk away from your computer for extended periods of time. After Effects will notify you when your renders are complete via the Creative Cloud app and notifications will display on your phone or smart watch.

Faster effects

After Effects has an insane number of effects and porting them to work on multiple cores was quite the challenge and has taken a lot of time. However, we continue to make progress and you’ll see many daily and weekly updates with more and more effects optimized throughout the Public Beta cycle from now until MAX, 2021.

Here’s a link to learn more.


Please rate the helpfulness of this tip.

Click on a star to rate it!

… for Visual Effects

Tip #1813: Unusual Textures to Capture at the Beach

Larry Jordan – LarryJordan.com

Textures are always useful. And, this summer, why not consider the beach?

Image courtesy of RocketStock.com.

Topic $TipTopic

Bulk up your motion graphics library with one-of-a-kind textures from the natural world using a few tips on what to look for. This article, written by Lewis McGregor, first appeared in RocketStock.com. This is a summary.

I have a disk drive bursting at the seams with textures and images I frequently use within my motion graphics and VFX. I use them for displacement maps, motion backgrounds, composite elements, or simply to give my solid colors some character. You would be surprised at how often a few texture JPEGs can change the dynamic of a tedious animation.

While your first thought may drift towards taking snapshots of sand, let’s take a look at a few not-so-obvious examples.

  • Shipwreck Remains
  • Rusted By Seawater
  • Rock Pools At Low Tide
  • Unique Angles

I find obtaining textures also useful for the off chance I’m working on a matte painting. Creating something that looks alien can be challenging. In fact, it might be one of my pet hates that whenever we see an alien world in film, it usually has the core properties of the earth. However, when you start to compile textures that seemingly look odd to look at, you might be on the way to create something truly alien.

EXTRA CREDIT

The author provides a range of stunning textures and images, as well as extended descriptions. The article is worth reading just for the pictures.


Please rate the helpfulness of this tip.

Click on a star to rate it!

… for Visual Effects

Tip #1818: Myst (the Game) Expands into VR

Larry Jordan – LarryJordan.com

Myst launched in 1993, and extended into VR in 2021.

Image credit: Cyan.

Topic $TipTopic

This article, written by Chris McGowan, first appeared in VFXVoice.com. This is a summary.

When Myst debuted on CD-ROM in 1993, it stood apart from other video games at the time. The classic adventure title has no physical violence, there is no time limit, and the player never dies. There is no “game over.” Initially, it isn’t even clear what the game is. The user arrives at a starkly beautiful island world called Myst and must discover the nature of the game through exploration.

Now, in a move that seems long overdue, Cyan Worlds has released a $29.99 VR version of Myst for Oculus Quest headsets.

“The first time I experienced VR was back in the ‘90s. And I’ve known since then that Myst was destined to be experienced that way,” says Rand Miller, CEO of Mead, Washington-based Cyan Worlds. He and his brother Robyn designed and created the original game. “We’ve always felt that Myst in VR was a given, it was just a matter of timing. VR has been around for a while, but it’s taken a long time for it to reach a stage where it strikes the right balance of quality and accessibility. We felt like the time had arrived.”

The VR edition of Myst has new art, audio and interactions. Myst VR also has VR moves like teleporting, snap turns and using a hand to grab or pull or turn. And there is also a new randomized puzzle option. Cyan describes the new version as “fully redesigned and created from the ground up using Unreal Engine.” Miller explains that the original Myst “was our design doc for this new version of Myst, but there were certain changes that were necessary or desirable. From an artistic standpoint of course we wanted it to be Myst, but there were improvements that could be made. Beyond that there were numerous interface elements that needed to be changed to be used comfortably and intuitively in VR.”

Reflecting on the importance of the original Myst nearly thirty years later, Miller observes, “I think it was the idea that games could allow you to explore at your own pace, while uncovering a story in a visually appealing virtual world. In some ways maybe it had just enough elements of a real world to feel real.”

EXTRA CREDIT

The article includes a longer interview, images from Myst and thoughts on converting it from a Hypercard stack to the Unreal Engine.


Please rate the helpfulness of this tip.

Click on a star to rate it!

… for Visual Effects

Tip #1792: Free & Paid Plug-ins for After Effects

Larry Jordan – LarryJordan.com

AEJuice provides free & paid plugins for After Effects and Premiere Pro.

The Motion Lovers logo, image courtesy of AEJuice.com.

Topic $TipTopic

Recently, Jacob Syrytsia, co-founder of AEJuice contacted me about his company. AEJuice provides hundreds of free and paid plugins for After Effects, plus hosts the world’s largest motion graphics community.

AEJuice is a team of motion designers and software engineers that create tools for animation. It was founded in 2015 by Jacob Syrytsia and Mark Duval.

They currently offer a bundle for Premiere Pro consisting of dozens of effects, sound effects, transitions and other elements. They also host “the world’s biggest motion graphics community: ‘Motion Lovers.'”

Here’s the link.


Please rate the helpfulness of this tip.

Click on a star to rate it!

… for Visual Effects

Tip #1799: The Craft & Culture of Motion Design

Larry Jordan – LarryJordan.com

Bi-weekly episodes on the craft and culture of motion graphics.

Austin Shaw (top) and Erin Sorofsky (Image courtesy of Between the Keyframes.)

Topic $TipTopic

Motionographer.com reports that “Between the Keyframes” is a new vidcast hosted by Erin Sarofsky and Austin Shaw, two formidable experts in the motion design industry.

Austin literally wrote the book on motion design (“Design for Motion: Fundamentals and Techniques of Motion Design,” Routledge, 2nd Edition, 2019) and is a sought-after educator and freelance creative director and designer. Erin owns Sarofsky, a studio that puts into practice all of those foundational principles while navigating the crazy tides of an exciting, ever-changing industry.

Online at https://betweenthekeyframes.com, the vidcast is now available via YouTube, Apple podcasts, Google podcasts, Spotify, and wherever you get your podcasts.

Already live with episodes exploring “The History of Now,” “Work from Home,” and “Passion Projects,” brand new episodes are debuting biweekly on Tuesdays. The next installment will cover “Fulltime vs. Freelance,” with part one dropping on July 13, and part two on July 27.


Please rate the helpfulness of this tip.

Click on a star to rate it!

… for Visual Effects

Tip #1800: Use Unreal Engine to Re-create Nature

Larry Jordan – LarryJordan.com

The Unreal engine can make the artificial look natural.

Image courtesy of Shutterstock.com.

Topic $TipTopic

In this screen shot, the terrain (hills, mountains, etc.) was fully sculpted in Unreal Engine with the landscape editing mode, using brushes to sculpt, smooth, and flatten areas in the map.

The landscape material and the vegetation were created with the Brushify toolkit. Finally, the props—rocks, cliffs, and manmade materials—are the result of customized elements and assets from the Megascan library by Quixel.

This article first appeared in ShutterStock.com. This is a summary.

In this first article of a three-part series, we’ll learn how to produce stunning, natural compositions in Unreal Engine. In particular, we’ll focus on aspects of planning an environment while making an eye-catching, well-balanced composition.

Here are the key points this article covers:

  • Planning the Environment. One of the biggest challenges while creating natural environments is to plan your scene from the start. Begin with big and bare areas and then develop the details in those macro zones by adding vegetation, assets, and so on.
  • Sculpting Terrain and Set Dressing. Unreal Landscape offers a series of tools for sculpting maps and adding scattered elements like flowers, grass, or anything else you want to import as an asset in your engine.
  • The Importance of Biomes. The art of compositing a good environment is also connected with the presence of biomes: a sort of habitat for organisms and the related terrain characteristics. This way we can have different zones—forests instead of grasslands, desert, etc.
  • Shot Composition: Thinking Like a Photographer. Once you’ve created your own landscape, you want to showcase your work in its best light.

Other subjects include:

  • The Choice of an Appropriate Vantage Point.
  • Low-Angle Shots
  • Depth of Field
  • Positive and Negative Space

That brings us to the end of the first article of a three-part series. We explained how to plan a 3D environment and how to collect photo references with details. We then moved on to talk about the sculpting in Unreal Engine and set dressing with the support of Brushify.


Please rate the helpfulness of this tip.

Click on a star to rate it!

… for Visual Effects

Tip #1773: Chaos Updates V-Ray 5

Larry Jordan – LarryJordan.com

Chaos updates V-Ray 5 to support USD.

Image credit: Goodbye Kansas & DDB Paris—Assassin’s Creed Valhalla © 2020 Ubisoft

Topic $TipTopic

Last week, Chaos introduced initial Universal Scene Description (USD) support for V-Ray 5 for Maya, Houdini and Cinema 4D tying powerhouse production renderers to one of the fastest growing file formats in visual effects. Artists now have a non-destructive way to collaborate and assemble their scenes, making it easier to store and move scene data between different applications.

Initially developed by Pixar, the USD format is designed to hold the most common types of scene data – geometry, shaders, lights, rigs, hair, etc. – so artists have an easy way to share and dynamically update assets without workarounds or compromises. As the pipelines have grown more complex, the need for a universal format has become even more pronounced. Today, Chaos will begin providing V-Ray support to USD, giving artists more flexibility as the technology continues to develop.

The initial Maya implementation will support several key asset exchanges, including static/animated meshes, V-Ray materials, subdivisions, displacement and more. V-Ray 5 for Houdini will also mark the beta launch of V-Ray for Solaris, which helps artists work natively in SideFX’s USD-based shot layout and look dev tool via a V-Ray Hydra delegate.

Learn more here.


Please rate the helpfulness of this tip.

Click on a star to rate it!