… for Random Weirdness

Tip #144: 4 Steps to Editing Better Interviews

Larry Jordan – https://LarryJordan.com

Don’t do everything at once

Tip Screen Shot

Topic $TipTopic

After shooting and editing hundreds of interviews, the biggest lesson I’ve learned is: Don’t do everything at once. Rather focus on completing very specific tasks. This allows you to better concentrate on the story, rather than the construction.

Specifically, I build an interview in four stages:

  1. The radio cut. Build the foundation of the story by editing all the sound bites in order into the timeline. Don’t worry about the visuals. Create the best story you can first.
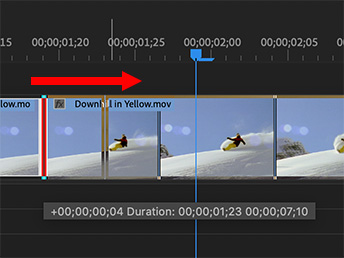
  2. Add B-roll. After the story is fleshed out, go back and add B-roll to illustrate what the speaker is talking about. (Adding B-roll before the story is complete just wastes time because the story you are telling keeps changing.)
  3. Add titles and graphics. With the story built and the B-roll in place, you now know where you can fit titles and which graphics you need.
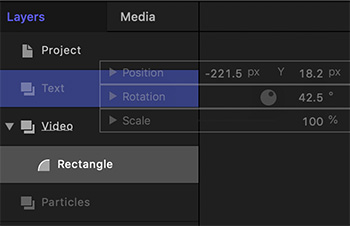
  4. Finally, effects. When everything else is done, add effects. I’ve learned that effects will take as much time as you have between now and the deadline… plus an hour. Don’t get sucked into adding effects until the rest of your story is complete, you’ll run out of time to finish your story.

The benefit of this approach is that you are intently focusing on one element at a time, without wasting time creating, say, an effect for a shot that you ultimately decide not to use.


Please rate the helpfulness of this tip.

Click on a star to rate it!

… for Random Weirdness

Tip #138: More RAM Isn’t Always Better

Larry Jordan – https://LarryJordan.com

Adding RAM has… implications.

Tip Screen Shot

Topic $TipTopic

More RAM, as we all know, boosts performance for most media tasks simply because our files are so big.

However, there’s a downside to adding RAM. RAM, whether it is used or not, always consumes power when your computer is on. The more RAM you have, the more power it requires.

For desktop systems, this isn’t bad because they are always plugged into a wall outlet. But for laptops, adding RAM pulls more power from the battery, decreasing battery life.

If you tend to edit with a plugged in laptop, again, no big deal. But, if you tend to edit on battery in remote locations, you’ll need to balance more RAM with battery life.

Just something to think about.


Please rate the helpfulness of this tip.

Click on a star to rate it!

… for Random Weirdness

Tip #132: Use QNAP Servers for FCP X

Larry Jordan – https://LarryJordan.com

QNAP supports editing using Final Cut.

Tip Screen Shot

Topic $TipTopic

J.J. Sereday writes:

I’ve been using the QNAP TVS-871T for 3-4 years now and have been able to keep/edit with my FCP X project files on the server using their NFS (for FCP X) connection. Plus you can take advantage of the Thunderbolt speeds using it as a Thunderbolt EtherNet connection. I tend to get 600-800 Mbps read/write with the 8-bay in RAID 5.

It’s been pretty amazing.

NOTE: QNAP also supports SMB3, which FCP X 10.3 and later also support. Visit the QNAP support pages to learn more.


Please rate the helpfulness of this tip.

Click on a star to rate it!

… for Apple Motion

Tip #189: A REALLY Fast Way to Copy Settings

Larry Jordan – https://LarryJordan.com

Dragging is fast, easy and precise.

Tip Screen Shot

Topic $TipTopic

As projects get more complex, matching settings becomes increasingly tricky. Here’s a fast way to copy one or more settings from one element to another.

  • Select the layer that has the settings you want to copy.
  • Then, from the Inspector, select the settings you want to copy.
  • Once selected, drag them from the Inspector to the element you want to apply them to.

NOTE: All the settings you want to copy must be visible in the Inspector. To copy settings hidden in other menus, simply make those settings visible and repeat the process.

EXTRA CREDIT

  • To select a single setting: click-and-drag it.
  • To select multiple settings that are next to each other: Shift-click
  • To select multiple settings that are not next to each other: Cmd-click.

Please rate the helpfulness of this tip.

Click on a star to rate it!

… for Apple Motion

Tip #188: Move Layers with a Keyboard Shortcut

Larry Jordan – https://LarryJordan.com

Moving layers need not be difficult.

Tip Screen Shot

Topic $TipTopic

Moving layers in Motion with the mouse can be challenging because you need to very carefully watch the location of that thin blue line.

It is much better to use a keyboard shortcut. This is one of those shortcuts that, once you learn it, you’ll wonder how you ever lived without it.

  • Cmd + ] — Go up
  • Cmd + [ — Go down

Sigh… so simple.


Please rate the helpfulness of this tip.

Click on a star to rate it!

… for Adobe Premiere Pro CC

Tip #164: 6 “Trim to Playhead” Shortcuts

Larry Jordan – https://LarryJordan.com

Keyboard shortcuts that speed trimming to the Playhead.

Tip Screen Shot

Topic $TipTopic

These six keyboard shortcuts speed trimming an edit point to the playhead.

Shortcut What It Does
Q Ripple trim previous edit to playhead (does not leave a gap)
Shift + Q Extend (Roll) previous edit to playhead
Option + Q Trim previous edit to playhead (leaves a gap)
W Ripple trim next edit to playhead (does not leave a gap)
Shift + W Extend (Roll) next edit to playhead
Option + W Trim next edit to playhead (leaves a gap)

The cool part about these is that you don’t need to select the edit point first.

NOTE: These shortcuts are all from the Adobe Premiere Pro Default keyboard map.


Please rate the helpfulness of this tip.

Click on a star to rate it!

… for Apple Motion

Tip #154: 3D Transform Tool Adds Perspective

Larry Jordan – https://LarryJordan.com

On-screen controls allow faster element manipulation.

Tip Screen Shot

Topic $TipTopic

There are two ways to add perspective to any element in Motion: The Inspector and the 3D Transform tool. To enable the 3D Transform tool, click the icon to the immediate right of the Arrow tool that looks like a wire globe.

When you select an element in the Layers panel, a white wireframe box appears around it. Inside are three circles and three color arrows. The secret code is R – G – B.

  • R (Red) – Makes adjustments on the horizontal axis
  • G (Green) – Makes adjustments on the vertical axis
  • B (Blue) – Makes adjustments to and from the viewer (camera); the Z-axis.

For example, dragging the green arrow slides the shape vertically.

But, the real secret is in the three white circles. These create rotation.

  • Left circle. Rotates on the vertical axis. (It displays a green line.)
  • Top circle. Rotates on the Z-axis. (It displays a blue line.)
  • Right circle. Rotates on the horizontal axis. (It displays a red line.)

By selecting the 3D Transform tool and dragging these six controls, you can quickly and intuitively adjust the position and rotation of any selected element.


Please rate the helpfulness of this tip.

Click on a star to rate it!

… for Adobe Premiere Pro CC

Tip #139: Customize the Project Panel

Larry Jordan – https://LarryJordan.com

Freeform View is a new feature hidden in the Project panel.

Tip Screen Shot

Topic $TipTopic

The Project panel provides multiple ways for us to view and organize our clips. What you may not know are the three icons in the lower left that allow you to alter the display of clips and projects:

  • List view (2nd from left). This displays additional information about each asset in a table form. Control-click a column header to customize the information it displays. Drag a column header to change its location in the table.
  • Icon view (3rd from left). This view is great to view the contents of a clip in the Project panel. Press the spacebar to play a clip. Hover your cursor over an icon and the clip plays backwards or forwards as you drag your mouse.
  • Freeform view (4th from left). This view allows you to visually organize your assets and create storyboards with your media. You can use the Freeform view to arrange clips freely into a custom layout, unrestricted by any kind of grid and sort order.

The Freeform view is especially useful when you want to think spatially, stack or group media files, or arrange clips as storyboards and assembly edits. You can also save different layouts for the same project and switch between them.

BONUS

To learn more about Freeform view, see Tip #146.


Please rate the helpfulness of this tip.

Click on a star to rate it!

… for Adobe Premiere Pro CC

Tip #137: Why Use Handles in the Project Manager?

Larry Jordan – https://LarryJordan.com

Handles allow you to make changes later.

Tip Screen Shot

Topic $TipTopic

We mark clips by setting an In and an Out. “Handles” are the extra media before the In and after the Out.

When we add a dissolve to a clip, we are using those handles because half of the the dissolve starts before the In on the incoming clip and half after the Out on the outgoing clip. So, also, with trimming. When we move an In earlier or an Out later, we are moving the edit point into the handles of a clip.

Audio, even more than video, uses handles to establish a sound even before we see the video.

For all these reasons, when you are transcoding clips, or archiving media for the future, be sure to include handles. The default setting in Premiere is 30 frames. In most cases, this is not enough. My recommendation is to save 5 seconds of extra media at the beginning and end of the clip.

Yes, it takes more storage space. But nothing is worse than needing an extra 1/2 second of a shot and not having it.


Please rate the helpfulness of this tip.

Click on a star to rate it!

… for Apple Final Cut Pro X

Tip #195: What is an Audio Component?

Larry Jordan – https://LarryJordan.com

Audio components allow manipulating audio channels separately.

View a clip's audio channels in the Audio Inspector.

Topic $TipTopic

An audio component is a channel in an audio file. For example, a stereo file has two channels – left and right. By default, Final Cut blends all the different channels in a clip into a single output. But, you can easily see each channel for clips located in either the Timeline or the Inspector. Here’s how.

  • Select a clip in either the Browser or the Timeline.
  • Go to the bottom of the Audio Inspector and change the menu in the top right corner to Mono. This displays each audio channel in the clip.
  • Drag across each channel to preview it.

NOTE: As you drag across a channel the source timecode is displayed in the Viewer.

  • Uncheck a channel to disable its audio.

NOTE: If you disable a channel in the Browser, it will remain disabled when you edit that clip into the Timeline.

EXTRA CREDIT

To display the audio components of a clip in the Timeline, choose Clip > Expand Audio Components. (Shortcut: Control + Cmd + S).

Displaying audio components in the Timeline also allows you to trim and modify audio levels for each channel separately.


Please rate the helpfulness of this tip.

Click on a star to rate it!