Tip #090: A Faster Way to Create Audio Fades
… for Apple Final Cut Pro X
Tip #090: A Faster Way to Create Audio Fades
Larry Jordan – https://LarryJordan.com
Apply fades using a keyboard shortcut.

You probably know that you can add an audio fade to either the beginning or the end of an audio clip by dragging the small white “audio fade dot” at the edges of an audio clip.
What you may NOT know, though, is that there is a much faster way to add fades, but it isn’t enabled by default.
Here’s how:
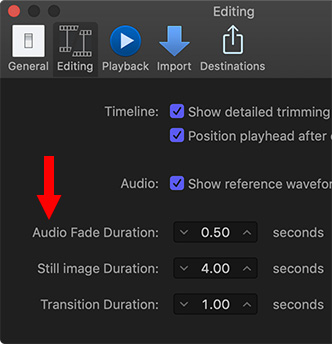
- Go to Preferences > Editing and enter the Audio Fade Duration you want to use as a default setting.
- Next, go to Commands > Customize, make sure you are in the Default command set (upper left corner), then search for “Audio Fades”
- Set Apply Audio Fades to the shortcut you want to use. (In my case, I set this to Option + A.)
Now, whenever you want to quickly apply an audio fade, select the clips you want to apply the fade to, then type Option + A. Poof! – fades appear at the end of all selected clips.
EXTRA CREDIT
These fades are fully adjustable by dragging the fade dot. All you are doing with this shortcut is applying a standard audio fade quickly.
‘Audio Fades’ is not available in my version FCP 10.4. ‘Audio skimming’, then ‘Audition +’ but not Audio fades and no evident way of adding a new category.
Christopher:
Make sure you are in the Default command set before doing the search.
Larry
This tip looks like it will solve the problem commented on in an earlier tip today, since getting the handles from the little dot in order to drag them can be frustrating.
Janice:
Smile… Yup, that’s why I included both of them in the same issue.
Larry