Tip #1022: The Pen Tool
… for Adobe Premiere Pro CC
Tip #1022: The Pen Tool
Larry Jordan – LarryJordan.com
The Pen tool creates shapes we can use standalone or under text.
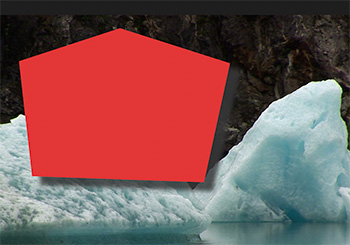

The Pen tool allows us to draw shapes directly in the Program Monitor, fill them with color, add a border or drop shadow, then animate them. We are used to using the Pen tool as part of Effect Controls. But there is also the Pen tool in the Tools palette. We use this to draw shapes on-screen.
- Put the playhead in the timeline where you want a shape to start, then, select the Pen tool from the Tools palette.
- In the Program Monitor, click and draw a shape. Click to create a corner, click and drag to create a curve.
- Re-click the starting point to create a closed shape, or don’t to create an open shape. (We most often use open shapes to create a curved line – it is a border with no fill.)
- To move a shape, select the clip, then use the Move tool.
- To adjust a shape, select the Pen tool, then, in Effect Controls, twirl down the Shape, and select Path.
NOTE: The shapes created by the Pen tool are vectors, which means they can be scaled as much as you want without losing edge sharpness.
EFFECT CONTROLS
The Shape controls, in the Effect Controls panel, provide:
- Path. Redraw the shape, using the Pen tool.
- Appearance. Change fill, stroke and shadow settings.
- Transform. Change size, position and rotation, along with adding keyframe animation.
Leave a Reply
Want to join the discussion?Feel free to contribute!