Tip #1187: Using Quick Export
… for Adobe Premiere Pro CC
Tip #1187: Using Quick Export
Larry Jordan – LarryJordan.com
Quick Export is a fast way to create H.264 versions of your timeline.
 Quick Export, new with the Nov. 2020 release of Adobe Premiere Pro, is a single-button way to create H.264 versions of the currently open project in your timeline.
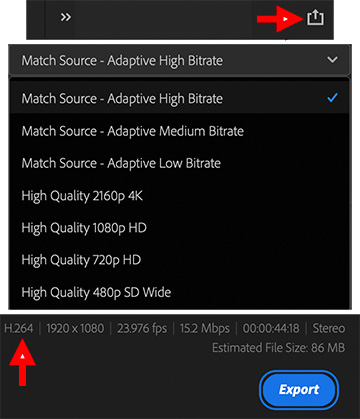
- Click the Quick Export icon in the top right corner of the Premiere interface (screen shot, top red arrow).
- This displays the Quick Export screen allowing you to change the file name, storage location and compression setting.
- Click Preset to pick from eight different compression settings: bit rate (top four) and image size (bottom four) for the exported file. (Middle image) The display at the bottom (bottom red arrow) shows the current export configuration.
- When the settings are the way you like – and most of the time, you probably won’t change them, click Export.
NOTE: All these options create H.264 files.
This quickly configures project exports. The export process remains the same.
EXTRA CREDIT
For more export options, simply export your project as always and configure it using the Export Settings window.
Leave a Reply
Want to join the discussion?Feel free to contribute!