Tip #1316: Change the Color of a Single Object
… for Apple Motion
Tip #1316: Change the Color of a Single Object
Larry Jordan – LarryJordan.com
Secondary color changes are a common tool to create colors that better tell our story.


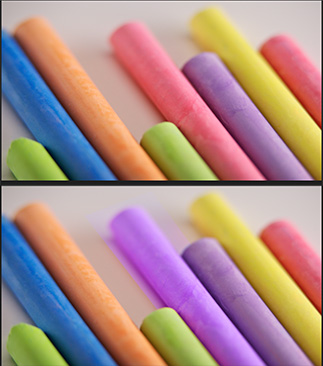
Look closely at this screen shot. What’s the difference between these two images…? Yup, the pink chalk at the top changed color. Here’s how.
A “secondary color correction” is one where a portion of the frame changes color, without affecting the rest of the image.
NOTE: Unlike chroma-key, which makes a color transparent, color replacement keeps all the image grayscale for texture and only alters the color.
- Select the element containing the object whose color you want to change.
- Apply Filters > Hue/Saturation Curves.
- Click the gray eyedropper for Hue vs. Hue. (A blue eyedropper means it is active.) This creates three dots on the color line. The left and right dot indicate the range of the selection.
- Drag the center dot up or down until you are happy with the color on screen. (For example, in the screen shot, both the chalk and its shadow/reflection are altered.)
Done.
EXTRA CREDIT
Many times, these color changes will spill to other parts of the image. To prevent that, duplicate the image, remove any filters, then draw a Bezier mask loosely around the object in the top-most layer.
This is what I did for the image in the screen shot.


Leave a Reply
Want to join the discussion?Feel free to contribute!