Tip #1358: Save & Manage Timeline Presets
… for Adobe Premiere Pro CC
Tip #1358: Save & Manage Timeline Presets
Larry Jordan – LarryJordan.com
Track height presets only change the height of tracks, which can also be assigned keyboard shortcuts.


One of the challenges in any large edit is seeing what you’ve got across all the tracks you are working with. Track Height presets make this easy. Here’s how.
There are a variety of ways to change the height of tracks:
- Type Shift + [plus] to maximize all track heights
- Type Shift + [minus] to minimize all track heights
- Type Cmd + [plus]/[minus] to change video track heights
- Type Option + [plus]/[minus] to change audio track heights
- Drag the horizontal line between tracks in the track header up or down
CREATE A PRESET
Let’s say that you like minimizing all tracks EXCEPT V1, A1 & A2, which you want taller for dialog editing.
- Configure the track heights as you wish.
- Then, click the Wrench icon in the top left corner of the timeline and choose Save Preset.
- Give the Preset a name and click OK.
You can assign keyboard shortcuts to these by searching for “Height” in the Keyboard Shortcuts window.
NOTE: Saved presets appear in the timeline Wrench menu.
MANAGE PRESETS
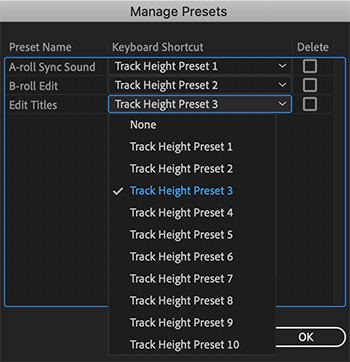
Go to the timeline wrench menu and choose Manage Presets (see screen shot).
Here you can reassign keyboard shortcuts, as well as delete any presets you no longer need.


These shortcuts are great, but work only within Premiere’s keyset. In my “FCP8” keyset, I will have to map them in.
One drag operation at the bottom of the list will adjust that single track in video or audio, but has a convenient expansion, which I believe cross all keysets:
Place the mouse cursor along a video or audio track divider, and press Shift, and drag to expand or collapse all tracks in a video or audio group.
A handy quick adjust.
Best, as always,
Loren
So, when are they gonna get around to letting you save filter, etc., presets in the Audio Track panel?