Tip #1448: 3D Navigation Controls
… for Apple Motion
Tip #1448: 3D Navigation Controls
Larry Jordan – LarryJordan.com
These navigation controls appear once you add a camera to your project.

(I discovered this tip while researching a recent PowerUP webinar illustrating Cameras, Sets & Drop Zones in Apple Motion 5.5.)
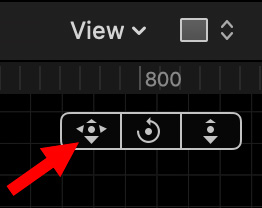
Once you add a camera to a Motion project, three new navigation controls appear in the top right corner of the Canvas (Viewer). Here’s what they do.
The three controls – indicated by the red arrow in the screen shot – are designed to be clicked and dragged with the mouse. In all cases, these shift the display in the Canvas, they do not change the composition of elements in the project.
From left to right:
- Move the Canvas up/down/left right.
- Rotate the Canvas on the Z axis. (This is the traditional way to rotate anything.)
- Move view either closer or farther away, again, along the Z axis.
EXTRA CREDIT
Double-click any icon to reset the screen to the default 0,0,0 centered location.
You can experiment with these by adding a camera (Object > New Camera), switch the Canvas from Active Camera to, say, Top view then tweak one of these controls.
Leave a Reply
Want to join the discussion?Feel free to contribute!