Tip #1537: A Fast Way to Improve an Image
… for Adobe Premiere Pro CC
Tip #1537: A Fast Way to Improve an Image
Larry Jordan – LarryJordan.com
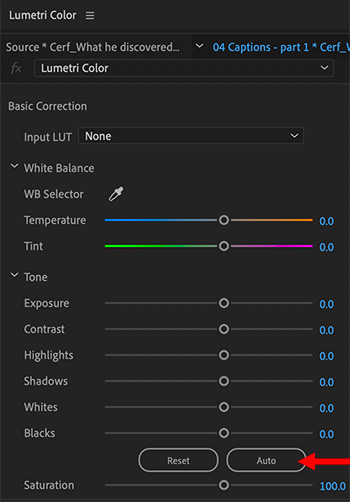
Basic Correction > Auto provides a quick fix for poorly exposed images.

[ This tip was part of a recent webinar: “Color Fundamentals in Adobe Premiere Pro” ].
If you have an image that isn’t exposed properly and you need a quick fix, here’s how.
Select the image in the timeline, then go to: Color workspace > Lumetri Color > Basic Correction and click the Auto button (see screen shot).
This adjusts the sliders in Basic Correction to correct exposure problems.
WHAT THIS DOESN”T FIX
This won’t fix color problems. It won’t fix blown-out areas caused by over-exposure. And it won’t fix black levels that were crushed when the image was taken such that all shadow detail was lost.
So, this doesn’t work miracles, but it can make many images look a LOT better.
Also, because this moved sliders, if you don’t like something in the new settings, the modified settings are easy to adjust manually.
Leave a Reply
Want to join the discussion?Feel free to contribute!