Tip #1571: Video Limiter Settings
… for Adobe Premiere Pro CC
Tip #1571: Video Limiter Settings
Larry Jordan – LarryJordan.com
The Video Limiter keeps video levels legal.


This post was written by Simon Walker on the Adobe forums. Simon is based in London.
In my experience, Premiere Pro’s Video Limiter effect has proven very useful as a method to keep luma and chroma levels legal for broadcast.
Video Limiter is only really meant to catch stray illegal pixels, and isn’t a replacement for properly colour correcting the clips, which is the best method to manage luma and chroma levels. However, I do think there is a place for a legalising check, especially if you’re on a deadline, and I’ve seen it used successfully on time sensitive projects.
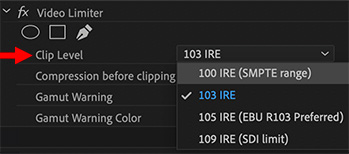
The trick to getting a good result out of Video Limiter is to set the Reduction Axis parameter to Chroma and Luma, rather than the default setting of Smart Limit. It’s also useful to apply the effect to an adjustment layer, set to the duration of the sequence. Video Limiter is a Mercury Playback accelerated effect, and therefore GPU enabled, so it won’t slow down playback or final output.
One thing that’s worth noting is that if you’re dealing with bright saturated colours the limiter can affect the final colour output, so be prepared to adjust the Chroma Max setting to compensate.
On sport productions I’ve been involved with, I’ve found that the Chroma Max default setting of +130% can display an RGB gamut error on the scopes, and reducing this to around 100% removes the error (which is one of the techniques we used at the World Cup in Rio last year). However it also can desaturate the brightest colors. Whilst this will give a reliable result in most cases, it’s important to keep an eye on those bright orange and red saturated colours which turn up on football shirts and racing cars (yes, I’m looking at you Netherlands and Ferrari).
EXTRA CREDIT
The Video Limiter filter is located in Effects > Video Effects > Color Correction > Video Limiter.
Here’s a tutorial on how this works.


Leave a Reply
Want to join the discussion?Feel free to contribute!