Tip #1666: Customize the Audio Mixer Meters
… for Adobe Premiere Pro CC
Tip #1666: Customize the Audio Mixer Meters
Larry Jordan – LarryJordan.com
Customizing audio meters makes sure they show you want to need to see.

Premiere Pro supports customizing the audio meter display in the timeline, as well as the Audio Clip and Track Mixers. Here’s what’s possible.
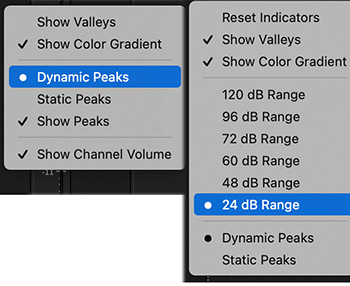
Open the Audio Clip Mixer (you can find it in the Windows menu, if it isn’t part of your current workspace). Control-click inside the area where the audio levels are displayed (i.e. the black stripe, not the numbers).
- Show Valleys. This displays the lowest level of your audio during the last two seconds.
- Show Color Gradient. This displays a smoother color ramp from green to yellow to red.
- Dynamic Peaks. This displays the loudest level of your audio during the last two seconds.
- Static Peaks. This displays the loudest level of your audio until something louder comes along. This is a good way to determine if any part of your mix exceeds 0 dB.
- Show Peaks. This enables either Dynamic or Static peak display.
- Show Channel Volume. This displays the current level of the audio clip in numbers.
Open the Track Mixer, control click in the same area and the options change. (These options are the same as Control-clicking in the timeline audio meters.) The one new choice is:
- dB Range. This only displays audio levels that exceed the level selected here. This is a good way to focus on the louder portions of your mix.
Leave a Reply
Want to join the discussion?Feel free to contribute!