Tip #278: How to Burn-in Timecode
… for Adobe Premiere Pro CC
Tip #278: How to Burn-in Timecode
Larry Jordan – LarryJordan.com
Burned-in Timecode creates the perfect reference video for clients.
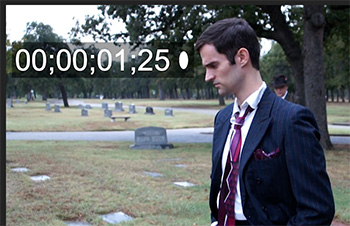

Often, a client needs to review the current state of an edit. The easiest way to provide this is using burned-in timecode. Timecode is a label that uniquely identifies every frame in a video. No two frames in the same clip have the same timecode.
NOTE: Timecode should not be confused with time-of-day. While it can reflect the actual time of a recording, most of the time, it doesn’t.
To display timecode for a clip:
- Select the clip
- In the Effects panel, search for “Timecode” (Its located in the Video category.)
- Drag the timecode effect onto the clip
Poof! Instant timecode.
Adjust size and position in the Effect Controls panel. Remember, your goal is visibility, not tastefulness.
EXTRA CREDIT
A better way to display timecode for an entire project is to add an adjustment layer. We’ll cover that in a later tip.
Wonderful, as always Larry.
Is there a way to add timecode to a clip and not have it zero out at every cut you make? I know you can export a window burn and import it with the permanent burn.
But can you do it without exporting.
Thanks again.
Doug
Chicago
Doug:
Timecode is NEVER changed when you make an edit in any NLE. Where are you seeing this?
Larry
Another way to do this without effecting your actual timeline is to do this coming out of media encoder instead, using the effects output panel. I usually encode proofs for clients (h.264) and place them on Vimeo with a private link for their review.
Al:
Thanks for your comment.
Larry