Tip #295: Save Time – Use Master Effects
… for Adobe Premiere Pro CC
Tip #295: Save Time – Use Master Effects
Larry Jordan – LarryJordan.com
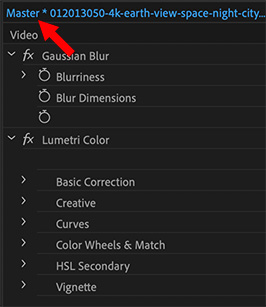
Master effects apply to all related clips in the Timeline.


This article first appeared in MotionArray.com. This is an excerpt. You’ve edited a flock of clips into your sequence in the Timeline – only to discover that all the segments from Clip #23 are a bit too blue; or need some other effect applied to all of them.
Fixing all these clips at once is what master effects are designed to do. A Master clip is a clip in the Project panel, from which you edited clips into the sequence in the Timeline. Apply a change to the Master clip, and all clips derived from it change as well.


This is an old question I’ve had about “filter packing” a master, and it sound great to have it.
But I wonder about markers. When I was cutting a museum job a couple years ago, I used precut historical videos, which often contained more than one subject of interest, for instance, manufacturing of bombers, boats, jeeps, etc.
I found I could mark a master with, say “bombers”, duplicate the master, wipe out the markers in the duplicate, and mark the dupe with, say, “boats”– and going back to the first master– the original markers for “bombers” remained intact! I didn’t have to specify making the master duplicate an “independent clip”– seems it became that when duped.
So I wonder if I can duplicate a master packed with filters, but be able to wipe those away to use sections that don’t need treatment, or perhaps different treatments? Has anyone tested this? If not, I’ll do it on a rainy Saturday.
Or conversely, you can take one of the common clips on the timeline and apply the desired effect filters, and adjust the parameters. Copy that clip (command C or right click from the contextual menu). Then select all the similar clips and again right click, and choose “paste attributes”. A default box will appear where you can check off what elements/aspects you are pasting. Done.
That seems simpler to me.