Tip #297: Multiband Compressor Improves Dialogue
… for Adobe Premiere Pro CC
Tip #297: Multiband Compressor Improves Dialogue
Larry Jordan – LarryJordan.com
The Multiband Compressor amplifies soft passages without altering the level of louder ones.

The best way to control the levels in your dialog is to use the Multiband Compressor filter. This raises the softer passages in your audio, without causing the louder passages to distort. Here’s a simple way to use it.
- Make sure that all dialog audio is on as few tracks as possible and that no other audio is on those same tracks.
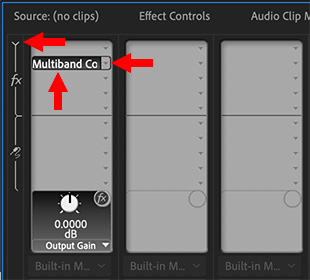
- Open the Audio Track Mixer in Premiere. (Not the Clip Mixer.)
- At the very top of the mixer, twirl down the small, right-pointing triangle to reveal the FX settings for the track(s) containing dialog.
- Click one of the small right-pointing arrows in the FX settings panel and choose Amplitude and Compression > Multiband Compressor.
- Double-click the words “Multiband Compressor” to reveal the interface.
Don’t be intimidated by how this looks! You only have three settings to change.
- Change the Presets menu at the top to Broadcast.
- Change the Margin, on the right, to -3 dB.
- Uncheck the Brickwall Limiter, also on the right.
That’s it. The difference in the quality and levels of your dialog is amazing!
Leave a Reply
Want to join the discussion?Feel free to contribute!