Tip #445: More Mask Tricks in Premiere
… for Adobe Premiere Pro CC
Tip #445: More Mask Tricks in Premiere
Larry Jordan – LarryJordan.com
While masks can’t be combined, we can create more than one mask in a clip.

While we can’t combine masks in Premiere, nor select multiple masks at the same time, we can create multiple masks to create unusual shapes. Here’s how.
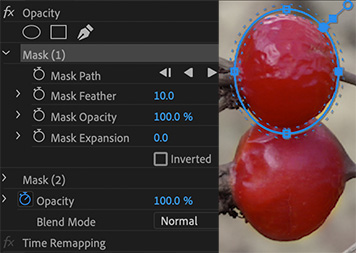
In this screen shot, I am using two separate circle masks to isolate each of the berries. This effect involves two versions of the same clip:
- The top clip contains the masks
- The bottom clip has been desaturated
Because I want to see the desaturated clip below the clip containing the masks, we need to create an Opacity mask. If we simply want to affect a portion of the image, say to apply a blur, we would create a mask in the Blur effect itself.
In this example, I drew two circle masks and adjusted each one’s shape to match the curves of each berry. There’s one mask for each berry. I slightly feathered each mask, then, in the lower clip desaturated it almost completely. (I retained a little bit of color so that the color edges around the berry which weren’t removed by the mask wouldn’t look too obvious.)
If the berries move, click the right-pointing arrow just below the mask name (i.e. Mask (1)) to track the mask with the movement of the berries.
Leave a Reply
Want to join the discussion?Feel free to contribute!