Tip #556: Blend Modes in Brief
… for Visual Effects
Tip #556: Blend Modes in Brief
Larry Jordan – LarryJordan.com
Blend modes create textures.

Iain Anderson, at MacProVideo, wrote this up in more detail. But I liked his summary of blend modes, which I have modified from his article.
Blend modes allow us to combine textures, and sometimes colors, between clips or elements that are stacked vertically on top of each other.
Whether you are in Photoshop or Premiere, Final Cut or Motion, blend modes work the same way. These are arithmetical expressions, with nothing to adjust. You either like the effect or you don’t.
NOTE: If you don’t like the effect, tweak either the gray-scale or color value of the top clip and the results will change.
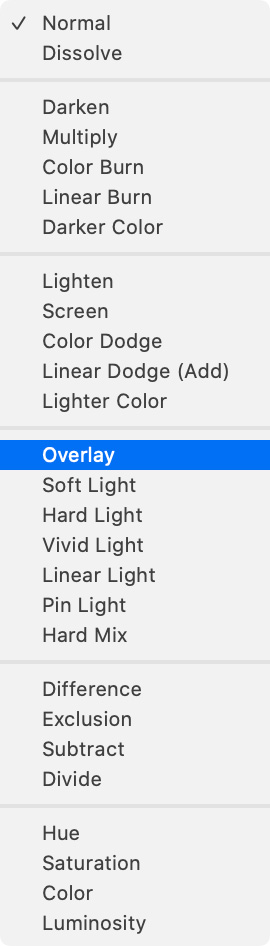
All these settings should be applied to the top clip. It will be the only clip that changes. Here’s what the settings mean.
- Normal. This leaves the top clip’s image unaltered
- Subtract, Darken, Multiply, Color Burn, and Linear Burn. These combine clips based upon darker grayscale values. For example, the top clip will darken clips below it. Multiply usually works best for adding darker areas.
NOTE: If nothing changes when you apply this setting, your top clip is too light. Darken it.
- Add, Lighten, Screen, Color Dodge, and Linear Dodge. These combine textures between clips based upon lighter grayscale values. Screen usually works best for adding bright elements like sparks and flame.
IMPORTANT: Avoid using Add. It creates highlights that exceed legal white values. Screen does not.
- Overlay, Soft Light, Hard Light, Vivid Light, Linear Light, Pin Light, and Hard Mix. These combine textures based on mid-tone grayscale values, often in a way that increases contrast. Overlay usually works best, though more often these days, I find myself using Soft Light.
NOTE: For better results, reduce opacity and play with the grayscale settings.
- Difference and Exclusion. These mess with color values to create very hallucinogenic effects. What’s happening is that color values in the top clip are mathematically removed from the clips below in slightly different ways. Also useful for spotting the difference between two clips.
- Stencil Alpha and Stencil Luma. These insert the background image into the foreground image. Use Stencil Alpha, provided the foreground has an alpha channel. If it doesn’t, use Stencil Luma, but the results may not be as good.
- Silhouette Alpha and Silhouette Luma. These cut a hole into the background image based upon the foreground image shape. Again, use Silhouette Alpha if the foreground image has an alpha channel.
- Behind. This displays the clips below the current effect. It is used when you are also using Stencil Alpha to insert one image into another.
The bottom choices will vary by application, and are covered in the Help files.
Leave a Reply
Want to join the discussion?Feel free to contribute!