Tip #651: Make Adjusting Color Curves More Precise
… for Adobe Premiere Pro CC
Tip #651: Make Adjusting Color Curves More Precise
Larry Jordan – LarryJordan.com
Curves make selecting and correcting specific ranges of color easy.


Here are three tips to help make color adjustments more precise using Curves in the Lumetri color panel.
When adjusting color using Curves in the Lumetri color panel, press the Shift key to lock the control point so it only moves up and down.
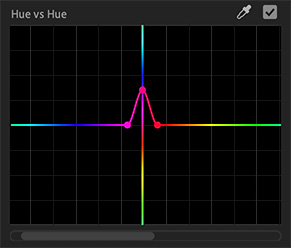
Use the eyedropper to select more than one color in the same image. Each color will have it’s own control points. To restrict the range, use three control points.
While moving a control point, a vertical band appears to help you judge your final result. It is useful in the Hue versus Hue curve, where it can be tricky to judge the resulting hue. For example: you want to fine-tune some skin tone values which look a bit red. You can use the Hue versus Hue curve to select a range of red colors; with the center control point selected the vertical indicator helpfully shows you that pulling down shifts the red toward orange, which is much better for skin-tone.
NOTE: To make adjustment easier to see, drag the slider at the bottom to center your adjustments.
EXTRA CREDIT
Here’s an Adobe Help page to learn more.


Leave a Reply
Want to join the discussion?Feel free to contribute!