Tip #787: Change Label Color Defaults
… for Adobe Premiere Pro CC
Tip #787: Change Label Color Defaults
Larry Jordan – LarryJordan.com
Labels can help organize complex projects.


As I was researching last week’s webinar on Adobe Premiere, I re-discovered some interesting facts about labels.
Labels can be used to:
- Color clips in the timeline
- Add color patches to media and sequences in the Project panel
I often use colors to flag dialog, B-roll, or stock footage clips. While totally optional, colors can help you organize a complex project. You can assign any color to anything, though there are default settings (see Tip #3).
To apply a color to an element in the Timeline or Project panel, select the object(s), then choose Edit > Label.
NOTE: You can also control-click a clip and choose Label, but the Edit menu allows you to select multiple elements and change them all at the same time.
TIP #1
- In Preferences > Labels, there are 16 different colors you can select from.
- To change a color, double-click the color chip.
TIP #2
- To change the name of a color, double-click the name and type the new text.
TIP #3
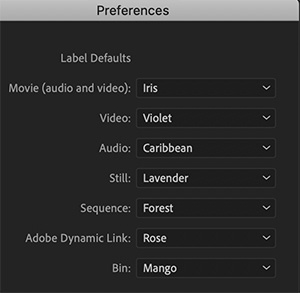
- To change the default color of a type of clip – for example, a sequence – select the color name from the Label Defaults section of the Labels preference panel.


Hiya. Any tips on how to revert to the original label colours? Thanks
Pete:
Yes. Trash Premiere’s preferences. Quit the app, then, when launching the app from the Dock (or its equivalent in Windows) press Shift + Option (Shift + Alt on Windows).
In both cases, continue holding the keys until the splash screen appears. You will know you successfully trashed preferences when the splash screen doesn’t have projects listed.
This resets all Premiere settings back to their defaults.
Larry