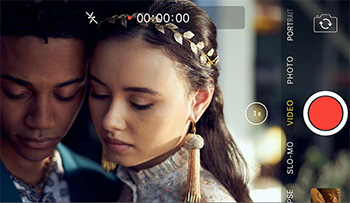
Trailers are the way we catch the attention of viewers today.
Image courtesy of Pixabay, via Pexels.com.
This article first appeared in MotionArray.com. This is a summary.
Trailers have always been an important part of film promotion, but when the era of internet video swept in, trailers became their medium. We now live in a world where a 1- to 2-minute video is exactly what people like to consume, and because of this trailers are created for everything from films to products to events.
Here are some tips to improve your next trailer.
Tell A Story. Don’t give everything away, but tell a story that your viewer can get behind.
Set The Pace. In many scenarios, fast pacing is the way to go with a trailer. There isn’t a lot of time, but there is a lot of information to convey, so keeping things moving will help you along.
Choose Your Words. Use text on the screen, but choose your words wisely. Short and punchy wins.
Get Graphic. Graphics can help keep an edit moving and create a common visual thread throughout.
Music Matters. We say over and over again that music plays a key role in visuals.
The article has several demo videos and more details on each of these points.
Screens are everywhere; we need to find ways to integrate them.
Still from R#J. Courtesy of Sundance Institute | Photo by Charles Murphy.
This article first appeared in NoFilmSchool.com. This is a summary.
Screens are the cigarettes of 2020s cinema, and we’re not going to quit anytime soon. Better figure out how to make the most of them!
As human beings, our daily reality has pretty much fully merged with our screens. Sure, it’s weird that we now have to think of creative ways to show an image of a 2D screen on a 2D screen. It’s almost more weird to purposely exclude phone screens from a story that’s set in the present day. It’s become a quintessential part of daily life. Do we go out of our way to make films without mentioning screens? Or do we find the best, most cinematic way to weave screens into our stories?
Here’s a look at five films at Sundance 2021 that took completely different approaches to screens on screen.
We’re All Going to the World’s Fair
We’re All Going to the World’s Fair moves from computer screens to Skype calls to handheld cameras, and the occasional production camera to paint a picture of a young girl (and her online friend) who is completely absorbed in one small corner of the internet.
R#J
A re-imagining of Romeo and Juliet, taking place through cell phones, in a mash-up of Shakespearean dialogue with current social media communication.
Searchers
The unusual way that Pacho Velez decided to shoot Searchers was to find a way for them to look into the camera as if they were looking through their phone or computer to swipe right—or left!
All Light Everywhere
All Light Everywhere focuses on surveillance as the main device to examine human bias, so naturally, surveillance camera footage and bodycam footage play a central role on screen. “[The camera] changes the person being filmed, and it changes the person who is doing the filming, and I’ve always been interested in that process,” said director Theo Anthony.
Users
Okay, this documentary isn’t strictly a rumination on screens, but the ever-present role of technology in our lives. The camera becomes much the POV of an all-seeing, all-knowing technological God to redefine the perspective of ourselves in the digital age.
The article provides more details, extended interviews and screen shots.
Please rate the helpfulness of this tip.
Click on a star to rate it!
https://www.theinsidetips.com/wp-content/uploads/2019/09/Tips-Logo-700x150.jpg00Larry Jordanhttps://www.theinsidetips.com/wp-content/uploads/2019/09/Tips-Logo-700x150.jpgLarry Jordan2021-02-17 01:30:002021-02-23 15:53:20Tip #1422: What’s the Best Way to Show Screens?
An in-depth look at how effects for this black-and-white movie were created.
The “Mank” movie logo.
Mank co-producer and VFX Producer Peter Mavromates shares his thoughts on creating the visual effects in Mank. This is a summary of the article, written by Trevor Hogg, that first appeared in VFXVoice.
Visual effects and DI are done in-house. “When we’re doing tests during pre-production,” Mavromates says, “a lot of the time they are shot in the parking lot and we bring the files right into the DI in the building.
That’s also the advantage to having in-house visual effects. I can call David upstairs where our visual effects are and say, ‘I want you to look at these three shots.’ I can give feedback to the artist right there, and maybe the artist can immediately do his note and get him to sign off.
The PIX workflow came in handy when the COVID-19 pandemic caused the production that had finished principal photography on February 22, 2020 to work remotely in mid-March. “David has never wanted to spend the time and money to travel to post-production when he’s on location,” says Mavromates. “Once the flag came down, we were up and running in three days. A lot of times David likes stuff on PIX even if we’re in the same building. We were 80% trained already. It didn’t impact our schedule. We delivered at the beginning of September.”
About half of the job for Mavromates is selecting and dividing the work among the vendors. “When I decide what stays in-house, usually it’s the smaller stuff that I can put through quickly,” he says. “When stuff gets bigger, that’s when I want a facility that has more bandwidth in terms of bodies and rendering. Over time, I have a checklist of things that these vendors have done successfully, so a lot of the choices have become easier over time. David likes to add a lot of lens flaring to his stuff, and I know that I’m going to go to Savage for that because we’ve designed lens flares over so many projects with them. In the birthday scene, there are 65 fireplaces that had flames added. That’s the kind of throughput that Ollin can handle.” The CG animals were produced by ILM, driving sequences by Territory Studio, and Artemple did everything from digital water to a close-up of a neon sign.
In total there were 753 visual effects shots. “A lot of that is ‘body and fender work,’ which encompasses getting rid of actor’s marks, straightening out curtains, removing metallic reflections that were unintended,” remarks Mavromates.
EXTRA CREDIT
The article then details how different effects were created and, espeically, the challenges because the film was shot in black-and-white, which prevented green screen effects from being used. Instead, they relied on LED projection panels.
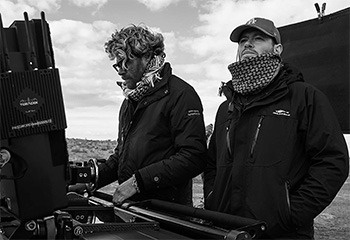
A system to streamline production and post workflows for Mank.
Cinematographer Erik Messerschmidt, ASC, on location with Mank.
Thinking about Tip #1402, the folks at X2X Media wrote a series of four detailed blog posts about the effects and remote workflow they created to support production and post for the film Mank. Here’s the link to start the series. This is a summary.
Making a movie during a pandemic requires a little innovation. During the production of Mank, David Fincher’s team needed to work remotely while retaining the ability to collaborate and also to consult with Fincher at a moment’s notice. In addition, they needed secure access to footage and associated metadata.
X2X engineered a bespoke solution to streamline the production and post-production workflow. Craig Mumma, Director of X2X LABS, summarized the requirements, “Our original remit was first and foremost to securely collect and store all data from pre-production through to the completed movie. Then, because of the pandemic, the Mank team needed to work remotely but still wanted to have super easy connections between themselves and with third-party contributors. The final piece of the puzzle was to upgrade an existing VFX turnover process and automate it.”
The workflow saw data from the RED RANGER cameras transferred on shuttle drives from production to post, where the near-set team used Fotokems’ nextLAB to manage the image QC, sound synchronization and metadata updates. They generated deliverables for the editor, who could then assemble the timelines in Adobe Premiere Pro.
Running alongside the main workflow and also feeding into the CODEX Media Vault, PIX software allowed contributors to upload information and share it with the team.
PIX RT (Real-Time) creates media that is immediately available to the director so that he or she can make annotations and notes on the image right after it has been captured. This media and metadata are synchronized to PIX to all the approved members of the production who can review them along with image files.
The article details the gear and workflow, then continues into a discussion of how they shot black-and-whate images with a RED RANGER camera brain equipped with a HELIUM 8K MONOCHROME sensor that can record 8192×4320 resolution at up to 60 fps.
“The monochrome was so spectacular and yielded such preferable results that it was absolutely the choice.”
EXTRA CREDIT
X2X wrote four detailed articles on the Mank VFX workflow:
Compositor Marijn Eken, who compared Nuke, Fusion and After Effects.
This article, written by Ian Failes and Marijn Eken, first appeared in VFXVoice.com. This is a summary.
Visual effects artists already know there are often many ways you can pull off a particular shot via different filming methods and with different tools and techniques. That’s certainly the case with compositing, where several pieces of software and compositing workflows can be used.
Here, visual effects artist Marijn Eken – who has worked as a compositor at studios including DNEG, Scanline VFX and RISE | Visual Effects Studios, and currently teaches at the Netherlands Film Academy – explains how he might tackle compositing of the same shot in three separate packages. These are Foundry’s Nuke, Blackmagic Design’s Fusion (inside DaVinci Resolve) and Adobe After Effects, arguably the three most accessible compositing tools.
The elements supplied to Eken were stock footage of a woman pinch-zooming a greenscreen and the marker-covered tablet, and a photograph of the space shuttle Endeavour taken at California Science Center, with the idea being that she would be zooming into an area of the photograph on the device.
In coming up with a methodology for approaching this relatively simple composite in the three different packages, Eken generally followed these steps:
Track the four corners.
Use the corner pin method to composite the image over the screen.
Track the two fingers on the screen and use that to position and zoom the image.
Apply grading on the inserted image to match the black levels and white point.
Use the greenscreen and some roto to separate the hand and composite it on top.
The article then illustrates in detail how he approached this task in each of the three software. (Link)
Please rate the helpfulness of this tip.
Click on a star to rate it!
https://www.theinsidetips.com/wp-content/uploads/2019/09/Tips-Logo-700x150.jpg00Larry Jordanhttps://www.theinsidetips.com/wp-content/uploads/2019/09/Tips-Logo-700x150.jpgLarry Jordan2021-02-10 01:30:002021-02-06 10:37:55Tip #1404: How to Comp a Shot in 3 Different Tools
These sessions can help demystify color grading in post.
Image courtesy of Maxon.com.
Red Giant, now a part of Maxon, announced “Demystifying Post-Production: Shooting for the Grade.”
Join the Maxon Color Training Team every Monday in February, as they investigate grading workflows for your camera gear. They’ll look at key aspects of production, such as how the sensor can affect your grade, and how colorists can take advantage of different picture styles, including paint, shade and raw settings. They’ll provide practical recipes to help in post-production, and also show how you can leverage the new color handing features in Magic Bullet Looks inside DaVinci Resolve.
They’ll feature DaVinci Resolve techniques for color correction, but the concepts we’ll be covering are applicable to multiple applications and workflows, including Premiere Pro and Final Cut Pro X.
https://www.theinsidetips.com/wp-content/uploads/2019/09/Tips-Logo-700x150.jpg00Larry Jordanhttps://www.theinsidetips.com/wp-content/uploads/2019/09/Tips-Logo-700x150.jpgLarry Jordan2021-02-03 01:30:002021-02-03 01:30:00Tip #1375: Red Giant Offers Free Color Training
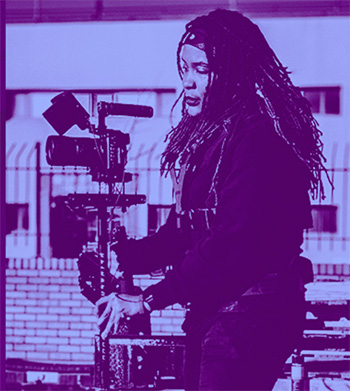
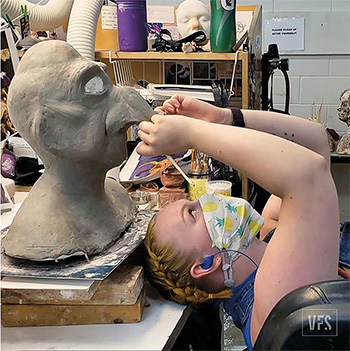
In-person classes are better, but here are some good alternatives.
Vancouver Film School Makeup Design for Film & Television student Aerien Steadman works on a clay sculpture after limited groups of students resumed campus activities last August. (Image courtesy of Vancouver Film School)
This article, written by Chris McGowan, first appeared in VFXVoice.com. This is a summary.
Once the pandemic hit and turned classes into virtual events, VFX and animation schools scrambled to get their curricula online, make classes glitch-free and dynamic, and offer remote access to workstations.
“As the world changed, so have we,” says Miguel Rodriguez about Vancouver’s InFocus Film School and its response to COVID-19. Rodriguez, Head of the 3D Animation and VFX program, comments, “It definitely was a rough process of adapting to the new normal. During the first week of the quarantine we worked hard to set up online learning tools and remote access to the class computers. It gave [students] 24/7 access to their workstations without leaving home.”
USC’s School of Cinematic Arts (SCA) animation and digital arts classes are using Zoom, Blackboard, SyncSketch and Slack, according to Teresa Cheng, Chair of the John C. Hench Division of Animation and Digital Arts at SCA, plus “our Creative Technology department has worked out virtual desktop access for our students via Teradici.” However, she emphasizes that “our value is in our faculty. Zoom is just a tool. Of course, there are limitations [in not] being physically in the same space, but good teachers always find inventive ways to reach their students and deliver good content.
The College of Motion Picture Arts at Florida State University pursued a hybrid model for the fall of 2020, going remote when possible, according to Ron Honn, Filmmaker-in-Residence, Visual Arts. He notes that the school went the extra mile for its students when the pandemic began. “We were determined that our students would have the equipment necessary to continue work on their projects. So we shipped professional camera packages, lighting and grip gear, as needed, to students in their various locations.”
InFocus Film School’s Rodriguez observes, “These are difficult times for everyone, but it’s also a great opportunity to look into developing your career. People will keep watching shows, movies and playing video games, much more so during these crazy times. That means more work needs to be done, more hands and talent are needed.”
EXTRA CREDIT
The article includes many more interviews, photos and details on specific software tools used to enhance teaching.
Please rate the helpfulness of this tip.
Click on a star to rate it!
https://www.theinsidetips.com/wp-content/uploads/2019/09/Tips-Logo-700x150.jpg00Larry Jordanhttps://www.theinsidetips.com/wp-content/uploads/2019/09/Tips-Logo-700x150.jpgLarry Jordan2021-02-03 01:30:002021-02-03 01:30:00Tip #1383: New Ways to Educate Tomorrow’s Pros
Additive dissolves add an extra visual “punch” in the middle of a dissolve.
Typical cross-fade dissolve (top) compared to an additive dissolve.
Normally, when we create a dissolve, in any NLE, the transition gradually moves from one clip to the next by cross-fading the opacity between the first clip and the next.
However, there is a lot of visual potential hidden in even the most mundane dissolve – if you know what to look for.
Most NLE’s include different dissolve settings – either as separate effects (Premiere) or settings within the dissolve (Final Cut).
An additive dissolve, for example, not only cross-fades using opacity, it also applies an additive blend mode during the dissolve which boosts the highlights in both clips as the transition progresses. (See the screen shot.)
NOTE: This works best when there are highlights in at least one of the shots. If both shots are dark, you won’t see much difference.
This has the effect of calling attention to the transition, rather than simply letting it slide past.
Please rate the helpfulness of this tip.
Click on a star to rate it!
https://www.theinsidetips.com/wp-content/uploads/2019/09/Tips-Logo-700x150.jpg00Larry Jordanhttps://www.theinsidetips.com/wp-content/uploads/2019/09/Tips-Logo-700x150.jpgLarry Jordan2021-02-03 01:30:002021-02-03 01:30:00Tip #1384: Add Punch to a Dissolve
Machine learning is accelerating all sorts of slow processes in visual effects.
Arraiy’s A.I.-based tracking solution in action.
This article, written by Ian Failes, first appeared in PremiumBeat.com. This is a summary.
If there’s a buzz phrase right now in visual effects, it’s “machine learning.” In fact, there are three: machine learning, deep learning and artificial intelligence (A.I.). Each phrase tends to be used interchangeably to mean the new wave of smart software solutions in VFX, computer graphics and animation that lean on A.I. techniques.
VFX Voice asked several key players – from studios to software companies and researchers – about the areas of the industry that will likely be impacted by this new world of A.I.
What exactly is machine or deep learning? An authority on the subject is Hao Li, a researcher and the CEO and co-founder of Pinscreen, which is developing ‘instant’ 3D avatars via mobile applications with the help of machine learning techniques. He describes machine learning (of which deep learning is a subset) as the use of “computational frameworks that are based on artificial neural networks which can be trained to perform highly complex tasks when a lot of training data exists.”
Since many graphics-related challenges are directly connected to vision-related ones – such as motion capture, performance-driven 3D facial animation, 3D scanning and others – it has become obvious that many existing techniques would immediately benefit from deep learning-based techniques once sufficient training data can be obtained.
The use of machine and deep learning techniques in the creation of CG creatures and materials is still relatively new, but incredibly promising, which is why several companies have been dipping their toes in the area. Ziva Dynamics, which offers physically-based simulation software called Ziva VFX, has been exploring machine learning, particularly in relation to its real-time solver technology.
“This technology,” explains Ziva Dynamics co-CEO and co-founder James Jacobs, “makes it possible to convert high-quality offline simulations, crafted by technical directors using Ziva VFX, into performant real-time characters. We’ve deployed this tech in a few public demonstrations and engaged in confidential prototyping with several leading companies in different sectors to explore use cases and future product strategies.”
One of the promises of deep and machine learning is as an aid to artists with tasks that are presently labor-intensive. One of those tasks familiar to visual effects artists, of course, is rotoscoping. Kognat, a company started by Rising Sun Pictures pipeline software developer Sam Hodge, has made its Rotobot deep learning rotoscope and compositing tool available for use with NUKE.
Hodge’s adoption of deep learning techniques, and intense ‘training,’ enables Rotobot to isolate all of the pixels that belong to a certain class into a single mask, called segmentation. The effect is the isolation of portions of the image, just like rotoscoping. “Then there is instance segmentation,” adds Hodge, “which can isolate the pixels of a single instance of a class into its own layer. A class could be ‘person,’ so with segmentation you get all of the people on one layer. With instance segmentation you can isolate a single person from a crowd.
Digital Domain’s Darren Hendler summarizes that “machine learning is making big inroads in accelerating all sorts of slow processes in visual effects. …In the future, I really see all these machine learning capabilities as additional tools for VFX artists to refocus their talents on the nuances for even better end results.”
EXTRA CREDIT
The source article has lots more detail, illustrations and links.
Please rate the helpfulness of this tip.
Click on a star to rate it!
https://www.theinsidetips.com/wp-content/uploads/2019/09/Tips-Logo-700x150.jpg00Larry Jordanhttps://www.theinsidetips.com/wp-content/uploads/2019/09/Tips-Logo-700x150.jpgLarry Jordan2021-01-27 01:30:002021-01-27 01:30:00Tip #1366: The New AI Frontier of VFX
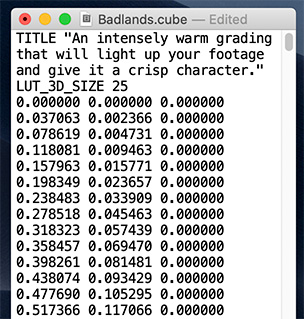
A LUT is a look-up table. Ideal for on-set use, more limited in post.
A LUT opened in TextEdit – just a table of numbers.
This article, written by Charles Haine, first appeared in NoFilmSchool.com. This is a summary.
A LUT is just a “lookup table.” That’s it. It’s a table of values. In fact, if you have a LUT of some sort, you can open that LUT in TextEdit or Notepad and read it. (See screen shot)
Every LUT format spells out what those numbers mean. So each number in the table refers to a specific color value in your image, and the numbers in the table tell the system how to change it. Make it brighter, make it darker, make it bluer, redder, greener.
You can think of a LUT as being a bit like a filter that changes what your footage looks like.
You’ll see a lot about 1D and 3D LUTs, and once you know the difference, it’s easy to remember.
A 1D LUT only covers one direction, brightness. So you’ll often see 1D LUTs used for converting log to linear footage, since that is a transformation of brightness.
A 3D LUT covers 3 dimensions, which are the red, green, and blue channels of color video. If you want to change the color of something, you’ll need a 3D LUT. Of course, brightness can be changed with a 3D LUT, but not as precisely and the files are bigger, so 1D LUTs remain popular for what they are used for.
Some might hear this and think, “Oh, a LUT is just a look!” And in some ways, a LUT and a “look” are somewhat similar. …A LUT can’t do sharpness. So it’s important to remember that a LUT and a look are different, with a LUT being a simple file designed for contrast, brightness, and color cast changes, while a “look” refers to all the things affecting the personality or vibe of an image.
First and foremost, it’s that a LUT affects your whole image the same way. You can’t apply any shape information on a LUT, so you can’t do a subtle vignette to point the eye or do anything else with shapes. A LUT affects every pixel in the frame the same way.
On top of that, LUTs have some technical issues that come from bit depth and banding. Because the file sizes of LUTs are small, you sometimes run into an issue where fine detail in a gradient comes in between steps in the table. This leads to an output that looks banded.
LUTs are best avoided as part of the final creative color grading process. When you get into your grading session, you might bring along your LUTs to show them to the colorist to help give them perspective on the looks you were using while shooting and editing, but it’s better for the colorist to recreate that look from scratch in their editing platform than to work with the LUT on.
Because of banding and gamut issues, LUTs can get in the way of taking full advantage of everything available to you in a final grade.
While LUTs are wonderful and are likely here to stay on set, they are slowly being moved out of post. The replacement is what is called a transform. Transforms are incredibly powerful because they don’t have the banding and gamut issues of LUTs. Since it’s math, there is no “out of gamut” error caused by the transform. It can always calculate a new value.
Please rate the helpfulness of this tip.
Click on a star to rate it!
https://www.theinsidetips.com/wp-content/uploads/2019/09/Tips-Logo-700x150.jpg00Larry Jordanhttps://www.theinsidetips.com/wp-content/uploads/2019/09/Tips-Logo-700x150.jpgLarry Jordan2021-01-27 01:30:002021-01-22 17:27:53Tip #1367: When to Use, or NOT Use, a LUT
We may request cookies to be set on your device. We use cookies to let us know when you visit our websites, how you interact with us, to enrich your user experience, and to customize your relationship with our website.
Click on the different category headings to find out more. You can also change some of your preferences. Note that blocking some types of cookies may impact your experience on our websites and the services we are able to offer.
Essential Website Cookies
These cookies are strictly necessary to provide you with services available through our website and to use some of its features.
Because these cookies are strictly necessary to deliver the website, refuseing them will have impact how our site functions. You always can block or delete cookies by changing your browser settings and force blocking all cookies on this website. But this will always prompt you to accept/refuse cookies when revisiting our site.
We fully respect if you want to refuse cookies but to avoid asking you again and again kindly allow us to store a cookie for that. You are free to opt out any time or opt in for other cookies to get a better experience. If you refuse cookies we will remove all set cookies in our domain.
We provide you with a list of stored cookies on your computer in our domain so you can check what we stored. Due to security reasons we are not able to show or modify cookies from other domains. You can check these in your browser security settings.
Google Analytics Cookies
These cookies collect information that is used either in aggregate form to help us understand how our website is being used or how effective our marketing campaigns are, or to help us customize our website and application for you in order to enhance your experience.
If you do not want that we track your visit to our site you can disable tracking in your browser here:
Other external services
We also use different external services like Google Webfonts, Google Maps, and external Video providers. Since these providers may collect personal data like your IP address we allow you to block them here. Please be aware that this might heavily reduce the functionality and appearance of our site. Changes will take effect once you reload the page.
Google Webfont Settings:
Google Map Settings:
Google reCaptcha Settings:
Vimeo and Youtube video embeds:
Other cookies
The following cookies are also needed - You can choose if you want to allow them:
Privacy Policy
You can read about our cookies and privacy settings in detail on our Privacy Policy Page.