… for Apple Final Cut Pro X

Tip #194: What is Audio Skimming?

Larry Jordan – https://LarryJordan.com

Audio skimming provides a high-speed preview of clip audio.

Click this icon to enable audio skimming in FCP X.

Topic $TipTopic

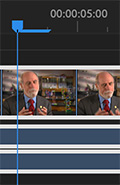
I have a love/hate relationship with skimming. I love using it in the Browser because it allows me to quickly review clips, but hate using it in the Timeline because it always seems to get in my way.

NOTE: You can toggle skimming on or off by typing S.

However, there’s a special form of skimming that you may not know about: audio skimming.

NOTE: The Blade, Trim and Range tools all act as skimmers when they are active.

By default, when you turn on skimming, you can quickly see the video, but not hear the audio. To turn on audio skimming, either click this icon so it turns blue, or type Shift + S.

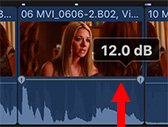
Now, when you drag over audio, you’ll hear it. (And even if you drag quickly, FCP X compensates for the speed and pitch adjusts the audio so it sounds normal.)

EXTRA CREDIT

Taking this one step further, you can turn on clip skimming, which allows you to hear the audio from one clip, but not the entire mix. For example, to hear dialog, without also hearing audio from the B-roll above it.

To enable clip skimming, first turn on audio skimming. Then, choose View > Clip Skimming (shortcut: Option + Cmd + S). Now, when you drag across a clip, you’ll just hear that clip.


Please rate the helpfulness of this tip.

Click on a star to rate it!

… for Apple Final Cut Pro X

Tip #192: Faster Ways to Show the Audio Meters

Larry Jordan – https://LarryJordan.com

One click to greater audio accuracy.

Miniature audio meters are displayed next to timecode in FCP X.

Topic $TipTopic

The audio meters in Final Cut are the only accurate way to measure the audio levels in your project. And, you probably display them using Window > Show in Workspace > Audio Meters. Or, um, you may just leave them open all the time.

NOTE: Or, you may be a shortcut lover like me and memorize the keyboard shortcut: Shift + Cmd + 8.

BUT… there’s an even cooler way to display the audio meters:

  • Click the small audio meter icon immediately to the right of the timecode display.
  • Click once to display the meters, click a second time to put them away.

Truthfully, I use this last option all the time.


Please rate the helpfulness of this tip.

Click on a star to rate it!

… for Adobe Premiere Pro CC

Tip #174: How to Fix a Crooked Horizon

Larry Jordan – https://LarryJordan.com

The human eye really, really likes a level horizon.

Tip Screen Shot

Topic $TipTopic These tips were first suggested in PremiumBeat.

Ideally, you are using both a tripod and a level for all your video shoots. But, in case you left one or both of them at home, here are three quick steps to level up a shot in post.

  1. Rotate the image. Use Effect Controls > Motion > Rotation. This is purely trial and error, but drag the rotation setting slightly until things are level.
  2. Check your corners. As you rotate your image, slices of black will appear at the corners. You’ll need to zoom in until these are gone. Hopefully, not a lot.
  3. Zoom in. Use Effect Controls > Motion > Scale to zoom in slightly so you don’t see the edges of a shot after you rotate it.

NOTE: Remember, the more you scale an image larger than 100%, the blurrier it will look. Ideally, shoot larger frame sizes than you need, if you plan to make these types of corrections in post.

EXTRA CREDIT

I often crop the image just above the edge of the horizon so I have a straight edge to use to determine when the horizon is actually level.


Please rate the helpfulness of this tip.

Click on a star to rate it!

… for Adobe Premiere Pro CC

Tip #141: How to Set a Poster Frame in the Project Panel

Larry Jordan – https://LarryJordan.com

Poster Frames are displayed in the Program Panel when no In or Out is set.

Tip Screen Shot

Topic $TipTopic

A Poster frame is a still image displayed in a clip when you are in thumbnail view in the Project panel. Poster frames are displayed when no In or Out is set. By default, the poster frame is the first frame in a clip, unless you change it.

Here’s how to create a new poster frame.

  • To set a poster frame for the media clip, drag the playhead or hover scrub to the desired frame, and then press Command + P (macOS) or Shift + P (Windows).
  • To clear the poster frame, press Option + P (macOS) or Ctrl + Shift + P (Windows).

Please rate the helpfulness of this tip.

Click on a star to rate it!

… for Adobe Premiere Pro CC

Tip #140: What’s the Minimum Duration of a Clip?

Larry Jordan – https://LarryJordan.com

Durations are always measured in frames and displayed using timecode.

Tip Screen Shot

Topic $TipTopic

A “duration” is the number of frames between the In and Out of a clip; or the entire clip if no In or Out is set. In Premiere Pro, the In point and Out points specify all durations in any panel. So, how are durations determined?

  • The In INCLUDES the frame it is parked on.
  • The Out EXCLUDES the frame it is parked on.

For example, setting the In point and Out point to the same frame results in a clip with a duration of one frame. In other words, Premiere requires a minimum duration of one frame.


Please rate the helpfulness of this tip.

Click on a star to rate it!

… for Codecs & Media

Tip #078: For Best Quality, Export a Master File

Larry Jordan – https://LarryJordan.com

“Highest quality” doesn’t always mean matching your camera format.

Tip Screen Shot

Topic $TipTopic

If you are in a hurry, export what you need to post and get on with your life.

However, one lesson I’ve learned over the years is that there’s never “just one version” of any project. Copies using different codecs and compression always need to be made. My recommendation is to ALWAYS export a master file of any project and archive that, so that when copies need to be made, you don’t need to reopen a project, reconnect media, re-render effects and re-export. A master file saves all that wasted time.

But, what is a master file? In terms of editing, it means exporting a video that matches your project settings. There’s no reason to export a different format, because the highest quality you can export is that which is the same as the project settings.

For example, exporting an H.264 project as ProRes 4444 will generate a larger file, but not higher quality.

This is why I recommend transcoding highly-compressed camera master files into a higher-quality intermediate codec before starting editing. Transcoding won’t improve the quality of what you shot, but it can improve the quality of transitions, effects and color grading; and, thus, the entire project prior to export.


Please rate the helpfulness of this tip.

Click on a star to rate it!

… for Codecs & Media

Tip #031: What Determines Storage Speed?

Larry Jordan – https://LarryJordan.com

Storage performance is key to successful video editing.

Tip Screen Shot

Topic $TipTopic

As you might expect, storage performance is dependent upon multiple factors – and how it connects is only a part. Storage speed, which is often called “bandwidth,” is determined by:

  • How it is connected to your computer, including the protocol used for communication
  • The number of drives or devices it contains

For example, Thunderbolt 3 is very, very fast – up to 3,000 MB/second! But, if that device only has one spinning hard disk inside, the actual speed will be closer to 150 MB/second. Here are three typical examples:

  • A single spinning hard drive transfers data about 150 MB/sec.
  • A single PCIe SSD transfers data around 400 MB/sec
  • A single NVMe SSD transfers data around 2,500 MB/sec

Think of it this way: The Thunderbolt 3 protocol is a very, very large water pipe. The devices connected to it determine how much water flows inside that pipe.

You can have a very large pipe, but if you are only filling it with a garden hose, you won’t get a whole lot of water through of it.


Please rate the helpfulness of this tip.

Click on a star to rate it!

… for Codecs & Media

Tip #014: Optimize Audio Levels for MP3 Compression

Larry Jordan – https://LarryJordan.com

MP3 compression sounds best when audio levels are not excessive.

Tip Screen Shot

Topic $TipTopic

The MP3 audio compression standard was invented back in the days of analog audio. Because of this, the compression standard was optimized for audio levels lower than 0 dB to prevent problems with high-energy transient audio peaks, which an analog system often didn’t catch.

Specifically, MP3 audio files sound the best if average peak levels are around -6 dB.

AAC (MPEG-4) audio files, however, being newer and taking advantage of digital technology, are optimized for audio levels that peak right at 0 dB.


Please rate the helpfulness of this tip.

Click on a star to rate it!

… for Apple Final Cut Pro X

Tip #193: When Can Audio Levels Exceed 0 dB?

Larry Jordan – https://LarryJordan.com

Audio levels must NEVER exceed 0 dB, except…

Increasing clip audio levels to +12 dB in FCP X.

Topic $TipTopic

When can audio levels exceed 0 dB? Smile… this is a trick question. Why? Because there are two types of audio levels: Relative and Absolute.

When we adjust the levels of a clip, we are adjusting the audio levels of the clip relative to the level at which it was recorded. Most dialog is recorded at lower levels to prevent distorting the audio during the original performance. Music, which is highly processed, is mastered within a few tenths of a dB of 0. So, we generally boost levels for dialog and reduce levels for music.

Unlike clips, the levels displayed by the audio meters are the absolute audio level of your project.

So, the answer to this question is that when we adjust audio levels on a clip, we often go far above 0 dB. However, during export, audio levels displayed on the audio meters must never exceed 0 dB, or the audio on the master file will distort.


Please rate the helpfulness of this tip.

Click on a star to rate it!

… for Apple Final Cut Pro X

Tip #191: What’s In An FCP X Library Backup?

Larry Jordan – https://LarryJordan.com

Backups, like saving, are automatic.

FCP X automatic library backups, stored by project.

Topic $TipTopic

We all know that Final Cut Pro X automatically saves anything we do in the app the instant we do it. In fact, I’ve had beta builds of FCP X crash a fraction of a second after I made an edit, yet, when I restarted the app, everything I had done was saved.

Which is very cool.

But did you know that FCP X also saves a backup copy of your Library, just in case…?

NOTE: You can see all backups, grouped by project name, in [User Directory] > Movies > Final Cut Backups. The backup location can be changed using File > Library Properties.

To access a backup copy, for example, to go back in time to an earlier edit, open Final Cut, then choose File > Open Library > From Backup. Next, select the date and time of the version you want to open from the menu.

NOTE: Opening a backup will not affect the currently open Library. Instead, FCP X makes a copy of the backup, stores it in the Movies folder and attempts to link it with the original media.

EXTRA CREDIT

As you can see from the file sizes in this screen shot, you need to know that these backups are ONLY of the library database. Any media stored in the library is not backed up. For this reason, while Library backups will preserve your edits, you are still responsible for backing up all your media separately; even media stored in a Library.


Please rate the helpfulness of this tip.

Click on a star to rate it!