… for Visual Effects

Tip #792: Stunning Light Effects

Larry Jordan – LarryJordan.com

Fully-animated, colorful textures for multiple applications.

A lighting effect created by Spectrum, from Luca Visual Effects.

Topic $TipTopic

Recently, I was playing with the fascinating Spectrum plugin from Luca Visual FX. This generates fully-animated, full-screen light effects that can be used as backgrounds, illuminated text fills, or anywhere visually appealing, yet amorphous, backgrounds are required.

Spectrum is a bundle of two very customizable generators designed to create stylized light and color effects. Light Effect Generator can be used either to create unusual backgrounds or subtle overlays. Light Transition Generator allows the user to create freely interpreted quick light and color transitions over a given cut point.

Available from FX Factory, this generator supports:

  • Final Cut Pro X
  • Motion
  • Premiere Pro
  • After Effects

This plugin offers 1,400 (if I did my math right) different presets, plus tons of customization.

The plug-in costs $89 (US), however, a free trial is available to give you a chance to experiment. And, ah, giggle. This creates some very cool looks.

Here’s the link.


Please rate the helpfulness of this tip.

Click on a star to rate it!

… for Codecs & Media

Tip #780: What’s a Proxy File?

Larry Jordan – LarryJordan.com

Proxy files are a tradeoff: faster performance with lower image quality.

The proxy file (green) has 1/4 the pixels of the source media, but with the same geometry. The pixels aren’t bigger, just fewer.

Topic $TipTopic

At its simplest, a proxy file is a “stand-in,” a proxy, for another file. However, when it comes to media, a proxy file is a smaller version of the original file.

This reduced size provides several benefits:

  • Smaller storage requirements
  • Slower bandwidth requirements
  • Ability to run on older or slower systems

However, while smaller files are a good thing, the real challenge is to create proxy files that provide a similar geometry to the source file, otherwise, any effects you create with them will need to be altered when you switch back to the source media.

For this reason, proxy files, by intent, are 1/4 the size of the source image but with the same aspect ratio as the source file. This decreases file size and bandwidth by 75%, but matches the geometry of the source.

The easiest way to create this is to divide each frame into a series of 4-pixel grids, then remove 3 of the 4 pixels in each grid. This means that a 4K (3840 x 2160) becomes 960 x 540. Often, many proxy files use 1280 x 720 because this is already a common video format.

While not providing the same image quality as the source media, the image is good enough to use for editing, until the time comes for final effects, color grading and output.


Please rate the helpfulness of this tip.

Click on a star to rate it!

… for Random Weirdness

Tip #760: 6 Categories of Documentary Films

Larry Jordan – LarryJordan.com

Which category does your doc best fit?

Topic $TipTopic

This article, written by Jourdan Aldredge, first appeared in PremiumBeat.com. This is an excerpt.

Documentary filmmaking is a cinematic style dating back to the earliest days of film. For film and video professionals looking to work in documentary filmmaking, it’s important to understand a bit of its history, as well as the different documentary types.

While there’s a lot of variation within, these are the six main categories of the genre into which all documentary films can be placed.

  • Poetic Documentaries. First seen in the 1920s, poetic documentaries are very much what they sound like. They focus on experiences, images, and showing the audience the world through a different set of eyes. Abstract and loose with narrative, the poetic sub-genre can be very unconventional and experimental in form and content. The ultimate goal is to create a feeling rather than a truth.
  • Expository Documentaries. These are probably closest to what most people consider “documentaries.” Those looking for the most direct form of documentary storytelling should explore the straightforward expository style. It’s is one of the best ways to share a message or information.
  • Observational Documentaries. These attempt to give voice to all sides of an issue by offering audiences firsthand access to some of the subject’s most important (and often private) moments and allow the audience to observe the world around them.
  • Participatory Documentaries. These include the filmmaker within the narrative. There’s some debate in the documentary community as to just how much filmmaker participation it takes to earn a documentary the label of “participatory.” In fact, some argue that, due to their very nature, all documentaries are participatory. Regardless, this style might be one of the most natural for those just starting off.
  • Reflexive Documentaries. These are similar to participatory docs in that they often include the filmmaker within the film. However, unlike participatory, most creators of reflexive documentaries make no attempt to explore an outside subject. Rather, they focus solely on themselves and the act of making the film.
  • Performative Documentaries. these are an experimental combination of styles used to stress subject experience and share an emotional response with the world. They often connect and juxtapose personal accounts with larger political or historical issues. This has sometimes been called the “Michael Moore-style,” as he often uses his own personal stories as a way to construct social truths (without having to argue the validity of their experiences).

EXTRA CREDIT

The article link above has examples and reference videos for all these categories. It is worth reading in full.


Please rate the helpfulness of this tip.

Click on a star to rate it!

… for Codecs & Media

Tip #732: How Many Megapixels is the Eye?

Larry Jordan – LarryJordan.com

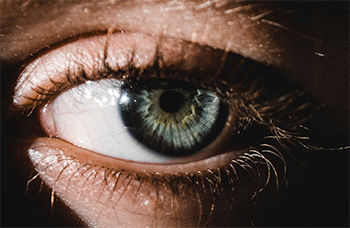
The eye is 576 megapixels – except, ah, it really isn’t.

The eye is more like a movable sensor than a camera.

Topic $TipTopic

This article first appeared in Discovery.com. This is an excerpt.

According to scientist and photographer Dr. Roger Clark, the resolution of the human eye is 576 megapixels. That’s huge when you compare it to the 12 megapixels of an iPhone 7’s camera. But what does this mean, really? Is the human eye really analogous to a camera?

A 576-megapixel resolution means that in order to create a screen with a picture so sharp and clear that you can’t distinguish the individual pixels, you would have to pack 576 million pixels into an area the size of your field of view. To get to his number, Dr. Clark assumed optimal visual acuity across the field of view; that is, it assumes that your eyes are moving around the scene before you. But in a single snapshot-length glance, the resolution drops to a fraction of that: around 5–15 megapixels.

Really, though, the megapixel resolution of your eyes is the wrong question. The eye isn’t a camera lens, taking snapshots to save in your memory bank. It’s more like a detective, collecting clues from your surrounding environment, then taking them back to the brain to put the pieces together and form a complete picture. There’s certainly a screen resolution at which our eyes can no longer distinguish pixels — and according to some, it already exists — but when it comes to our daily visual experience, talking in megapixels is way too simple.


Please rate the helpfulness of this tip.

Click on a star to rate it!

… for Codecs & Media

Tip #703: What is GoPro Cineform?

Larry Jordan – LarryJordan.com

This 12-bit, full-frame video codec is optimzied for speed and image quality.

Topic $TipTopic

GoPro CineForm is a 12-bit, full-frame wavelet compression video codec. It is designed for speed and quality, at the expense of a very high compression size. Image compression is a balance of size, speed and quality, and you can only choose two. CineForm was the first of its type to focus on speed, while supporting higher bit depths for image quality. More recent examples would be Avid DNxHD and Apple ProRes, although both divide the image into blocks using DCT.

The full frame wavelet has a subject quality advantage over DCTs, so you can compression more without classic ringing or block artifact issues. Here are the pixel formats supported:

  • 8/10/16-bit YUV 4:2:2 compressed as 10-bit, progressive or interlace
  • 8/10/16-bit RGB 4:4:4 compressed at 12-bit progressive
  • 8/16-bit RGBA 4:4:4:4 compressed at 12-bit progressive
  • 12/16-bit CFA Bayer RAW, log encoded and compressed at 12-bit progressive
  • Dual channel stereoscopic/3D in any of the above

Compression ratio: between 10:1 and 4:1 are typical, greater ranges are possible. CineForm is a constant quality design, bit-rates will vary as needed for the scene. Whereas most other intermediate video codecs are a constant bit-rate design, quality varies depending on the scene.

EXTRA CREDIT

Here’s a link to learn more.


Please rate the helpfulness of this tip.

Click on a star to rate it!

… for Visual Effects

Tip #694: What is Parallax?

Larry Jordan – LarryJordan.com

Reducing parallax is important in panoramic stills, VFX and Stereo 3D video.

Topic $TipTopic

Parallax is the difference in the apparent position of an object viewed along two different lines of sight; say from the left eye to the right eye, or each lens of a stereo 3D video camera.

As the eyes of humans and other animals are in different positions on the head, they present different views simultaneously. This is the basis of stereopsis, the process by which the brain exploits the parallax due to the different views from the eye to gain depth perception and estimate distances to objects.

In addition to its use in making stereo3D believable, parallax is also used in panoramic images, visual effects and web design.

EXTRA CREDIT

Even if your camera setup is perfectly level, you won’t be happy with the results for panoramic images until you eliminate image parallax. Image parallax occurs when near and far objects don’t align in overlapping images. For example, if you’re shooting a scene that contains a fence line, each fencepost in Image 1 should line up with its twin in Image 2. You can eliminate the effects of parallax by placing the optical center of the lens (not the camera) directly over the point of rotation.

Learn more here


Please rate the helpfulness of this tip.

Click on a star to rate it!

… for Codecs & Media

Tip #690: H.264 vs. HEVC – What’s the Difference?

Larry Jordan – LarryJordan.com

Smaller file size, greater image quality; but requiring more CPU power to encode or decode.

Topic $TipTopic

This tip, written by Ana Rodrigues, first appeared in Medium.com. This is a summary.

Conceived to boost video streaming, High Efficiency Video Coding (HEVC), or H.265, is a video compression standard designed to substantially improve coding efficiency when compared to Advanced Video Coding (AVC), or H.264.

With this new format, image resolutions around 8192×4320 become possible to display and stream. HEVC reduces file sizes 40-60%, depending upon frame size. As well, when compared to H.264, HEVC/H.265 delivers a significantly better visual quality, when compressed to the same file size or bitrate.

However, apart from the fact that the codec is patented by various parties and it is associated with high licensing fees, HEVC/H.265 comes with the trade-off requiring almost 10x more computing power.

Both codecs work by comparing different parts of a video frame in order to find the ones that are redundant within the subsequent frames. These areas are replaced with a short information, describing the original pixels. What differs HEVC/H.265 from H.264 is the ability to expand the size of these areas into bigger or smaller blocks, called coding tree units (CTU) in the HEVC/H.265. The pattern CTU sizes can be from 4×4 to 64×64, whilst H.264 only allows a maximum block-size of 16×16 (CTU is particular feature of HEVC). An improved CTU segmentation, as well as a better motion compensation and spatial prediction require much more signal processing capability for video compression, but has a significantly less impact on the amount of computation needed for decompression. Motion compensated prediction, another great progress in HEVC/H.265, references blocks of pixels to another area in the same frame (intra prediction) or in another frame (inter prediction).


Please rate the helpfulness of this tip.

Click on a star to rate it!

… for Random Weirdness

Tip #678: A Guide to On-Set Film Terms – Part 2

Larry Jordan – LarryJordan.com

Topic $TipTopic

The intrepid team at MotionArray.com has compiled a glossary of film terms. This list relates to the key people on set. There’s the producer, who’s the money, and the director, the creative force, but who are all the rest of these people? 

  • 1st AD. The first assistant director is basically the second in charge on any set. They serve as the all-important link between the head honcho director and the entire cast and crew and are responsible for ensuring that the production runs like a well-oiled machine. Did someone say presssshhha?
  • 2nd AD. Working directly under the 1st AD, the second assistant director is responsible for drafting up all the logistical documents (call sheets and the like) and making sure that the 3rd AD has the cast and crew in check.
  • 3rd AD. The third assistant director is basically one big people wrangler. It’s their job to ensure that all members of the cast and crew are in the right place and the right time.
  • Gaffer. Head electrician responsible for setting up all of the lighting equipment used in a given production. You might also hear them being referred to as a Spark or Juicer.
  • Key Grip. Head technician responsible for setting up all the non-electrical lighting equipment. (Think lighting modifiers, flags, cookies, etc).
  • Best Boy. Assistant to either the Gaffer or Key Grip, distinguished by the titles Best Boy Electric or Best Boy Grip.
  • Second Unit. A completely separate crew charged with filming any takes that don’t involve face-to-face interaction, such as inserts and action sequences. Second units usually work simultaneously alongside the main unit to help speed up the production process.

Please rate the helpfulness of this tip.

Click on a star to rate it!

… for Random Weirdness

Tip #677: A Guide to On-Set Film Terms – Part 1

Larry Jordan – LarryJordan.com

These eleven terms are heard daily on virtually every production set.

Topic $TipTopic

The intrepid team at MotionArray.com has compiled a glossary of film terms. Here’s a sample that relates to the gear on set.

  • Blonde. A type of light but much brighter than a redhead. (1,000-2,000 watts).
  • Boom Mic. A directional mic mounted to the end of a long pole that is then wielded by sound technician folk to capture close-range audio.
  • Clapper. So it turns out that black-and-white striped board that someone snaps in front of the camera before every take does have a name. And that name is clapper. Or clapboard. Or a clacker. This does two very important things: It displays all the scene and take info that the crew needs to sort through the footage at a later date, and the snappy sound it makes is essential for syncing video with the audio during post.
  • Dead Cat. A fuzzy black cover that goes over the end of a boom mic.
  • Dolly. A wheeled cart onto which you mount a camera in order to capture smooth horizontal shots. Ever since steadicams came onto the scene, the use of dollies has been reduced in production.
  • Hot Brick. A walkie-talkie with a fully charged battery.
  • Legs or Sticks. Simple slang for a tripod.
  • Redhead. A type of light with a power rating in the vicinity of 800 watts.
  • Squib. A tiny explosive device used to simulate a bullet hitting an actor. You’ve probably seen squillions of these throughout your movie-watching career.
  • Steadicam. This stabilizing contraption enables you to strap a camera to your big ol’ belly (or rather a vest that you’re wearing around your big ol’ belly) to get those super smooth shots.
  • Stinger. An extension cord

Please rate the helpfulness of this tip.

Click on a star to rate it!

… for Adobe Premiere Pro CC

Tip #668: Productions: Toggle Read-Write

Larry Jordan – LarryJordan.com

Switching between read-only and read-write is a single mouse click.

Green indicates you have read-write permission. Red indicates read-only.

Topic $TipTopic

Switching a project between read-write and read-only (and back) is a single mouse click. Here’s what you need to know.

First, if someone else has the file open read-write, you can’t take over the file, you can only have read-only access until the other editor releases it to the group.

Open the file from the Production panel. If someone else has the file open or if you are the only person who has the file open but were not the creator, it will open as read only.

To switch a file between read-write (green pencil) and read-only (red lock) simply click the pencil or lock icon in the extreme lower-left corner of the Premiere interface.

EXTRA CREDIT

A good reason to switch a file to read-only is to allow another editor to add graphics or titles to an ongoing project.


Please rate the helpfulness of this tip.

Click on a star to rate it!