… for Apple Motion

Tip #620: Clone vs. Copy in Apple Motion

Larry Jordan – LarryJordan.com

Clones simplify syncing style changes.

Control-click any layer and choose Make Clone Layer.

Topic $TipTopic

I just discovered clones in Motion recently. Clones are an easy way to make multiple elements all look the same and change their look in sync with each other.

Create an element and make of copy of it. These become independent elements. When you change the color of one, it doesn’t affect the other.

Clones, though, are different. Clones are EXACT style and geometry replicas of the original. While you can apply different effects and transform settings to each, all the options in Inspector > Shape disappear for a clone.

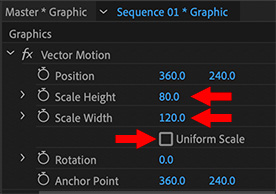
When you change any of the Style or Geometry settings of the master, they are instantly reflected in the clone. And you can’t change the color or geometry of a clone – the options themselves don’t exist.

The more you play with this, the more ways you’ll find to use it.

EXTRA CREDIT

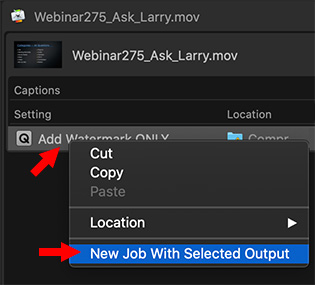
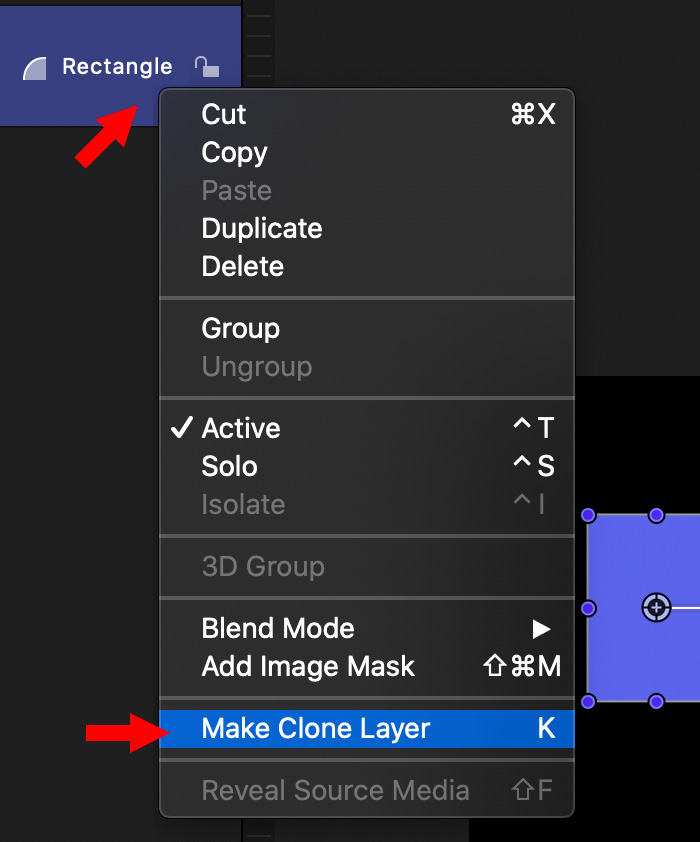
To create a clone, control-click an element in the Layer panel and choose Make Clone Layer (shortcut:K).


Please rate the helpfulness of this tip.

Click on a star to rate it!

… for Visual Effects

Tip #634: Three Easy Recipes for Fake Blood

Larry Jordan – LarryJordan.com

Fake blood stains easily. Be careful of your clothes.

Image courtesy of Raindance.com.
Nothing like blood everywhere to add, uh, impact.

Topic $TipTopic

This tip originally appeared in Raindance.com article. This is an excerpt.

We all gotta die sometime – however most actors prefer that it not happen on camera. For those situations, we need FAKE BLOOD! Here are three recipes.

Corn Syrup Blood

This is the recipe that pretty much everyone uses, and there’s a lot of variations so feel free to experiment.

  • 16 oz. White corn syrup (Karo syrup – this is a US product, but adding golden syrup does the job just as well, alternatively just mix sugar and water and reduce on the stove until it becomes syrupy)
  • 1 oz. red food coloring
  • 1 oz. washing detergent
  • 1 oz. water

Options: Add a drop of blue food coloring to create a more realistic color. Remove the detergent if you want to make edible blood. Adding condensed milk makes it less transparent and more like real blood.

The blood is extremely sticky and can stain skin and clothes so makes sure it’s washed off quickly and have stain remover handy for clothes!

Jelly Blood

Microwave 3-4 bottles of glycerin then add one cube of strawberry jelly and mix until dissolved. Then add a small amount of gelatine (1/5 of a packet) and then add red food colouring to desired effect. Keep stirring until mixed well. It is slightly runny but great for that Reservoir Dogs look in the back seat of the car. All ingredients are easily found in supermarkets.

Black and White Blood

Take a tip from the old school and use opaque chocolate syrup as used by Alfred Hitchcock in Psycho. Tastes delicious as well!


Please rate the helpfulness of this tip.

Click on a star to rate it!

… for Visual Effects

Tip #633: Storyboarding Visual Effects

Larry Jordan – LarryJordan.com

Storyboards and production design are integral to all visual effects.

Doubling – a split-screen effect. (Image courtesy of StoryboardThat.com)

Topic $TipTopic

This tip, written by visual effects artist, Miguel Cima, first appeared in StoryboardThat.com. This is a summary.

From the very beginning of the creative process, imagination is in play. Before a thing exists, it must be visualized in the mind. This happens in filmmaking all along the way. First the screenplay must be written, a necessary text exercise which does not allow for initial images. Then comes the storyboard. At this point, the first spark of what lies inside the artist’s mind comes to life.

Deep into film’s history, various techniques have been employed to insert imagery which was not filmed on set with things which were. Regardless of how special visual effects are accomplished, one central challenge has always been consistently presented to filmmakers: how can a scene be filmed when much of it cannot be seen at all? Here are some of the more common visual effects used in live action feature films, and how the filmmaker can approach mastering the art of “see you later.”

  • Animation. The good news for the filmmakers is that a well-crafted storyboard will serve as a guide in pre-production to get cast and crew familiar with the idea of what the final frames and sequences will look like. When combined with character illustrations and production design renderings, a full picture can be grasped to help translate not only the action, but the mood of what will be added in later.
  • Miniatures. One of the oldest tricks in the special visual effects book is the use of miniatures. Traditionally, this meant building scale models of environments to represent very large sets like entire cities, massive vehicles, huge structures, and so forth.
  • Matte Paintings. Another time-honored method to add large-scale environments is the Matte Painting. There’s a few different ways to do it, but essentially, an artist paints a highly detailed photo-realistic set piece, often on a massive scale, to depict what a set could not.
  • Stop Motion. There’s a certain charm to stop motion animation, even if the final product cannot mask what it is. From old classics like King Kong to 2015’s Oscar-Nominated Anomalisa, there’s a texture to exposing fully posable models one frame at a time that CGI can never recreate.
  • Doubling. Everybody seems to love twins. And clones. Whatever the case, every time you see a double of a character on screen, it is almost invariably the technique of doubling which you are watching (as opposed to using real-life twins, triplets, etc.). But as always, doing early tests with the tech on hand can do an even better job on performance prep.

EXTRA CREDIT

The article itself, as well as the illustrations, are a fun, easy read.


Please rate the helpfulness of this tip.

Click on a star to rate it!

… for Visual Effects

Tip #632: Crop vs. Trim: What’s the Difference?

Larry Jordan – LarryJordan.com

The difference is what happens to the original frame size.

The Crop vs. Trim options in Apple Final Cut Pro X.

Topic $TipTopic

It’s a simple thing that confuses a lot of people: What’s the difference between crop and trim?

Well, first, they have a lot in common:

  • Both remove portions of the image.
  • Both use rectangles to work their magic
  • Both allow us to concentrate the viewer’s eye on a certain part of the image.

The big difference is that crop always reduces the image size to match the cropped area, while trim does not alter the image size.

EXTRA CREDIT

If you trim an image on the lowest layer, you’ll create black areas for the removed portions of the original image.

Generally, trimming is used for elements on higher layers/tracks, while cropping is used for the lowest layer/track/background.


Please rate the helpfulness of this tip.

Click on a star to rate it!

… for Codecs & Media

Tip #637: Compressor: Job Chaining

Larry Jordan – LarryJordan.com

Job chaining creates an intermediate master file, which saves time creating derivatives.

The Job Chain menu in Apple Compressor.

Topic $TipTopic

There is a hidden feature in Apple Compressor that can save time when creating multiple versions of the same master file. It’s called “Job Chaining” and here is how it works.

Every week, when I post my webinars, I add a watermark of my website URL into all the compressed versions. However, I never export the master file with a watermark, so that I always have a clean copy for archiving.

One of the versions I create is an HTTP Live Streaming (HLS) version of it for mobile devices. (See Tip #635). The problem is that HLS compression creates thousands of short ten-second movies from the master file. There’s no easy way to add watermarks to them.

So, I do this in two steps:

  • First, create an intermediate master file – using ProRes 4444 – with a watermark.
  • Then take the output of that process and “job chain” it as the source file for HLS compression. (see screen shot)

Specifically:

  • Import your master file into Compressor
  • Apply the setting to create the interim master – in my screen shot, this is called “Add Watermark Only.” All it does is burn a watermark into the intermediate master. Because I am working with ProRes 4444 there is no loss in audio or video quality.
  • Control-click the compression setting and choose New Job with Selected Output.
  • This creates a new line in Compressor to which I apply the HTTP Live Streaming settings.

This allows me to create one master file with the watermark, rather than re-create it over and over again.

I use this technique every week.


Please rate the helpfulness of this tip.

Click on a star to rate it!

… for Codecs & Media

Tip #636: Compressor: What is a Job Action?

Larry Jordan – LarryJordan.com

This only applies when one setting is applied to a video.

The Job Action menu at the bottom of the Job panel in Compressor.

Topic $TipTopic

A Job Action in Apple Compressor is an automated activity that occurs when a compression task is complete. It is assigned to the job, not to a compression setting. Here’s how it works.

  • Select a movie (called a “job” in Compressor), not the compression setting.
  • At the bottom of the Job panel is the Action section. This describes what can be done with a compressed file when compression is complete.
  • There are ten options, as illustrated in this screen shot. Save only means the file will be saved and nothing else done to it.

For example, choosing Publish to YouTube, asks for your log-in credentials, project title, description and tags. When compression is complete, the compressed file will be automatically transferred to YouTube with the tags you specify.


Please rate the helpfulness of this tip.

Click on a star to rate it!

… for Codecs & Media

Tip #635: HTTP Live Streaming

Larry Jordan – LarryJordan.com

HTTP Live Streaming compensates for shifts in bandwidth for mobile devices.

HTTP Live Streaming compression settings applied to a job-chained clip.

Topic $TipTopic

The problem with mobile devices is that the bandwidth that connects them to the web changes as they move from one cell tower to another. This becomes important when watching movies that are longer than 10 minutes.

Apple Compressor has a feature – called HTTP Live Streaming – that compensates for this difference in bandwidth. This process compresses a master file into ten-second segments, using seven different frame sizes and bandwidths. In the case of my one-hour webinars, it generates about 2,000 separate segments.

This allows the server to seamlessly switch between different quality levels as bandwidth changes. If you are connected via a high-speed Internet WiFi connection, all these different segments are ignored. They only apply to mobile devices connected via cell towers.

My website has supported this playback style for seven years now. The problem is that implementing this takes a bit of programming from your webmaster.

EXTRA CREDIT

Here’s an article that explains this process in more detail. Remember, this only applies to movies longer than ten minutes which are NOT streaming on a social media service.

The reason you don’t need to worry about this if your files are streamed on Facebook or Vimeo, et al, is that these services create the HLS versions automatically on their servers.


Please rate the helpfulness of this tip.

Click on a star to rate it!

… for Adobe Premiere Pro CC

Tip #626: How to Easily Edit SRT Captions

Larry Jordan – LarryJordan.com

It is easy to make minor corrections to SRT caption files.

This is what an SRT caption text file looks like, viewed in Text Edit.

Topic $TipTopic

SRT captions are text files which are both easy to read and easy to edit. These text files can be opened in any text editor, such as Text Edit or BBEdit.

The format of the text inside the file is very specific:

  • Caption number. This must be on the top line and a unique, sequential number.
  • Timecode. This indicates the start and end of the caption, with the last set of numbers set off by a comma and representing milliseconds.
  • Caption text. This is one or two lines of text. Notice that this text file does not support significant text formatting.

As long as your text lines don’t run too long, you can easily correct spelling or punctuation errors.

EXTRA CREDIT

While you can correct timing in this file, Premiere makes timing adjustments easier within their respective programs.


Please rate the helpfulness of this tip.

Click on a star to rate it!

… for Adobe Premiere Pro CC

Tip #621: Color Management Secret in Premiere

Larry Jordan – LarryJordan.com

Color management not easy – but this menu choice helps.

Display Color Management is off by default. Turn it on.

Topic $TipTopic

A common complaint about Premiere is that colors often look darker in Premiere than in other software. This is caused by color management differences between software.

First, if you have a modern system, go to Preference > General and turn ON Display Color Management. (It is off by default.)

Second, read this very helpful blog by Carolyn Sears, at Adobe.


Please rate the helpfulness of this tip.

Click on a star to rate it!

… for Adobe Premiere Pro CC

Tip #609: What Does Uniform Scale Do?

Larry Jordan – LarryJordan.com

Disabling Uniform Scale allows stretching images assymetrically.

When Uniform Scale is turned off, height and width can be scaled independently.

Topic $TipTopic

By default, when you scale (resize) an image, Premiere maintains the aspect ratio. This means the image gets larger or smaller, but retains its overall shape. But, what if that’s not what you want?

When Uniform Scale is checked, whenever you adjust the size of an image, both height and width scale in proportion. This retains the overall shape (aspect ratio) of an image.

When Uniform Scale is unchecked, horizontal and vertical size can be scaled independently. This allows for some very interesting – and weird – visual effects. Especially when you keyframe the size changes over time.


Please rate the helpfulness of this tip.

Click on a star to rate it!