… for Random Weirdness

Tip #023: Eight Tips to Help You Pick the Right Gear

Larry Jordan – https://LarryJordan.com

Let these help you plan for your next computer.

Tip Screen Shot

Topic $TipTopic

I’ve spent a lot of time researching and writing about how to plan your next computer purchase for media editing. Here are eight guidelines to help you plan your next editing system:

  • The tighter the deadlines, the more you should spend for both computer and storage. Faster is worth the money.
  • 16 – 32 GB of RAM is sufficient for almost all video editing.
  • Premiere editors should spend a bit more for a faster CPU.
  • Final Cut editors should spend a bit more for a faster GPU.
  • If you can afford it, get an i7 or i9 CPU.
  • Budget to spend as much for storage as you do for the computer. I know, you don’t want to, but at some point you’ll need to.
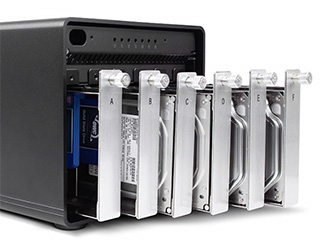
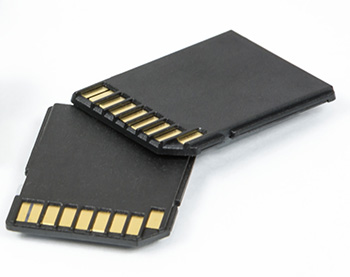
  • As you move to 4K, HDR or Raw media editing, you’ll need to migrate to external SSD or RAID drives. I know, you don’t want to, but at some point you’ll need to – and sooner than you expect.
  • Larger computer screen sizes are better, because editing interfaces are complex. Large screens make the interface and media easier to see.

Please rate the helpfulness of this tip.

Click on a star to rate it!

… for Random Weirdness

Tip #072: Where Should You Store Media

Larry Jordan – https://LarryJordan.com

Internal or external storage. Which is best?

Tip Screen Shot

Topic $TipTopic

As much as we obsess about our computers, storage is much more important to media editors. When it comes to planning your storage and media, there are two essential questions you need to ask:

  • How much capacity do you need?
  • How much speed do you need?

Most current computers – and all Macs – use high-speed SSDs for their internal boot drives. These provide blazing speed but very limited storage capacity.

So, as you are thinking about where to store media, consider this:

  • If you have a small project, using the internal SSD is fine.
  • If you have a large project, or need to move it between computers or editors, external storage is better because it is more flexible.
  • For best results, store cache files (and Libraries in FCP X) on the internal boot drive or your fastest external storage.
  • SSDs are about four times faster than spinning media (traditional hard disks), but spinning media holds more and is much cheaper.
  • A single spinning hard disk is fine for HD, but not fast enough for 4K or HDR,
  • RAIDs are preferred for massive projects, like one-hour shows or features, large frame sizes, HDR, or faster frame rates. They hold more and transfer data much faster than a single drive.
  • Don’t store media on any gear connected via USB 1, 2, or 3 Gen 1. It won’t be fast enough. Howver, you can use these devices for backups and longer-term archiving.
  • Servers are fine for storing and accessing media, but they won’t be as fast as locally-attached storage.
  • In general, if you are getting dropped frame errors, it means your storage is too slow to support the media you are editing. Invest in faster storage.

Please rate the helpfulness of this tip.

Click on a star to rate it!

… for Random Weirdness

Tip #098: What’s the Best Way to Repair the Boot Disk?

Larry Jordan – https://LarryJordan.com

Not all repairs work the same – this is better.

Tip Screen Shot

Topic $TipTopic

A common question, when it comes time to maintain your computer system, is whether it really makes a difference to switch to Recovery mode to repair a hard disk. There are two answers:

  • No, if it is an external disk
  • Yes, if it’s the boot disk

WHY?

While we can repair an external drive at any time, we really can’t repair the boot disk when it is running AS the boot disk. By definition, all the OS files need to be open and active and we can’t repair an open, running file. Disk Utility compensates for this, but it can’t do a complete repair.

By launching into Recovery mode, we are booting from a completely different part of the hard drive, using totally different files. This allows Disk Utility to fully repair everything on the main boot disk – Macintosh HD – without interference.

EXTRA CREDIT

To launch into Recovery Mode, restart your Mac while pressing Cmd + R. Startup will take longer, but, when complete, you’ll be able to run First Aid from Disk Utility. I try to do this once a month or so.


Please rate the helpfulness of this tip.

Click on a star to rate it!

… for Random Weirdness

Tip #030: What Do RAID “Levels” Mean?

Larry Jordan – https://LarryJordan.com

Enhance RAID performance by picking the right level.

Tip Screen Shot

Topic $TipTopic

RAIDs (Redundant Array of Independent Disks/Drives/Devices) consist of a number of hard drives or SSDs grouped together into a single unit so that they appear to the computer as a single device. Because there is more than one hard drive in a RAID, they offer greater performance and storage.

There are different levels of RAIDs, identified by numbers:

  • RAID 0 – Fast, inexpensive, no data redundancy. Requires a minimum of two hard drives inside the RAID enclosure. The more drives you add, the faster the performance, as performance and storage capacity are the sum of all drives in the RAID. However, if you lose one drive, you’ve lost ALL your data. Most often used when speed combined with low cost are paramount.
  • RAID 1 – Complete data redundancy. Generally only uses two hard drives inside the RAID enclosure. Often called “mirroring,” each drive is a complete copy of the other. Most often used for backing up servers or when on-set for DIT media work. Has the speed and capacity of the slowest single drive in the system.
  • RAID 3 – Medium-fast, data redundancy. Requires a minimum of three drives, as one drive is reserved solely for parity data. Should one drive die, your data is safe. This technology is no longer in common use, replaced by the faster performance of RAID 4 or 5 systems.
  • RAID 4 – Very-fast, data redundancy. Similar to RAID 3, requires a minimum of three drives, as one drive is reserved solely for parity data. Should one drive die, your data is safe. This is the preferred RAID format for SSD drives because of how the data is stored on the drives. When compared to a RAID 5, RAID 4 with SSDs is about 25% faster on reads.
  • RAID 5 – Very fast, data redundancy. Requires a minimum of three drives and shares parity data across all drives. Most often found with four or more drives inside. If one drive goes down, your data is safe. This is the preferred choice for RAIDs containing spinning media (traditional hard disks). Used for both locally-attached storage and servers.
  • RAID 6 – Fast, extra data redundancy. Requires a minimum of four drives. This version protects your data in the event two hard drives die at the same time. More expensive than RAID 5, but, generally, the same physical size. Like the RAID 5 this is most often used connected to just one computer. Not as fast as a RAID 5.
  • RAID 10 (or 1+0) – VERY fast, totally redundant. Requires a minimum of four drives, but is more often created by combining two matched RAID 0’s into a RAID 1. This provides the speed equivalent of a RAID 0, with the data redundancy of RAID 1. As RAIDs continue to drop in price, this can be a less-expensive way to create systems that rival the performance of a RAID 50.
  • RAID 50 – VERY fast, data redundancy. Generally the domain of very large RAIDs, this format combines the speed of RAID 0 with the redundancy of RAID 5 by dividing the RAID into sections, where you can lose a drive in each section without losing data. These systems generally cost more than $10,000 and contain at least twelve drives. Generally used in network and server situations where multiple users need to access the same data.
  • RAID 60 – VERY fast, extra data redundancy. Generally the domain of very large RAIDs, this format combines the speed of RAID 0 with the redundancy of RAID 6 by dividing the RAID into sections, where you can lose two drives in each section without losing data. These systems generally cost more than $10,000 and contain at least twelve drives. Generally used in network and server situations where multiple users need to access the same data.

Please rate the helpfulness of this tip.

Click on a star to rate it!

… for Random Weirdness

Tip #053: Safe Zones

Larry Jordan – https://LarryJordan.com

Don’t let key text or graphics get cut off.

Tip Screen Shot

Topic $TipTopic

Back in the old days, when TV’s had picture tubes, producers discovered that when a program was broadcast, text which was easily readable in the control room was cut off on most home TV sets.

This was caused by the fact that images back then were generated by scanning a high-voltage electron beam across the inside glass of the picture tube, causing the phosphors that coated the picture tube to glow.

The problem was that the manufacture of these picture tubes was not precise, meaning that edges of the image would be cut off, but it could be a different edge for each picture tube.

So, to solve this problem, directors and graphics designers created two boundaries within the image. While we still need to compose a complete frame, when adding text or other essential graphics we need to pay attention to these two boundaries to make sure all the essential elements safely make it to the home viewer.

  • Action Safe is 5% in from all edges. All essential actors and action need to be contained inside the outer rectangle.
  • Title Safe is 10% in from all edges. All essential text, logos and graphics need to be contained inside the inner rectangle.

Even today, programs destined for broadcast or cable must follow these guidelines. However, for the web, where media is displayed digitally, my recommendation is to keep all essential text and logos inside Action Safe (the outer rectangle).

Why? Two reasons:

  • We are all used to watching this framing on all professionally produced programs. Adopting the same looks says that we are professional, too.
  • You really don’t have any control over where your digital media files will play, Even today, using rear screen or front projection, images get cut off.

There’s no reason to risk losing that critical phone number or URL simply because you put your text too close to the edge.


Please rate the helpfulness of this tip.

Click on a star to rate it!

… for Random Weirdness

Tip #071: An Editing Workflow to Boost Efficiency

Larry Jordan – https://LarryJordan.com

Eleven steps to boost your productivity.

Tip Screen Shot

Topic $TipTopic

Workflows exist to help you accomplish a task efficiently. These eleven steps were developed to help editors focus on what needs to be done now – as opposed to what you want to do now.

  1. Plan. The more time you spend planning, the faster the actual edit will go. Specifically think about what you need to deliver, then work everything backward from that.
  2. Gather. Gather all the media you need and put it where you can access it. Once you start editing, try not to move media.
  3. Import & Label. Import media into your project then label it so you can find it.
  4. Build the story. The most time-consuming part is figuring out what order of clips best tells your story.
  5. Organize and trim the story. Once you have the story roughly told, organize your clips to tell it better. Then, trim the edit points so the story flows smoothly from one shot to the next.
  6. Add transitions. Only after you have the story built and organized should you spend time adding transitions.
  7. Add text and effects. Now that the story is complete, polish it with text and effects. This will take all the available time between now and your deadline, which is why you need to build your story first.
  8. Mix the Audio. When the story is told and pictures are locked, its time to mix the audio.
  9. Color grade the story. While the audio mix is going on, color grade the images to create the look you want.
  10. Output the project. When everything is done, create the final version.
  11. Archive the project. Archiving is critical in today’s digital world. We are ALWAYS re-purposing assets. What do you need to keep for the long-term, where are you going to store it and how are you going to pay for it to be stored there?

All too often, we jump right into the sexy part of editing with transitions and effects, only to lose sight of the fact that, first, we need to tell a compelling story.


Please rate the helpfulness of this tip.

Click on a star to rate it!

… for Random Weirdness

Tip #029: Which Files Should Be Copied From a Camera Card?

Larry Jordan – https://LarryJordan.com

“Pick-and-Choose” is the wrong option for best results.

Tip Screen Shot

Topic $TipTopic

All of them.

Select the entire contents of the card, even the folders and files that you don’t recognize, and copy the entire contents of the card into its own folder on your hard disk.

One folder per camera card. Always.

Why? Because, depending upon the codec, different parts of your media are stored in different folders on the card; especially metadata. Copying everything from the card into its own folder on your local storage means that whichever NLE you use for editing is able to assemble all the pieces and track all your data without any problems.


Please rate the helpfulness of this tip.

Click on a star to rate it!

… for Random Weirdness

Tip #038: Magic Maintenance: Do a Safe Boot

Larry Jordan – https://LarryJordan.com

Three steps for smooth operations.

Tip Screen Shot

Topic $TipTopic

Keeping our systems running their best requires periodic maintenance. A Safe Boot is something you can do yourself and, for best results, I recommend you do this every couple of weeks. This will not affect the data or applications stored on your system.

  • Start, or restart, your computer while holding the Shift key down. Continue holding the Shift key for 30 seconds after you see the start-up thermometer appear.
  • Log into your computer. You know you held the Shift key down long enough if the words “Safe Boot” appear in the upper right corner of your screen. If they don’t, restart your system and press the Shift key until the log-in screen appears.
  • After login, go to Utilities > Disk Utility, select the name of your boot drive (generally, “Macintosh HD”) from the sidebar on the left then choose First Aid.
  • When repair is complete, restart your Mac and, this time, don’t hold any keys down.

BONUS

Sometimes, your system will act strange and Safe Boot won’t fix it. Here’s a more thorough repair process:

  • Restart your computer and press Cmd + R during restart. This will take a LOT longer than normal. This launches your computer from a hidden partition with a “recovery version” of macOS on it. This allows much deeper repair of the boot disk.
  • After a bit, a menu will appear allowing you to choose between four options. Choose Disk Utility.
  • Again, select your boot drive and click First Aid. When repair is complete, restart your computer.

Following these procedures should minimize the amount of time you spend trying to fix problems with your system.


Please rate the helpfulness of this tip.

Click on a star to rate it!

… for Random Weirdness

Tip #061: When To Choose JPG, PNG or TIFF?

Larry Jordan – https://LarryJordan.com

Different codecs are best for different uses.

Tip Screen Shot

Topic $TipTopic

While there are a LOT of image codecs, there are only four that you’ll need to choose from most of the time: PSD, JPG or JPEG, PNG, and TIFF. So, which should you choose?

Here are some tips.

PSD

This is the native Photoshop format.

Use this when you need to retain the ability to edit the elements of an image or when you want to enable, or disable, specific layers within the image.

NOTE: For best results, always embed media into the Photoshop file.

JPG or JPEG

This is a highly-compressed file best used for final distribution. Good image quality in a very small file size.

Part of compressing a JPEG file involves throwing away color data and reducing some of the image quality. While this is almost always OK for images destined for the web, it is not a good idea for any image that you want to edit.

NOTE: Compressing an already compressed file will materially damage quality.

PNG

This is a modestly compressed image format. Excellent image quality with a large file size.

This is a more modern format than TIFF and is the best choice for outputting finished images at high quality. While you can’t reedit a PNG image the way you can a PSD, this provides excellent image quality. PNGs, unlike JPEG, supports an alpha channel for transparent image elements.

The biggest limitation of PNG is that it is only supports 8-bit color.

TIFF

This is a lightly compressed image format, providing excellent image and color quality with a large file size.

TIFF is my go-to still image format. Supporting up to 10-bit color, alpha channels and essentially lossless images, it has been around for a long, long time.

The biggest limitation of TIFF is that, unlike PSD, you can’t edit elements within the image.


Please rate the helpfulness of this tip.

Click on a star to rate it!

… for Random Weirdness

Tip #009: Counting Words for Voice-Over Timing

Larry Jordan – https://LarryJordan.com

Media is like poetry. Every word counts.

Tip Screen Shot

Topic Icon

The following word count timings should assist you in determining how many words will comfortably fit within a specified amount of time in a spot. This guide assumes a “normal” rate of speech (neither fast nor slow) and a basic “announcer” read.

WORD COUNT TIMINGS

SECONDS WORDS
3 seconds
7 words
5 seconds
12 words
7 seconds
17 words
10 seconds
23 words
15 seconds
35 words
30 seconds
70 words
60 seconds
140 words

NOTE: For phone numbers, each spoken number = 1 word.
(i.e., 1-877-000-0000 = 11 words)


Please rate the helpfulness of this tip.

Click on a star to rate it!