… for Visual Effects

Tip #796: Particle Illusion – the App – Now FREE!

Larry Jordan – LarryJordan.com

Particle Illusion – the application – is now free.

A screen shot from a Particle Illusion demo by BorisFX.com.

Topic $TipTopic

Particle Illusion – the standalone application from BorisFX – is now available and FREE!

The new Particle Illusion application makes creating real-time motion graphics and particles a breeze.

  • Fun, fast, and easy-to-use
  • 2500+ professionally-designed, drag & drop presets
  • Unlimited hardware-accelerated particles
  • Unlimited particle emitters
  • Add forces and deflectors to create organic movement
  • Lightning-fast renders with ProRes export
  • Integrated motion blur
  • Supports up to 8K projects

See the video, learn more and download here.


Please rate the helpfulness of this tip.

Click on a star to rate it!

… for Visual Effects

Tip #798: The 3D Motion & Design Show Premieres

Larry Jordan – LarryJordan.com

Maxon redesigned and rebranded CineUniversity to 3DMotionShow.

Screen shot detail from first presentation at 3DMotionShow.com.

Topic $TipTopic

The team at Maxon – Cinema 4D, RedGiant & RedShift – have created a new online training and education website: 3DMotionShow.com.

It premiered June 18, with shows continuing until Dec. 9, 2020.

Current titles include:

  • Rigging and Animating Characters in Cinema 4D for the Hillarious Short: “Coffee Run”
  • Cinema 4D, Redshift and Red Giant Techniques Used to Create VFX for Talos
  • Time-Saving Compositing Tips in VFX Suite
  • Building a Crystal Cave with Cinema 4D/Redshift for the Short: “The Search”

Here’s the link to learn more and watch.


Please rate the helpfulness of this tip.

Click on a star to rate it!

… for Apple Final Cut Pro X

Tip #788: The Floating Timecode Window

Larry Jordan – LarryJordan.com

The project timecode window displays the current project playhead location.

The floating Project Timecode window.

Topic $TipTopic

There are two floating timecode windows in Final Cut Pro X: one for projects and one for source media. Here’s how to use the Project Timecode window.

  • Choose Window > Project Timecode to display the floating window.
  • Drag a corner to resize it.
  • Control-click in the window to copy the currently-displayed timecode.
  • Drag the window to move it.

I use this window for most of my edits, just to help me remember where I am.

EXTRA CREDIT

Open the Commands window, search for “timecode” then assign keyboard shortcuts to:

  • Toggle the project timecode window open or closed.
  • Copy project timecode
  • Paste project timecode

Tip #789 illustrates the Source Timecode window.


Please rate the helpfulness of this tip.

Click on a star to rate it!

… for Visual Effects

Tip #783: Red Giant Tutorials

Larry Jordan – LarryJordan.com

RedGiant Product Quick Tips are a fast way to see what’s possible.

A RedGiant Product Quick Tip: Quick & Awesome Titles

Topic $TipTopic

Wondering how to create a specific effect? Or hoping to find a faster and easier way to create the effect you see in your imagination?

The team at RedGiant has published a ton of tutorials covering their products, along with usage tips for nine different host applications (Avid, DaVinci, Final Cut, and Premiere, to name four).

What’s especially helpful is their series of Quick Tips – short video demos that illustrate cool effects you can create without a lot of extra work using their tools.

Here’s the link to learn more.


Please rate the helpfulness of this tip.

Click on a star to rate it!

… for Visual Effects

Tip #784: NewBlueFX Titling Tutorials

Larry Jordan – LarryJordan.com

NewBlueFX provides effects with an emphasis on titles

A sample title from NewBlueFX Titler Pro.

Topic $TipTopic

NewBlueFX is not well known on the Mac, but they’ve been creating effects for Windows systems for years.

They are best known for titling and effects, with both Titler Pro and Titler Live. They currently support Premiere, Avid, Edius, VEGAS and their own application: NewBlue Titler Pro 2+.

If you want to see what’s possible, and how to create it, check out their tutorials page. NewBlueFX has a wealth of plugins, templates and tutorials to bring your titles to the next level.

Here’s a link to learn more.


Please rate the helpfulness of this tip.

Click on a star to rate it!

… for Visual Effects

Tip #785: A Good Green-screen Tutorial

Larry Jordan – LarryJordan.com

Quality green screen keys focus on lighting, background and separation.

Image from B&H green-screen video.

Topic $TipTopic

As this video tutorial makes clear, the worst thing you can say on set about a green-screen effect is: “We’ll fix it in post.” As this video tutorial from B&H makes clear, by the time you get a green-screen to post, it is often too late.

This video tutorial illustrates key concepts to improve the quality of green-screen work on set; from lighting to background to staging. While the entire video is filled with tips – and only runs about three minutes – the most useful are examples to help you pay attention to your lighting.

Here’s the link to watch.


Please rate the helpfulness of this tip.

Click on a star to rate it!

… for Codecs & Media

Tip #781: What is Debayering?

Larry Jordan – LarryJordan.com

Virtually all cameras only record partial images. Debayering is required to make them whole.

A camera sensor Bayer pattern (Image by en:User:Cburnett – Own work, CC BY-SA 3.0)

Topic $TipTopic

Debayering, or demosaicing, is a digital image process that reconstructs a complete image from the incomplete color samples recorded by virtually every video camera.

In this screen shot, notice that the camera records twice as many green pixels as either red or blue.

Wikipedia writes: Most modern digital cameras acquire images using a single image sensor overlaid with a color filter array (CFA). This has alternating red (R) and green (G) filters for odd rows and alternating green (G) and blue (B) filters for even rows. There are twice as many green filters as red or blue ones, catering to the human eye’s higher sensitivity to green light.

Since each pixel of the sensor is behind a color filter, the output is an array of pixel values, each indicating a raw intensity of one of the three filter colors. (The camera sensor itself only captures luminance data.) Thus, an algorithm is needed to estimate for each pixel the color levels for all color components, rather than a single component. Demosaicing is part of the processing required to render these grayscale images into a viewable image.

EXTRA CREDIT

Many modern digital cameras can also save images in a raw format allowing the user to demosaic them using software, rather than using the camera’s built-in firmware.

Here’s a Wikipedia article to learn more.


Please rate the helpfulness of this tip.

Click on a star to rate it!

… for Apple Final Cut Pro X

Tip #765: Customize Your Timeline

Larry Jordan – LarryJordan.com

This control only affects the timeline display, it doesn’t change any clips.

The Clip Appearance button in the top-right corner of the Timeline.

Topic $TipTopic

Final Cut offers several ways to customize the look of the timeline. Over in the top right corner of the timeline is an icon that looks like a film strip. This is the Clip Appearance button. This provides a variety of controls over how the timeline looks in Final Cut Pro X.

  • The top slider zooms into or out of the timeline. (For me, it is faster to use keyboard shortcuts: Cmd + [plus], Cmd + [minus], and Cmd + Z.)
  • The six icons on the second row determine the ratio of waveform to image. Far left is waveform audio only, second from the right is image only. The far right icon reduces the height of all tracks to thinner lines so you can see the overall organization of your project.
  • The slider on the third row determines the height of all clips.

The four checkboxes at the bottom enable the display of:

  • Clip names.
  • Multicam camera angle names.
  • Clip Role names.
  • Lane Headers. These only apply when you are displaying Roles.

Please rate the helpfulness of this tip.

Click on a star to rate it!

… for Random Weirdness

Tip #762: How Lens Focal Length Affects a Video Image

Larry Jordan – LarryJordan.com

Too wide and too tight are both poor choices for lens angle.

Topic $TipTopic

This article, written by Mike Wilkinson, first appeared in fstoppers.com. This is an excerpt.

We can learn a lot from studying what happens to an image at different focal lengths. Here, I’ll discuss the visual effects created when choosing a wide versus telephoto lens for documentary-style interview productions.

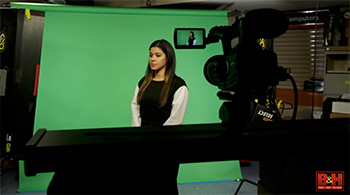
While using wide-angle lenses can be helpful when working in tight spaces, especially when filming B-roll for a project, rarely are they an ideal choice for capturing interviews.

With a focal length of less than 28mm, not only will you have to stand very close to the subject, but if the subject approaches the edges of the frame, it’s quite possible that barrel distortion or keystoning may happen to parts of their body. Facial features can become exaggerated, and that’s usually not desirable.

Another byproduct of using wide-angle lenses is how much more apparent the background becomes. It can appear further away, and your viewer will be able to see much more of the surrounding location

Focal lengths between 35mm and 50mm can be a “safer” choice when you still want to include some of the background, or don’t have a large space to work in.

My go-to choice for most documentary style interviews is usually between the range of 70mm and 110mm, depending on the space and how much background I want to show.

I find that for a 2-camera interview shoot, my lens kit will include a 24-70, 70-200, and an 85mm prime. These lenses should provide me with all of the options I need for both a medium shot and a closeup.

EXTRA CREDIT

The article includes more lens detail, as well as photos illustrating the author’s production process.


Please rate the helpfulness of this tip.

Click on a star to rate it!

… for Apple Motion

Tip #750: What Are Simulation Behaviors?

Larry Jordan – LarryJordan.com

Simulation behaviors are very simple ways to create complex motion.

The Simulation Behavior submenu in Apple Motion.

Topic $TipTopic

The following text is from the Apple Motion Help files.

Simulation behaviors perform one of two tasks. Some Simulation behaviors, such as Gravity, animate the parameters of an object in a way that simulates a real-world phenomenon. Other Simulation behaviors, such as Attractor and Repel, affect the parameters of objects surrounding the object to which they’re applied. These behaviors allow you to create sophisticated interactions among multiple objects in your project with minimal adjustments. Like the Basic Motion behaviors, Simulation behaviors also affect specific object parameters. Examples include Attractor, Gravity, and Repel.

Important: Several Simulation behavior parameters contain object wells into which you drag target objects used as attractors, repellers, orbiters, and so on. Dragging an object to a well can be tricky—be sure to drag the object name (or thumbnail) from the Layers list to the object well in the Inspector without releasing the mouse button until the pointer is over the object well. If you click the object in the Layers list and release the mouse button, that behavior object is deselected its parameters are no longer displayed in the Inspector. This applies to all object wells, including mask source wells and image wells.


Please rate the helpfulness of this tip.

Click on a star to rate it!