… for Visual Effects

Tip #845: New Tutorial on Visual Effects

Larry Jordan – LarryJordan.com

Earth invaded! Jets vs. Dinosaurs. What’s not to like?

(Image courtesy of Pexels.com.)

Topic $TipTopic

Maxon and Red Giant have teamed up to create a new visual effects tutorial on how to create an alien invasion. And, it wouldn’t be Red Giant if there wasn’t a twist. This invasion features dinosaurs..!

Inspired by the 1996 hit movie Independence Day, Seth Worley took on the challenge of replicating the invasion, sans the octopus-like aliens from the film, opting instead for flying dinosaurs. Seth used Cinema 4D to create the short film’s supervillains and tools from Red Giant Complete to incorporate Independence Day-style visual effects. In the YouTube tutorial out now, Seth showcases how to work with lens distortion, camera tracking, 3D animation, color correction, compositing and much more to create the larger-than-life effects.

According to Red Giant, the full set of tools used includes:

  • Maxon Cinema 4D: Cinema 4D is an Academy Sci-Tech Award-winning professional 3D modeling, animation, and rendering software solution. Its powerful and flexible toolset makes 3D workflows more accessible for design professionals.
  • VFX Lens Distortion Matcher: A tool that makes it incredibly easy to undistort footage from any lens so that elements can be composited into a shot. Even if the kind of lens is unknown – wide angle, GoPro, fisheye, etc. – Lens Distortion Matcher can figure it out instantly.
  • VFX Supercomp: Supercomp is a compositing environment that makes it easy to create complex, seamless composites. In Supercomp, light and atmospheric effects interact with all layers and elements of a scene in a far more natural way, and with far less pre-composing in After Effects than ever before.
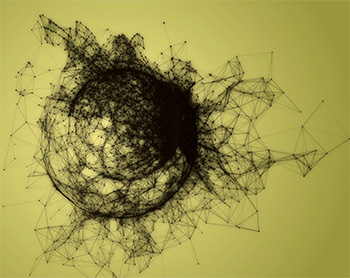
  • Trapcode Tao: With tools to generate complex procedural 3D geometries using built-in auto paths, mask shapes, and the motion from 3D lights, Trapcode Tao brings new depth to motion graphics projects.
  • VFX Optical Glow: A blazing fast, drop-dead gorgeous, photo-realistic glow effect for After Effects and Premiere Pro, Optical Glow makes adding picture-perfect glow effects to projects incredibly simple.
  • Red Giant Universe: Red Giant’s collection of GPU-accelerated video effects and transitions plugins for motion graphics artists and editors, Universe boasts over 85 tools supported across eight host-applications.
  • Magic Bullet Colorista IV: Magic Bullet Colorista IV provides professional color correction for filmmakers, turning Adobe Premiere Pro and After Effects into a high-speed professional color grading environment.

Here’s the link to the YouTube video


Please rate the helpfulness of this tip.

Click on a star to rate it!

… for Visual Effects

Tip #847: 5 “Old School” Effects That Still Work

Larry Jordan – LarryJordan.com

Effects don’t always need computers to be effective.

Image courtesy of MotionArray.com.

Topic $TipTopic

This article first appeared in MotionArray.com. This is an excerpt.

Special effects have come a long way since the black and white films of yesteryear. Nevertheless, there’s still a handful of techniques pioneered over a century ago that are still alive and well in Hollywood today.

  1. Forced Perspective. This is an optical illusion used to make an object or a character appear larger, smaller, closer, or further away than it actually is. It’s a technique that’s been used since the days of Charlie Chaplin, all the way up until today, playing an especially pivotal role in the Lord Of The Rings trilogy.
  2. Rotoscoping. Over the last two decades, the art form has advanced to ‘interpolated rotoscoping,’ a digital process that uses computer graphics and vector keyframes to create animation instead.
  3. Dolly Zoom. The dolly zoom (a.k.a. the Vertigo effect) is an iconic cinematic technique. The vertigo effect is achieved by zooming the camera lens in, while simultaneously drawing the camera back in the opposite direction on a dolly—or vice versa.
  4. Miniature (Tilt Shift) Effect. Simply speaking, miniature effect refers to any artificial sets or models that feature in a film. With the advent of CGI, the miniature effect has slowly but surely been working its way onto the special effect endangered list in recent years. But it’s still far from extinct.
  5. Matte Painting. In a nutshell, this is where you paint part or all of a landscape you aren’t able to film because a) it doesn’t exist, or b) you don’t have the budget to create it.

Here’s the link to the full article, including links and illustrations.


Please rate the helpfulness of this tip.

Click on a star to rate it!

… for Visual Effects

Tip #848: 10 Essential After Effects Plugins

Larry Jordan – LarryJordan.com

Plugins make creating the impossible a whole lot easier.

Image courtesy of PremiumBeat.com.

Topic $TipTopic

This article, written by Lewis McGregor, first appeared in PremiumBeat.com. This is an excerpt.

Whether you’re an After Effects veteran or an AE newbie, these ten plugins are a fantastic addition to your motion design toolkit.

  1. Trapcode Particular 4 (and Trapcode Suite 15)
  2. Lockdown
  3. Element 3D
  4. Plexus 3
  5. Newton 3
  6. Optical Flares — Video Copilot
  7. Boris Continuum 2020.5
  8. Deep Glow
  9. Data Mosh
  10. Render Garden

NOTE: The article linked above has product descriptions, video tutorials, and links to further your interest.


Please rate the helpfulness of this tip.

Click on a star to rate it!

… for Adobe Premiere Pro CC

Tip #839: FX Badge Colors Actually Mean Something

Larry Jordan – LarryJordan.com

Badge colors can help you quickly spot which clips have effects applied.

The four colors of clip Fx badges.

Topic $TipTopic

Have you ever wanted to know which clips in your sequence have effects applied to them? Or, have you ever want to know which clips have specific effects applied to them? Well, there’s an easy way to find out – check the color of the FX badge!

  • Gray. No effects applied.
  • Green. A Motion effect (position, scale…) is applied to a clip.
  • Yellow. A speed change or keyframe effect is applied.
  • Purple. An effect from the Effects panel is applied.

EXTRA CREDIT

I looked these up, here’s Adobe’s official list of badge colors:

FX badge color Denotes
Gray No effect applied (default badge color)
Purple Non-intrinsic effect applied (like, color correction, blur)
Yellow Intrinsic effect modified (like, position, scale, opacity)
Green Intrinsic effect modified and additional effect applied
Red underline Master Clip effect applied

Please rate the helpfulness of this tip.

Click on a star to rate it!

… for Apple Final Cut Pro X

Tip #836: Automatic Keyword Creation

Larry Jordan – LarryJordan.com

Use folder names as key words to quickly find clips without manually creating lots of events.

Media is stored in clearly labeled folders. When you import a folder, the folder name is assigned to each clip as a keyword.

Topic $TipTopic

There’s a huge benefit to clearly naming the folders where media is stored before you import your clips. The reason? Keywords.

For example, in this screen shot, I gave each media folder an easy-to-read name.

NOTE: For your projects, pick names which help you determine which files are in each folder. Names need not be this simple, though shorter names are better.

When it comes time to import, select the containing folder (“Pond5” in this example), not just individual clips.

Make sure, in the Import Settings on the right of the Media Import window, that Keywords > From Folders is checked.

This means that, when you import the file, FCP X will assign a keyword to each clip with the name of the folder(s) that contained it. A mountain shot stored in the Scenic folder would be given “Scenic” and “Pond 5” as keywords.

These keywords make it VERY fast to find all the files stored in the same folder without having to create lots of extra events to organize them.


Please rate the helpfulness of this tip.

Click on a star to rate it!

… for Random Weirdness

Tip #826: Capture Stunts Better with a Long Lens

Larry Jordan – LarryJordan.com

The key to stunts is to imply danger while keeping everyone on set safe.

Image courtesy of Pexels.com.

Topic $TipTopic

This article, written by Rubidium Wu, first appeared in PremiumBeat.com. This is an excerpt.

Shooting on long lenses is an easy way to capture normal actions and make them appear as dangerous stunts. It’s a good technique to learn and practice, because, ultimately, a director’s first duty is making sure everyone — stunt performers, actors, and camera crew — gets home safely at the end of the day.

However, the history of stunts in movies has been marred by injuries and deaths of stunt performers (and sometimes even camera crews). Lloyd himself suffered numerous injuries and burns throughout his career, even with the primitive camera tricks they used to distance him from danger.

As cameras and optics evolved, filmmakers found innovative ways to make stunts safer and sell better. The most used and useful of these is via a long lens, which continues to be a cheap and effective way for filmmakers — of all levels and budgets — to sell stunts right up to present day.

In the article linked above, Rubidium provides examples, tips and links on the best ways to shoot stunt work.


Please rate the helpfulness of this tip.

Click on a star to rate it!

… for Random Weirdness

Tip #827: When Is It Time to Fire Your Client?

Larry Jordan – LarryJordan.com

The creative arts are stressful- don’t let clients make them worse.

Image courtesy of Pexels.com.

Topic $TipTopic

This article first appeared in MotionArray.com. This is an excerpt.

The truth is, everyone wants to work, and everyone wants to make money, but sometimes it’s not worth the hassle to deal with a bad client. So, when do you know when it’s time to let go of a client and get on with your life? Take note of these situations and consider if it’s worth letting go.

  • Please Pay Me. We all know those clients that ask you for a ton of revisions, then they can’t seem to remember to drop the check in the mail. There are also really nice clients who never seem to pay on time either. The point is, you deserve to be paid, and you deserve to be paid on time.
  • R-E-S-P-E-C-T. Any client has the right to not like what you are putting out. It happens all the time. After all, art is subjective. But that doesn’t give a client the right to treat you like a child…or worse. If a client can’t treat you like the talented artist you are and respect that you are a human, well, then you can do better.
  • Revisions Never End. This one is tricky. After all, there is a fine line between too many revisions, and you just not being able to deliver what’s being asked. Working with clients is always going to have its fair share of headaches. And many times it’s not even the client’s fault. We artists can be hard to work with too. It’s a give and take, and we do want to work after all. But when you start dreading the client call, when you have to really wonder if it’s worth it to take that new project, then it probably isn’t.

Please rate the helpfulness of this tip.

Click on a star to rate it!

… for Apple Motion

Tip #820: Weird Fun with Bulges

Larry Jordan – LarryJordan.com

Animated text as something moves behind it creates a funny and unusual look.

(Footage courtesy of Jim Walker and Lobsters Gone Wild Productions.)
The Bulge behavior animates as the shark’s fin swims behind it.

Topic $TipTopic

OK. This has no social redeeming quality whatsoever, but it made me laugh. Here’s a cool trick using the Bulge filter.

  • Place some text, in my example I used the word “Shark,” on top of a clip that has things moving through it; a shark’s fin in my example.
  • Apply Filters > Distort > Bulge.
  • Drag the circle that surrounds Bulge in the Viewer to get the shape and position you want.
  • Go to Inspector > Filters > Bulge and adjust settings as you see fit.
  • Then, keyframe the Center parameter so that the Bulge moves as something moves behind it; the shark’s fin in my example.

NOTE: Be sure to start and end with no bulge for best results. You do this by dragging the Bulge Center off to one side or the other.

EXTRA CREDIT

Experiment with different blend modes for the text to see if it improves the look for the clips you are using.


Please rate the helpfulness of this tip.

Click on a star to rate it!

… for Apple Motion

Tip #822: Photoshop-like Image Control – in Motion

Larry Jordan – LarryJordan.com

The Levels filter performs the same function as in Photoshop – but the pixel display is not as good.

The Levels filter, with settings applied to a clip.

Topic $TipTopic

Hidden deep within Motion is an image tool that would feel comfortable to most Photoshop users: Levels. Here’s where to find it.

The Levels filter provides separate control over grayscale shadows, midtones, and highlights in an image.

To apply it:

  • Select the layer with the clip you want to adjust.
  • Choose Filters > Color > Levels to apply it to the selected clip.
  • Go to Inspector > Filters. Adjust the left (black) pointer just below the gray box to adjust shadow levels. Move the middle (gray) pointer to adjust midtones. Then slide the right pointer to adjust highlights.

Unlike Photoshop, the range of pixels is not well-displayed, so this will be less accurate than adjusting the same filter in Photoshop. Still, the operation is the same.

EXTRA CREDIT

While the middle sliders expand shadow and highlights, while adjusting midtones, the two sliders at the bottom contract grayscale values. While useful, you’ll find yourself moving the three in the middle more.


Please rate the helpfulness of this tip.

Click on a star to rate it!

… for Visual Effects

Tip #831: Beginner’s Guide to Visual Effects

Larry Jordan – LarryJordan.com

This provides great information, and lots of extra links.

Image courtesy of TheRookies.co

Topic $TipTopic

Andrew McDonald, writing for The Rookies, has published an outstanding – and free – Beginner’s Guide to Visual Effects. He writes:

This guide is for absolute beginners who are trying to find a career that compliments their passion for film, technology, design, coding and digital art. You are the type of person who knows that finance and medicine really isn’t your thing. You also know you never want to wear a suit to work either. However, you need some help getting started. It’s also a great guide to share with your parents and guardians who are trying to understand what the hell you are rambling on about, and why you are so excited.

What you will learn in this guide:

  • An overview of the Visual Effects industry
  • The most common jobs in the industry
  • How much you could earn as a visual effects artist
  • How to start learning visual effects
  • How to select the best school in your area
  • The best free and professional software to learn
  • Essential communities and blogs to start following
  • Top companies that employ visual effects artists
  • Essential reading for visual effects artists
  • Advice on how to get started with your own projects

Here’s the link to learn more, as well as a variety of links.


Please rate the helpfulness of this tip.

Click on a star to rate it!