… for Random Weirdness

Tip #676: 7 Best Digital Film Festivals & Challenges

Larry Jordan – LarryJordan.com

Seven Festivals to keep you from going stir-crazy.

A typical example: The 48-Hour Film Project.

Topic $TipTopic

This article, written by Jourdan Aldredge, first appeared in PremiumBeat.com. This is an excerpt.

Here are seven online film festivals and challenges where filmmakers can compete from home.

1. Roger Corman’s Film Festival. Rules: You have to stay home and stay safe and film the video inside your house or in the backyard. The short must be filmed on a cell phone. It must be under two minutes. Upload to Instagram and tag Roger Corman’s account.

2. Quarantine Film Festival. Hosted by the Plaza Theatre in Atlanta, Georgia, the Quarantine Film Festival is an ongoing online film festival that accepts entries every Monday through Wednesday, then streams the winners on Fridays

3. COVIDaVINCI Film Festival. Put on by what is usually called the DaVinci Film Festival in Los Angeles, California, the COVIDaVINCI Film Festival is a five-minute quarantine film challenge that empowers filmmakers to submit for the “Shelter-In-Place Vitruvian Award.” Learn more here.

4. Couch Film Festival. Fittingly titled, the Couch Film Festival is an IMDb-eligible quarterly film festival based in Toronto, Ontario, that’s put together a new “quarantine” category for its upcoming Summer 2020 showcase.

5. Long Distance Film Festival. The Long Distance Film Festival is truly an online-based festival that intends to live entirely online via a global live-streaming marathon of selected projects. Learn more here.

6. Online Isolation Short Videos Festival. The Online Isolation Short Videos Festival is an online event film festival hosted out of Russia. It’s actually an offshoot of the Russian International Horror Film Festival. Learn more here.

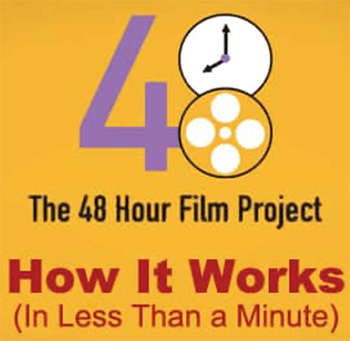
7. 48-Hour Film Project. The 48 Hour Film Project takes the traditional on-the-run film challenge to a new level, with an open online weekend challenge set for every other weekend during quarantine. Learn more here.


Please rate the helpfulness of this tip.

Click on a star to rate it!

… for Apple Motion

Tip #665: B-spline Masks

Larry Jordan – LarryJordan.com

The key to the B-spline is feathering and mask blend modes.

A B-spline mask, using a subtraction blend mode with feathering.

Topic $TipTopic

There are five different masks in Apple Motion. The B-spline mask is probably the most misunderstood.

B-spline masks always create curves. (A Bezier mask, on the other hand, can create corners or curves.)

Where B-splines get interesting, however, is when you start changing the Mask Blend Mode. You modify these by selecting the mask, then going to Inspector > Mask. There are four choices:

  • Add: Adds the mask to the alpha channel (the default setting). This is useful for adding back regions of an image that other masks are cutting out.
  • Subtract: Subtracts a mask from the alpha channel. This is useful for creating holes in the middle of layers, or for masking out additional regions of an image that are untouched by other masks.
  • Replace: Replaces the layer’s original alpha channel, as well as any other masks applied to the same layer that appear underneath the current mask in the Layers list, with the current mask. You can add masks above, set to whatever blending mode you like.
  • Intersect: Masks out all regions of the layer that do not overlap the mask itself (but does not replace a layer’s original alpha channel). This includes other masks applied to the same layer that appear nested underneath the intersecting mask in the Layers list.

The final mask is the combined result of all image masks applied to the layer.

EXTRA CREDIT

Remember, you can combine different masks to the same layer to allow you to select very specific, non-geometric shapes.


Please rate the helpfulness of this tip.

Click on a star to rate it!

… for Visual Effects

Tip #673: Create VFX in Photoshop

Larry Jordan – LarryJordan.com

Photoshop is great for adding shapes and textures, but not for rotoscoping video.

Image courtesy of Pexels. com.
Photoshop is great at adding textures to video.

Topic $TipTopic

This article, written by Audrey Ember, first appeared in PremiumBeat.com. This is an excerpt.

Here are a few Photoshop tricks you can pull off to quickly and easily add a little life to your video projects. Use these for specific shots, don’t try editing video in Photoshop.

To start, switch to Window > Workspace > Motion. This displays a timeline at the bottom of the interface.

Things You Can Do

  • Add Color and Texture. Use different brushes to create shading and highlights.
  • Create Interesting Titles or Text Overlays. In Photoshop, the possibilities are endless, whether it’s creating unique shapes or adding textures to text or backgrounds.
  • Use Animations to Add Emphasis and Interest. Add different designs to emphasize movement and create a more stylized looks to the background.

EXTRA CREDIT

The original article has videos that show the results of these tips.


Please rate the helpfulness of this tip.

Click on a star to rate it!

… for Visual Effects

Tip #674: 51 Free Accent Animation Graphics

Larry Jordan – LarryJordan.com

51 Free Motion Graphics from PremiumBeat.com

Free Stuff!

Topic $TipTopic

This article, written by Todd Blankenship, first appeared in PremiumBeat.com. With these FREE motion graphics, you can easily add elegant motion and animation accents to your titles and designs in any project.

Most of the time, those little extra touches are things like really small details and additional motion in small portions of the scene. These are things that the viewers might not even fully notice but, when added as part of a whole, these accents and animations can really bring your work to a whole new level.

We’ve made a pack of FREE motion graphics that you can use to add little accents of motion to your titles and animations.

Here’s the link.


Please rate the helpfulness of this tip.

Click on a star to rate it!

… for Visual Effects

Tip #679: 9 Free After Effects Templates

Larry Jordan – LarryJordan.com

Cool Stuff to Improve Your Projects

The After Effects logo.

Topic $TipTopic

This article, written by Annie St. Cyr, first appeared in PremiumBeat.com. This is an excerpt.

  1. 9 Digital Distortions. The digital distortions template allows you to simply drag and drop your footage into the composition and play with the motion parameters to get Noise, Color Boxes, Flicker, Tuning, Turbulence, Pixel Blending, Rolling Bars, Chromatic Aberration, and Color TV Pixels.
  2. The Anamorphic Look. The wider visuals of the anamorphic lens can add drama to your travel video or help draw focus to a character or element of a video you’d like to feature more prominently. This juxtaposition of usefulness has made the anamorphic highly sought after.
  3. Free Action Effects. Fire is one of the most difficult elements to pull off digitally. This free Action Elements Pack can be used in any NLE or motion graphics software. Adjusting the scale, motion parameters and alpha channels will provide you with some solid fire and explosion effects. It’s better than any fire template I have seen. These elements look much more realistic and require much less render time.
  4. Animated Fonts. With over 43 unique compositions, this animated font After Effects template can make any information much more invigorating. This skill is essential for your motion graphics tool kit. You never know when you might need a few animated letters or numbers to spice up your next edit.
  5. VHS Distortion. Just like the digital distortions pack, this free After Effects template allows you to recreate the look of an old VHS tape. Once again, all you have to do is drag and drop your footage. You can even customize the text. This template does require you to download a free font as well.
  6. Free HUD Elements. If you are looking for that futuristic HUD aesthetic this free After Effects template is for you. Below is a tutorial for how to create a Spider-Man: Homecoming-inspired look, but these HUD elements have a multitude of uses.
  7. Dynamic Car Gauges. Now that so many car commercials have gone digital, every video editor needs digital assets for commercial work and promos. With these 16 free After Effects car gauges, you can easily create a custom gauge for your car work. The download also includes 9 free sound effects.
  8. 20 Free Color Grading Presets. If you aren’t a color grading expert but want to add a great custom look to your footage, these 20 free AE color grading presets are fantastic. Each color grade adds a unique style and tone to your films and commercials. Check out all twenty presets in this video.
  9. Split Layers.If you aren’t the best with motion graphics, this free After Effects template instantly creates split layers to splice up your images or video. You just drop your footage into the project and select which of the nine types of layers you want.

Please rate the helpfulness of this tip.

Click on a star to rate it!

… for Codecs & Media

Tip #680: What is the Alpha Channel

Larry Jordan – LarryJordan.com

Alpha Channel defines the transparency in a digital image or video.

Topic $TipTopic

The Ask Tim Grey website had a nice answer to this question.

An alpha channel is essentially any channel other than the channels that define color values for pixels in an image. Generally an alpha channel is used to define areas of a photo, such as to define transparency.

In the context of a digital image, the term “channel” generally refers to the information about individual color values that comprise the overall pixel information. For example, with a typical RGB image there are three channels that individually define the red, green, and blue values for pixels.

So, an alpha channel is essentially a “map” that defines specific areas of the image. It is similar in many ways to a channel that defines color, but since it is used to define transparency or selection rather than defining color for an image, it needed a “special” name. The term “alpha channel” is the name that was given to this feature.

EXTRA CREDIT

Here’s a link to learn more from Tim.


Please rate the helpfulness of this tip.

Click on a star to rate it!

… for Codecs & Media

Tip #681: When Does Using High Sample Rates Make Sense?

Larry Jordan – LarryJordan.com

Most of the time, 48K sampling is the best choice.

Image courtesy of Electro-Voice.
An Electro-Voice RE-20 microphone.

Topic $TipTopic

This is an excerpt from an informative article in Sound-on-Sound, written by Hugh Robojohns.

Higher sample rates only provide a greater recorded bandwidth — there is no intrinsic quality improvement across the 20Hz‑20kHz region from faster sampling rates — and, in fact, jitter becomes a much more significant problem. So I would suggest that you forget 192kHz altogether unless you need to do specialist sound‑design work where you want to slow recorded high‑frequency sounds down dramatically.

The question of whether to use a 96kHz sample rate is less clear-cut, because it can prove useful in some specific situations. Yes, it creates larger files and higher processing loads, but it also removes the possibility of filtering artifacts in the audio band and reduces the system latency compared with lower rates. Many plug‑in effects automatically up‑sample internally to 96kHz when performing complex non‑linear processes such as the manipulation of dynamics.

EXTRA CREDIT

Note, though, that not all software is particularly good at sample‑rate conversion, with even some expensive and well regarded DAW software resulting in noticeable aliasing. You do, of course, need to judge results subjectively, but if you’re curious how well your software performs in this respect — or whether any free software performs this function any better — then check out Infinite Wave’s database at (src.infinitewave.ca) which compares results from a huge number of applications, and includes test files so you can perform your own tests too.

Larry adds: Most of the time for video recording a sample rate of 48K is the best choice.


Please rate the helpfulness of this tip.

Click on a star to rate it!

… for Apple Final Cut Pro X

Tip #642: Add a Cast Shadow to Text

Larry Jordan – LarryJordan.com

All it takes is changing one setting.

Text, filled with a gradient, with a cast shadow effect applied.

Topic $TipTopic

You can add a cast shadow to any clip, however it is most effective with text. Here’s how to create it.

In my example, I created a text clip and filled it with a gradient. (The color settings are in the Text Inspector > Face.)

  • Select the text clip.
  • Go to the Effects browser > Stylize and apply the Drop Shadow effect.
  • In the Video Inspector, change the drop shadow settings from Classic Drop Shadow to Perspective Back.
  • Finally, using the onscreen controls, tweak the shadow position and settings so it best matches your scene.

Done.


Please rate the helpfulness of this tip.

Click on a star to rate it!

… for Random Weirdness

Tip #657: The Importance of Creating a Sizzle Reel

Larry Jordan – LarryJordan.com

The primary purpose of a sizzle reel is to sell your film.

Sizzle reels are hot!

Topic $TipTopic

This article, written by Tanner Shinnick, first appeared in PremiumBeat.com. This is an excerpt.

Typically, a sizzle reel is a three to five minute summation of your story’s main plot points, narrative approach, direction, and introduction to your main characters. Unlike a stylish, marketing-motivated trailer or demo reel, a sizzle is a cohesive, narrative visual approach that gives your audience an ultra-clear look at what your story is about.

Typically, the audience for a sizzle is a room of decision-makers who can help make your entire story, film, or series come to life. Its larger task is to sell your film, so it doesn’t need to be perfect. However, what it should do is enable you to create the full, ideal version of your project. Much like a musician has demos of their songs before they go to record in the studio, the sizzle is a necessary stepping stone.

Short films can and do consistently serve as sizzles for feature length narrative projects.

Steps to Create Your Own Sizzle

  • Concept
  • Develop, Research, and Write
  • Gather Assets
  • Produce
  • Pitch

Whether you’re producing a series, feature, or documentary, sizzles are an essential component in making that idea a reality.


Please rate the helpfulness of this tip.

Click on a star to rate it!

… for Visual Effects

Tip #655: Control Keyframe Speed

Larry Jordan – LarryJordan.com

Keyframe speed is determined by distance and interpolation.

Image courtesy Adobe Systems, Inc.
Linear Interpolation (top) has sharp corners. Bezier interpolation has curves.

Topic $TipTopic

In After Effects, when you animate a property in the Graph Editor, you can view and adjust the rate of change (speed) of the property in the speed graph.

The following factors affect the speed at which a property value changes:

  • The time difference between keyframes in the Timeline panel. The shorter the time interval between keyframes, the more quickly the layer has to change to reach the next keyframe value. If the interval is longer, the layer changes more slowly, because it must make the change over a longer period of time. You can adjust the rate of change by moving keyframes forward or backward along the timeline.
  • The difference between the values of adjacent keyframes. A large difference between keyframe values, such as the difference between 75% and 20% opacity, creates a faster rate of change than a smaller difference, such as the difference between 30% and 20% opacity. You can adjust the rate of change by increasing or decreasing the value of a layer property at a keyframe.
  • The interpolation type applied for a keyframe. For example, it is difficult to make a value change smoothly through a keyframe when the keyframe is set to Linear interpolation, but you can switch to Bezier interpolation at any time, which provides a smooth change through a keyframe. If you use Bezier interpolation, you can adjust the rate of change even more precisely using direction handles.

EXTRA CREDIT

Here’s an Adobe Help article to learn more.


Please rate the helpfulness of this tip.

Click on a star to rate it!