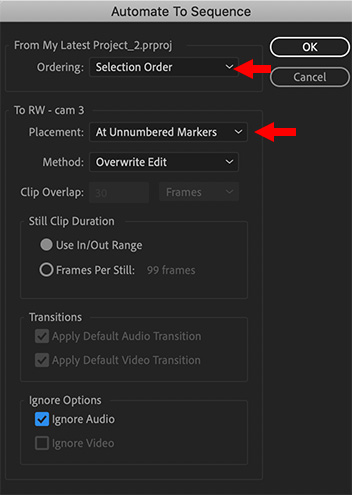
… for Visual Effects
Tip #436: What is a B-spline Curve?
Larry Jordan – LarryJordan.com
B-splines are used to create shapes with no sharp corners.
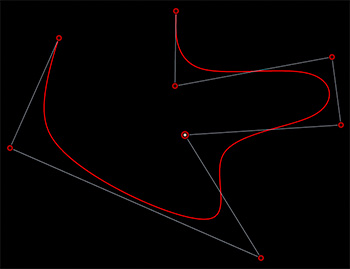

B-spline curves (short for Basis spline) are frequently used to create shapes because, unlike Bézier curves, B-splines have no corners.
A B-spline is a combination of flexible bands that pass through a number of points (called control points) to create smooth curves. These functions enable the creation and management of complex shapes and surfaces using a number of points. B-spline and Bézier functions are applied extensively for shape optimization.
B-splines can be open (where the ends are not connected, as in this screen shot), or closed.
The shape of the B-spline is determined by moving the nodes, the red dots in this illustration. These act as magnets, attracting the shape of the curve as the nodes move.
Neither Premiere nor Final Cut support B-splines, but After Effects and Motion do.
EXTRA CREDIT
An extension of B-splines are NURBS (short for “non-uniform rational B-splines”). The big benefit to NURBS is that they can exist in three dimensions. I’d, ah, show you the equations for these, but they make my brain hurt.