… for Adobe Premiere Pro CC

Tip #987: Share Creative Cloud Libraries

Larry Jordan – LarryJordan.com

Libraries allow sharing assets between projects, computers or team members.

An empty library – waiting for you to add something in Premiere.

Topic $TipTopic

Creative Cloud libraries got a bad rap for Premiere users when they were first introduced because they were optimized for Photoshop and limited to still images. Since then, Adobe added new features and, now, they may be worth a second look.

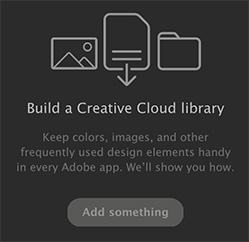
Creative Cloud Libraries let you gather design elements for specific projects, clients, or teams for use within any of your Creative Cloud apps. Libraries help ensure you and your team access the same elements for a project throughout its life-cycle.

Creative Cloud Libraries are displayed in the Libraries panel in Premiere Pro.

Whatever you save in the Libraries panel becomes available for use across Premiere Pro projects that you are working on. You can also access libraries across projects in the following ways:

  • Across computers. Libraries are synced to Creative Cloud. Your Library becomes available on any computer that you are signed into using your Creative Cloud ID.
  • Across apps. Whatever you save in the Libraries panel becomes automatically available across desktop and mobile apps that support Creative Cloud Libraries. For example, you can access Libraries from desktop apps such as, After Effects, Photoshop, and mobile apps such as Adobe Hue.

Additionally:

  • You can create multiple libraries to separate elements from different projects.
  • You can add color grading looks to a library.
  • You can add assets from Adobe Stock
  • You can share libraries with other Creative Cloud users.
  • You can share motion graphics templates

EXTRA CREDIT

Here’s a link to learn more about what Libraries can do.


Please rate the helpfulness of this tip.

Click on a star to rate it!

… for Adobe Premiere Pro CC

Tip #986: The Slip Tool is My Favorite

Larry Jordan – LarryJordan.com

The Slip tool lets you optimize content without changing durations.

The Program monitor display when using the Slip tool. See the text for details.

Topic $TipTopic

The Slip tool is one of those tools in Premiere that you either use constantly, or you puzzle over what it does. For me, it’s my favorite trimming tool.

The Slip tool (Shortcut: Y) allows us to change the content of a shot without changing its duration or location in the timeline.

To use it, select the tool, then drag the middle of a timeline clip. In the Program monitor (see screen shot) up to four images will appear.

NOTE: If the clip has clips on either side of it, you’ll see four images. If the clip has blank space on either side you may see only two.

These images, from left to right, are:

  • The Out of the out-going clip
  • The In of the clip you are slipping
  • The Out of the clip you are slipping
  • The In of the in-coming clip

As you drag, you display different portions of the slipped clip. For example, in a clip of a foot race, you could slip the clip to show the start, or where the 2nd-place runner takes the lead, or where runners cross the finish line.

When slipping, only the content changes, not the duration or location of the clip itself.

If you haven’t used the Slip tool, it is a great way to quickly select the best portion of a B-roll clip. I use this tool a lot!


Please rate the helpfulness of this tip.

Click on a star to rate it!

… for Adobe Premiere Pro CC

Tip #985: Hidden Sort Options

Larry Jordan – LarryJordan.com

Thumbnails can be sorted in far more than simple file name order.

The thumbnail sort options in the project panel.

Topic $TipTopic

Hidden in the Project panel is a wealth of sort options for all the elements in the Project panel or a bin. Here’s how to access them.

  • Open the Project panel.
  • Switch to thumbnail view.
  • To the right of the slider that determines thumbnail size, is an icon of three stacked lines with a down arrow. Click it.

From this menu, you can sort thumbnails on over 30 criteria.

EXTRA CREDIT

For you list junkies, the default sort is alphabetically on file name. However:

  • To sort on any column, click the column header.
  • To sort in reverse order, click the column header again.

Please rate the helpfulness of this tip.

Click on a star to rate it!

… for Apple Final Cut Pro X

Tip #982: The Event Viewer Offers Preview

Larry Jordan – LarryJordan.com

The Event Viewer previews whatever clip is selected in the Browser.

The Event Viewer (left) mirrors the controls in the Viewer’s View menu.

Topic $TipTopic

Another feature that is often overlooked in Final Cut is the Event Viewer. Unlike the Comparison Viewer (Tip #981) which just displays still frames, the Event Viewer provides playback and preview of whatever clips you are skimming or playing in the Browser.

Choose Window > Show in Workspace > Event Viewer (Shortcut: Cntrl + Cmd + 3) to display the Event Viewer.

Once open, any clip you select, skim, or play in the Browser is displayed at a much larger size in the Event Viewer.

The key benefit is enabling you to better select the precise In and Out for a clip by presenting a larger image. (Think of this as the “Preview monitor” in Final Cut Pro 7 or other NLEs.)

If you need it, it’s there. If you don’t, you can hide it so it doesn’t take up any extra space.

EXTRA CREDIT

It has the same controls for both size and view as the Viewer’s View menu (red arrows in the screen shot).


Please rate the helpfulness of this tip.

Click on a star to rate it!

… for Apple Final Cut Pro X

Tip #981: Discover the Hidden Comparison Viewer

Larry Jordan – LarryJordan.com

Comparison view displays the In of the previous or next clip.

Comparison View (left) with arrows pointing to Previous / Next edits.

Topic $TipTopic

Hidden in an unusual place inside Final Cut Pro X is Comparison Viewer. This can make effects like color matching a whole lot easier.

Unlike most other interface options, display the Comparison View from Window > Show in Workspace > Comparison Viewer (Shortcut: Cntrl + Cmd + 6) .

This displays a window to the left of the Viewer that, by default, shows the In of the clip just before the clip the playhead/skimmer is in.

Click Previous Edit / Next Edit (red arrows in the screen shot) to jump between clips in this display.

NOTE: You can’t play clips in the Comparison Viewer, just view the frame at the In.

Click Saved at the top, then Save Frame at the bottom to capture the current frame under the playhead. Now, when you click Timeline, you view previous or next clips, then compare those to the frame saved as part of the Save option.

EXTRA CREDIT

The Comparison Viewer has the same display options as the Viewer. Go to the View menu to see different ways of displaying an image.


Please rate the helpfulness of this tip.

Click on a star to rate it!

… for Apple Final Cut Pro X

Tip #980: Final Cut Adds Custom Overlays

Larry Jordan – LarryJordan.com

Overlays provide custom framing display options.

A Viewer image with an overlay showing 16:9, 4:3 and 1:1 grids.

Topic $TipTopic

A new feature in the 10.4.9 update to Final Cut Pro X is custom overlays. These are PNG or TIFF graphics that can be superimposed on clips in the Viewer to help frame shots – especially for different aspect ratios.

In Photoshop, or the graphics app of your choice, create the image you want to import. While you can use any graphic, I recommend using a grid, because this will be placed over all Viewer images. Make sure the background is transparent, because, again, this will be supered over other images.

Save the image in a location you can find later.

  • Open Final Cut and go to the View menu in the top right corner of the Viewer.
  • Choose Custom Overlay > Add Custom Overlay and select the image you just created.
  • From the same menu, choose Show Custom Overlay and choose the transparency percentage you want to use.

NOTE: In the screen shot, the white grids indicate framing for 16:9, 4:3 and 1:1. Transparency is set to 75%.

Overlays can be anything you want. Keep in mind, however, that these won’t output. If you need to include them in your project the images need to be in the timeline.

EXTRA CREDIT

To turn off the overlays, uncheck Show Custom Overlays.


Please rate the helpfulness of this tip.

Click on a star to rate it!

… for Random Weirdness

Tip #975: How to Succeed Even With Competition

Larry Jordan – LarryJordan.com

Competition challenges us to focus on what we do best.

(Racing image courtesy of Pexels.com.)

Topic $TipTopic

A couple of years ago I wrote an article: “How to Succeed When There’s So Much Competition.” Finding consistent paying work back then was hard, today it is even harder. Here are my thoughts.

A reader asked: “How can editors retain their important role and convince the client that they are still important and worth their normal rate?”

DaVinci Resolve is free, Adobe Premiere is available on a subscription basis, and Final Cut Pro X is affordable for just about anyone interested in editing. Therefore, everyone now has the tools necessary for professional video editing. Does that make them an editor?

No.

In my workshop, I have a hammer, a saw and a level – but I can’t build a house. I have the tools, but not the skills.

This illustrates a problem we’ve had for a long time. All too often, video editors define themselves by the tools they use, not the skills they have. If you define yourself solely by the tools you use, you’re going to be competing with the next college graduate that has Photoshop, or Final Cut, or Premiere installed on their laptop. And you are going to lose.

It isn’t our tools – it’s the stories that we tell, our dependability, and the client relationships that we build that sets us apart. The more that we focus on creative story-telling – in all of its different phases – the more people will demand our services.

EXTRA CREDIT

Here’s the full article.

And here’s a follow-up: Tips to Build Your Media Career.


Please rate the helpfulness of this tip.

Click on a star to rate it!

… for Random Weirdness

Tip #974: A Master Class in Vertical Video

Larry Jordan – LarryJordan.com

Vertical video works when you embrace it for what it is, not what you would like it to be.

One of the titles from “The Stunt Double.”

Topic $TipTopic

This article, written by Jourdan Aldredge, first appeared in PremiumBeat.com. This is a summary.

If you, like me, were skeptical about the value of “vertical video” (that is, with an aspect ratio of 9:16, rather than 16:9), Apple, in conjunction with director Damien Chazelle, has created a video that will change your mind.

In this article, Jourdan links to, then analyzes the nine-minute short film “The Stunt Double” starring Tom McComas and Preeti Desai. If you haven’t seen the movie, it is totally worth ten minutes of your time. It is rich at multiple levels, not just plot but production.

As Jourdan writes: “Chazelle’s vertical short can be appreciated in a couple of ways. On the surface, it’s a fun love letter to the classic genres of film history. Even better, and perhaps more importantly, it’s a master class in how to frame your cinematography in this new direction.”

Jourdan’s article looks at:

  • The impact of vertical titles to set a mood.
  • The use of establishing shots, even vertically, to set the geography.
  • How vertical video enhances close-ups.
  • The director’s effective use of 2-shots.
  • How rotating traditional framing – like shooting the slate – can still enhance the story.

As he concludes: “If you’re going vertical, remember to embrace and elevate the limitations. If something just doesn’t want to fit, change the definition of ‘fit’ by turning your classic horizontal instincts on their head. You’ve still got a frame to fill and a story to tell.”

Both the article and the video – which are linked above – are well worth your time.


Please rate the helpfulness of this tip.

Click on a star to rate it!

… for Random Weirdness

Tip #973: Frame.io Announces Big Updates

Larry Jordan – LarryJordan.com

Update feature faster file transfers, better FCP X integration and more security.

The Frame.io logo.

Topic $TipTopic

Last week, Frame.io announced a new version and several new features, along with updated support for Final Cut Pro X 10.4.9, released the same day. These new features include:

  • Version 3.7 – focused on speed, precision and security
  • The Frame.io Transfer app
  • Improvements to the Final Cut Pro X workflow extension
  • The ability to display HDR media during playback on iOS devices
  • Improved iOS player controls
  • Improved Admin controls for enterprise accounts

Quoting from the Frame.io press release:

Frame.io Transfer provides more customizable control over how users move creative assets. The control center for effortlessly moving creative assets, Transfer now lets users upload and download large files, entire folders—or entire projects—effortlessly, with a single click. Use Transfer to monitor progress updates, prioritize transfer job order, and configure bandwidth for even more flexibility.

EXTRA CREDIT

Here’s a news article from my website that describes the update in more detail.


Please rate the helpfulness of this tip.

Click on a star to rate it!

… for Apple Motion

Tip #970: Colorizing 3D Objects

Larry Jordan – LarryJordan.com

Colors applied to a 3D object apply to the entire object, even as it moves or rotates.

Gradient Colorize (left) and Colorize (right) applied to a white 3D mug.

Topic $TipTopic

3D objects are new with the 5.4.6 update to Apple Motion. Tip #969 describes what these are. However, many of the these objects are pure white. Here’s how to change that.

While we can’t, at least yet, apply textures to 3D shapes (and have them retain their “3D-ness”), we can apply color.

In the screen shot, the white 3D mug has two different filters applied:

  • Filters > Color > Colorize. This is the green color.
  • Filters > Color > Gradient Colorize. This is the pink color.

NOTE: I created this effect by blending three different screen shots in Photoshop.

I tend to prefer the results of the Gradient Colorize because I can apply a slightly different shade of the color to emphasize shadows.

NOTE: Keep in mind that this color will “stick” even as you rotate the object.


Please rate the helpfulness of this tip.

Click on a star to rate it!