… for Random Weirdness

Tip #462: Lighting Day for Night

Larry Jordan – LarryJordan.com

Day-for-night scenes require thinking about the quality of moonlight.

(Image courtesy of pexels.com.)

Topic $TipTopic

This article, written by Tanner Shinnick, first appeared in PremiumBeat.com. This is an excerpt.

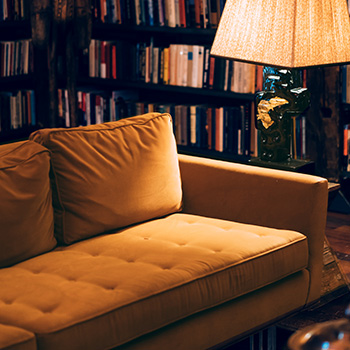
Day for night interiors can be tough. However, with the right approach, you can sell the effect by controlling, shaping, and cutting out the daylight.

We always hear about day for night exteriors but hardly ever day for night interiors. The first thing to understand when lighting any type of night scene is your main light source — in this case, it’s the moon. You’ll also have many practical sources in the room. However, to give a little lift to the scene, you’ll still want to push some moonlight through a window.

Many people think that the moon is a soft source because it is dim. However, the moon is actually a hard source and casts a hard shadow.

When lighting a night scene, interior or exterior, it’s always wise to rely on your harder light sources like your pars or spotted fresnels. Using these sources, you can easily imitate the quality of light of the moon and create those harsh shadows.

Also, be sure to avoid rooms with white walls. Once you start pushing in your moonlight, the white walls will behave like giant reflectors and start pushing your light in all sorts of directions. From that point, it will be difficult to sell the night effect.

Exposure is a key component when filming any night scene. To really sell the effect, it is wise to underexpose your subject by 2-3 stops. Creating this darkness for the subject will create an evening effect.

Color temperature plays a huge role in selling the effect of moonlight in a night scene. Moonlight is a very blue light source.


Please rate the helpfulness of this tip.

Click on a star to rate it!

… for Random Weirdness

Tip #473: 3 Tips for Perfect Exposures

Larry Jordan – LarryJordan.com

Don’t let the camera think for you; let it enable you, instead.

(Image courtesy of pexels.com.)

Topic $TipTopic

This article first appeared in PetaPixel.com. This is an excerpt.

One of the first things beginning photographers learn is the relationship between ISO, aperture and shutter speed. Known as the “exposure triangle,” this is the basis of the photography world. Here is a short summary of how each component affects your image:

  • ISO: The sensitivity of a film, or the base sensitivity (and gain) of a digital camera sensor.
  • Aperture: The opening of a lens used to control the amount of light necessary to expose the sensor/film; in addition, the aperture is used creatively to control the compositional use of depth of field.
  • Shutter Speed: The length of time of an exposure, usually measured in fractions of a second and sometimes in whole seconds.

Locate your Camera LCD Brightness setting in your menu. Most cameras are set to ‘Auto’ LCD brightness to adapt to the ambient light around you. Setting the brightness manually gives you a more reliable way to judge what you see.

Locate your Highlight Alert function in your camera’s menu system. Highlight alerts are a flashing overlay that can be enabled to alert you when you’ve blown-out highlights and lost that information. This means that if you take a photograph with portions of it so bright that no detail is recorded at all, the portions with the missing detail will flash on the screen.

Locate your Picture Style settings in your camera’s menu system. Your camera will likely default to the ‘Auto’ option and we don’t want that, in fact, none of these picture styles are ideal so we are going to make our own User Setting. You want to make this custom picture style as flat and neutral as possible. I’ve turned the Contrast, Sharpness, and Saturation all the way down to keep the image looking as flat as possible to retain all the information in your image.


Please rate the helpfulness of this tip.

Click on a star to rate it!

… for Apple Motion

Tip #475: Fill Text with Video

Larry Jordan – LarryJordan.com

The secret is Stencil Alpha.

Property settings inside the Inspector put video inside text.

Topic $TipTopic

Text with animated video inside it is always fun to watch. Motion makes it easy to fill any text with any background. Here’s how:

  • Create and format your text. Thicker letters make this effect more visible.
  • Put the background you want to fill the text with in the same group, but behind the text.
  • Select the text and go to Inspector > Properties and change the Blend Mode to Stencil Alpha.

Done.

EXTRA CREDIT

The screen shot shows the Inspector settings to create this effect. I then added the text effect so you could also see it. The text is Kraash Black, the background is Two Color Ray,both found in the the Motion Library.


Please rate the helpfulness of this tip.

Click on a star to rate it!

… for Visual Effects

Tip #489: Simulate Speed with a Channel Blur

Larry Jordan – LarryJordan.com

As long as you blur only one channel, your image will stay mostly in-focus.

A 2-channel blur (top), a 1-channel blur (middle) and the source image.

Topic $TipTopic

The channel blur effect blurs one, two or all three color channels in a clip. (Red, green and blue are the three color channels in any clip.) By selectively blurring a single channel you can, for example, imply speed or create a halo, without sacrificing apparent focus.

Here’s a detail from an air show clip. The bottom section is the source. The middle blurs just the blue channel. The jet develops a “halo,” which, to me, makes it seem like it is flying really fast.

Only when we blur two channels do we lose focus and, now, the jet looks like it’s part of a bad dream (top).

Play with this and see what you think. If you blur the dominant color, you won’t lose much focus.

EXTRA CREDIT

Image courtesy of Hallmark Broadcast Ltd. www.hallmarkbroadcast.tv


Please rate the helpfulness of this tip.

Click on a star to rate it!

… for Adobe Premiere Pro CC

Tip #480: Advanced Mask Controls

Larry Jordan – LarryJordan.com

First, you draw the mask – then you tweak it.

The five mask controls in Premiere.

Topic $TipTopic

This article first appeared in MotionArray.com. This is an excerpt.

You may be familiar with the Mask Path controls, which allow you to draw a variety of different masks on a clip. But, the other three options can be confusing.

Mask Feather. Feathering allows the effect to slowly fade in or out from the edge of the mask. You can designate how much feathering there is both from the Effects Control panel or dragging the outside blue border in the Program Monitor.

Opacity. When applied to a mask this changes the Opacity of the footage you have cropped out.

Expansion. The Expansion control allows you to increase or decrease how close to your shape line the footage is masked. If you are creating complex shapes, changing your mask explanation can help smooth out some of the rougher edges, meaning you don’t need to spend hours getting each angle perfect.

Invert. This flips the selected portion of a mask; what was in is now out and what was out is now in.


Please rate the helpfulness of this tip.

Click on a star to rate it!

… for Apple Final Cut Pro X

Tip #440: Secrets of the Range Tool

Larry Jordan – LarryJordan.com

Ranges make it easy to set and In and Out.

A range selected in the Final Cut Pro X timeline.

Topic $TipTopic

The Range tool (shortcut: R) is one of those tools in Final Cut that could be useful, but isn’t as useful as it could be. Still, it can help you to quickly set an In and Out.

Select the Range tool from the Tool popup menu. Then, drag to select a region in the Timeline. What you’ve just done is set an In and an Out that applies to all layers within that range.

  • To change the duration, drag an edge – or –
  • Type Control + D and enter the revised duration using timecode
  • To cancel the range, type Option + X

The Range tool is very helpful in creating a back-time edit, which covered in Tip #481, or a 3-point edit, which is covered in Tip #482.

WHAT’S MISSING?

  • The ability to click in the middle of the range to move it without losing the duration.
  • The ability to select and move an edge using the keyboard.

For me, it’s often easier to just use the playhead and set the In and Out manually.


Please rate the helpfulness of this tip.

Click on a star to rate it!

… for Apple Final Cut Pro X

Tip #481: The Power of a Back-time Edit

Larry Jordan – LarryJordan.com

Back-time edits are used in situations where you care more about the end than the beginning.

Topic $TipTopic

A back-time edit is one where the Out of the clip in the Browser is matched to an Out in the timeline, then Final Cut calculates where to apply the In.

NOTE: A back-time edit doesn’t play a clip backwards, rather it determines the position of a clip based on the Out, rather than the In.

An example of using a back-time edit is sports, where you care more about the runner crossing the finish line than where they started running. To create a back-time edit:

  • Set at least an Out in a clip in the Browser
  • Set at least an Out in the Timeline, or use the Range tool to set both the In and Out.
  • Type Shift + D to back-time edit the clip into the Timeline
  • – or – type Shift + Q to back-time edit the clip on a higher layer.

NOTE: Setting an Out in the timeline always sets a range. When the edit is performed, the duration indicated by the range in the timeline determines the duration of the edit. The Browser In is ignored.

Experiment with this feature, you’ll discover all kinds of places where this can solve an editing challenge.


Please rate the helpfulness of this tip.

Click on a star to rate it!

… for Apple Final Cut Pro X

Tip #482: How to Create a 3-point Edit

Larry Jordan – LarryJordan.com

3-point edits provide precision without changing duration.

Topic $TipTopic

A 3-point edit is one where the duration of a range in the Timeline determines where a clip from the Browser will begin and end. These are used in an already-edited project where you need to insert a shot, without changing the duration of the overall sequence.

Here’s how to create one:

  • Set at least an In for a clip in the Browser.
  • Use the Range tool to set an In and Out in the Timeline.
  • Type D to perform an overwrite edit in the timeline equal to the Range and matching the In of the Browser clip to the In of the timeline.
  • Type Q to perform the same edit, but place the new clip on a higher layer.

The benefit to a 3-point edit is precision. You can precisely control where a clip starts and where it ends, without changing the overall duration of your project. And this technique makes creating them very fast.


Please rate the helpfulness of this tip.

Click on a star to rate it!

… for Random Weirdness

Tip #460: 5 Tips to Improve a Boring Documentary

Larry Jordan – LarryJordan.com

If your doc is boring, look to your story first.

(Image courtesy of Pexels.com.)

Topic $TipTopic

This article first appeared in PremiumBeat.com. This is an excerpt. The primary goal of any good documentary is — first and foremost — to inform. However, to inform an audience well, you have to put something together that has all the elements of compelling entertainment. If you find yourself working on a documentary project that’s starting to get boring, here are some quick tricks to help you get back on track.

Work on Story and Structure. Whether you’re just starting out on your project or are deep in the editing process, you should ask yourself the following: If you were to sit down with a pen and paper, could you write (or sketch) out the entire story and structure of your film? If not, why not?

Animate or Illustrate When Needed. Adding custom illustrations or animations to a documentary project can be very appealing to documentary filmmakers. However, overusing animations or illustrations is something to avoid — and it can become expensive and time-consuming, depending on the number and quality of the illustrations and animations.

Add Movement and Transitions. In addition to animating or illustrating B-roll or specific scenes, other smaller editing tricks can actually be quite helpful for speeding up sequences and making the general tone and style a bit more appealing.

Alternate Means of Exposition. Consider letting the mystery of your story develop in some areas. Sometimes, all you need to make a compelling documentary is a few sentences over a black screen to provide all the exposition you actually need. Other things like lower thirds, narration, or interviews can provide the rest.

Make Those Tough Cuts. Documentaries are notorious for requiring tons and tons of filming and footage. At the end of the day, you’d much rather someone watch your film and say “I wish that was longer” than “I wish that was shorter.”


Please rate the helpfulness of this tip.

Click on a star to rate it!

… for Random Weirdness

Tip #461: 3 Tips to Shoot a Conversation in a Car

Larry Jordan – LarryJordan.com

There’s a direct correlation between believability and dollars and/or time.

(Image courtesy of Pexels.com.)

Topic $TipTopic

This article first appeared in PremiumBeat.com. This is an excerpt. There’s something about the cinematic road scene that is deeply embedded in American film and culture. However, from a DP’s perspective, it can be one of the most difficult and taxing set-ups to tackle.

Green screen. This method involves the least amount of moving (parts, and in general) but the greatest amount of post-production. Leaving the car stationary and setting up a green screen will allow you to control the scene as much as possible. However, it will require some serious editing chops to fill every mirror and window reflection in a believable way that looks natural.

Camera Mount. The car mount method (dash cam, side mount, etc…) would be your best DIY small-production option. It’s also the riskiest in terms of possibly damage to your camera or gear. The small dashboard cam might be the safest shot possible, but it’s also one of the most used. Unless you’re project is embracing a practical DIY approach, it would be worth it to invest time or money into other options.

Tow Car. This is the professional method of choice. The tow car gives you maximum control of your car “set” while in a natural, uncontrolled environment. Tow car production still requires a production team and solid coordination (especially for filming scenes multiple times from multiple angles). But if you can afford a tow car (or makeshift trailer), you’ll get the most authentic cinematic look.


Please rate the helpfulness of this tip.

Click on a star to rate it!