… for Visual Effects

Tip #468: How to Add Lens Flares

Larry Jordan – LarryJordan.com

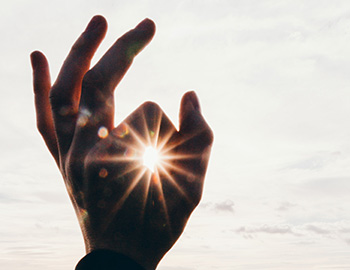
Lens flares add life to a scene.
(Background image courtesy: Editstock.com. Lens flare courtesy: Rampant Design Tools.)

Topic $TipTopic

Lens flares occur when the sun, or a light, gets too close to the same level as a lens. In production, we try to avoid them because they can be unnecessarily distracting; and impossible to control. But, adding them later in post, where we can control them, adds life to an otherwise bland scene. The good news is that lens flares are easy to add, regardless of what editing software you are using.

There are two ways to create lens flares: using the computer, or shooting actual light with a camera. My preference is flares shot with a camera look more complex and believable.

Companies like Rampant Design Tools specialize in creating flares, fires and other visual effects in the camera. To add a flare:

  • Put the playhead in the background image.
  • Import and place the flare video on a layer above the background.
  • Select the flare clip and change the Blend mode to Screen.

That’s it. Use standard effects controls to rotate and position the effect to your liking. The screen shot illustrates a before-and-after example of a lens flare.


Please rate the helpfulness of this tip.

Click on a star to rate it!

… for Visual Effects

Tip #469: What is a Bump Map?

Larry Jordan – LarryJordan.com

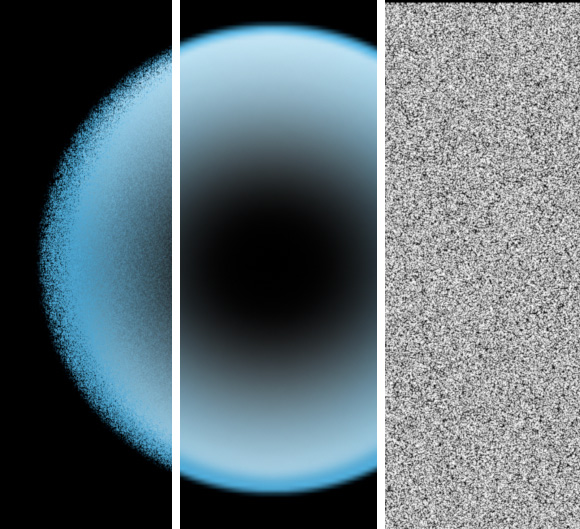
Bump maps provide texture to objects based on grayscale textures.

(From L to R) Bump-mapped image, source image, gray-scale texture.

Topic $TipTopic

Typically, bump maps are used to apply texture to a smooth object.

Bump maps are 8-bit grayscale images. This means that they only have 256 values between black and white. These gray-scale values are used to tell the effects software how to texture an object.

In this screen shot, a texture (right) is applied to a smooth image (center) using a bump map effect to give the final image (left) texture.

In this example, to create the source texture for a bump map, a high-amount of visual noise was applied to a mid-tone gray background using Photoshop.

Bump maps are highly useful in creating texture, but they don’t change the actual shape of an image. This means that if you are creating cast shadows, the shadow will mirror the source object, not the bump-mapped finished effect.


Please rate the helpfulness of this tip.

Click on a star to rate it!

… for Visual Effects

Tip #340: Quick Green Screen Lighting Tip

Larry Jordan – LarryJordan.com

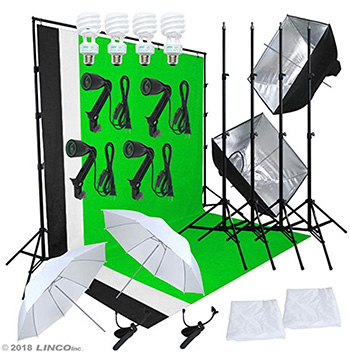
The sun makes a great set light.

Using the sun as a set light is OK by me.

Topic $TipTopic

Looking for a fast way to evenly light a green-screen background?

Move outside.

Let the sun light both your talent and background. However, to avoid screaming at your screen during editing, make SURE your green – or blue – background is as smooth as possible. Wrinkles are almost impossible to key well.


Please rate the helpfulness of this tip.

Click on a star to rate it!

… for Visual Effects

Tip #394: Why Use Vignettes

Larry Jordan – LarryJordan.com

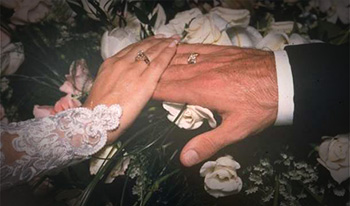
Vignettes conjure emotions of the “old times,” romance, and warmth.

A vignette applied to a wedding photo.

Topic $TipTopic

A vignette, in film, darkens the edges of the frame to focus the attention of the eye on the brighter portion of the image at the center.

In the old days, photographs created these automatically because the lens was not particularly good at passing the same amount of light across the entire exposure. The center was always brighter than the edges.

Since those early days, lenses have improved tremendously, which is why we associate vignettes with older images, romance, or something historical.

This screen shot illustrates a vignette – see the darkening from the center out to the edges of the image? It also illustrates a typical use – to subtly highlight the subject at the center, while lending a feeling of warmth and romance to the image.

To be most effective, a vignette should be subtle; it’s a darkening of the edges, not a spotlight on the center.


Please rate the helpfulness of this tip.

Click on a star to rate it!

… for Visual Effects

Tip #450: What Does Sharpening Do?

Larry Jordan – LarryJordan.com

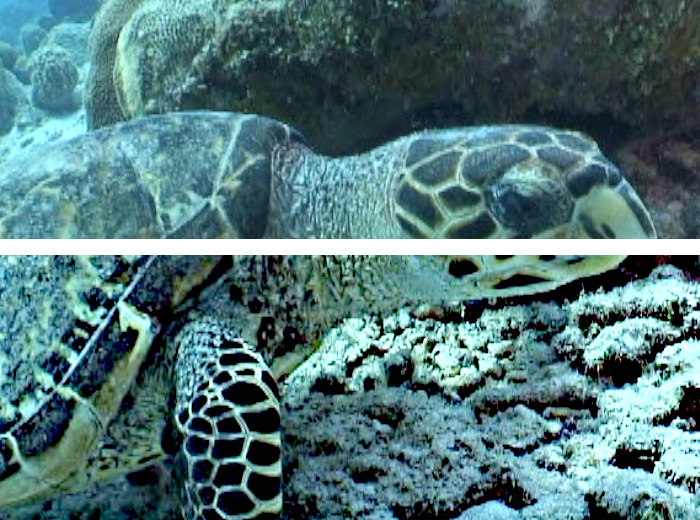
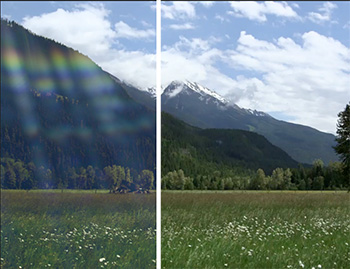
Sharpening adjusts the apparent focus of a clip.

The top is unsharpened, the bottom is significantly sharpened.

Topic $TipTopic

Sharpening adjusts the apparent focus of a clip, without actually changing its focus.

Sharpening adjusts the contrast at the edges of objects in an image to improve their apparent focus. What our eye sees as “focus” is actually the sharpness of the edges between a foreground object and the background. If the edges are sharp, our eye considers the image in focus. If not, we consider the image – or that part of the image at least – blurry.

Unsharp Masking (which is the preferred method of sharpening) enhances the contrast between two adjacent edges. Our eye perceives that improved contrast as improved focus, though nothing about the focus of an image has changed.

When using Unsharp Mask, a little goes a long way. A Radius setting between 1.5 and 4 will yield perceptible results without making the image look like bad VHS tape.


Please rate the helpfulness of this tip.

Click on a star to rate it!

… for Visual Effects

Tip #338: How to Create Retro Looks

Larry Jordan – LarryJordan.com

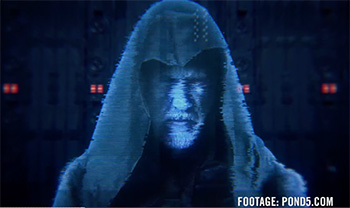
These can be used in Premiere Pro, After Effects, Final Cut Pro X and Media Composer.

An image from a Red Giant tutorial on using Universe.

Topic $TipTopic

This tip – featuring Red Giant Universe effects – first appeared as part of a YouTube segment from Kelsey Brannan, showing how this can be created in Premiere Pro. However, these effects can be applied in recent versions of Final Cut Pro X, Avid Media Composer, and After Effects, as well.

Select the clips to which you want to apply a retro look.

NOTE: A “retro” look is one that makes your footage look like it was shot years ago, using older technology.

  • Search for Universe Stylize in your Effects browser.
  • Within the folder, select uni.retrograde
  • Inside uni.retrograde, browse the presets to view a selection of 8mm and 16mm scans
  • To give a bit more “stuttery” effect to movement, select 18 FPS
  • Adjust frame, vignette, grime, and color treatment settings to create a more realistic effect

EXTRA CREDIT

Here’s the link to Kelsey’s original video.

And here’s the link to learn more about Red Giant Universe.


Please rate the helpfulness of this tip.

Click on a star to rate it!

… for Visual Effects

Tip #435: Faster Still Image Rotoscoping

Larry Jordan – LarryJordan.com

The secret is to let Photoshop figure out where the edges are.

The girl was rotoscoped, then the color was removed from the background.

Topic $TipTopic

Rotoscoping allows you to select a portion of an image by tracing the edges of the subject you want to isolate. The problem is that rotoscoping is really, really tricky; especially when hair or other soft edges get involved.

While this tip involves Photoshop, I’ve used it constantly to extract images for my video projects.

  • Open the image you want to rotoscope in Photoshop.
  • Convert the image to a layer; click the small lock icon on the right side of the layer.
  • Choose Select > Subject. (I don’t know when this feature showed up, but it’s magical.)

Photoshop makes its best guess and selects what it thinks is the subject. At which point, you can do whatever you want with it.

EXTRA CREDIT

To create this screen shot:

  • Convert the image to a layer
  • Chose Select > Subject
  • Inverted the selection
  • Deleted the color from the selection

Took me 15 seconds. And, yes, I remember how hard this was in the past.


Please rate the helpfulness of this tip.

Click on a star to rate it!

… for Visual Effects

Tip #436: What is a B-spline Curve?

Larry Jordan – LarryJordan.com

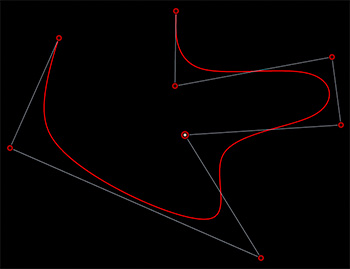
B-splines are used to create shapes with no sharp corners.

An example of an open-ended B-spline curve.

Topic $TipTopic

B-spline curves (short for Basis spline) are frequently used to create shapes because, unlike Bézier curves, B-splines have no corners.

A B-spline is a combination of flexible bands that pass through a number of points (called control points) to create smooth curves. These functions enable the creation and management of complex shapes and surfaces using a number of points. B-spline and Bézier functions are applied extensively for shape optimization.

B-splines can be open (where the ends are not connected, as in this screen shot), or closed.

The shape of the B-spline is determined by moving the nodes, the red dots in this illustration. These act as magnets, attracting the shape of the curve as the nodes move.

Neither Premiere nor Final Cut support B-splines, but After Effects and Motion do.

EXTRA CREDIT

An extension of B-splines are NURBS (short for “non-uniform rational B-splines”). The big benefit to NURBS is that they can exist in three dimensions. I’d, ah, show you the equations for these, but they make my brain hurt.


Please rate the helpfulness of this tip.

Click on a star to rate it!

… for Visual Effects

Tip #403: Blue or Green: Which Keys Better?

Larry Jordan – LarryJordan.com

Green and blue background yield different results.

Typical green-screen background and lighting.

Topic $TipTopic

This article, written by Charles Yeager, first appeared in PremiumBeat.com. This is an excerpt.

Chroma key compositing is the actual technique of layering two images together based on color hues. The solid color background essentially acts like a matte for your footage. Later, in post-production, you can remove the solid color background to make it transparent, allowing for compositing.

We use green and blue backgrounds because they are the furthest colors from human skin tones. But the two colors don’t give the same results. In an EXCELLENT article, Charles Yeager explains when to use green and when to use blue backgrounds. Here are the highlights:

Green Screens Pros:

  • Results in a cleaner key because digital cameras pick up more information
  • Requires less lighting
  • High luminance is good for daytime scenes
  • Uncommon color in clothing

Green Screen Cons:

  • Color spill can be too heavy, especially on fine details and edges (or blonde hair)
  • High luminance is not great for dark or night scenes

Blue Screen Pros:

  • Less color spill is great for subjects with fine details and edges
  • Lower luminance is good for dark or night scenes

Blue Screen Cons:

  • Requires more lighting, which can be expensive
  • Common clothing color, making it difficult to key in post

Please rate the helpfulness of this tip.

Click on a star to rate it!

… for Visual Effects

Tip #413: Mask Multiple Clips with an Adjustment Layer

Larry Jordan – LarryJordan.com

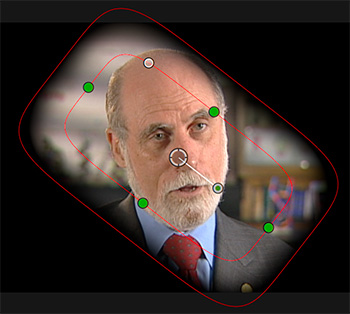
Adjustment layer masks can apply to one or more clips.

Masking applied to an adjustment layer in Final Cut Pro X.

Topic $TipTopic

Both Adobe Premiere Pro and Apple Final Cut Pro X support adjustment layers; though you’ll need to create one first for Final Cut. This is a technique you can use in both.

NOTE: This tutorial explains how to create an adjustment layer for FCP X.

If you want to mask a single clip, Draw Mask in FCP X, or the masking tools in the Effect Controls panel (Premiere) work great. But, what if you want to mask multiple clips?

Well, you could create a mask in one clip, then copy and paste it to multiple clips. That works, until you need to make a change. Adjusting multiple clips is a pain in the neck.

Here’s the better way: Use an adjustment layer.

In Premiere:

  • Open the sequence you want to mask.
  • Choose File > New > Adjustment layer and match the settings in your sequence.
  • Add the adjustment layer to the top of your timeline, then select it.
  • Use the masking tools in the Effect Controls panel to create the shape and effect you want.

In FCP X:

  • After you create an adjustment layer, you’ll find it in the Titles browser. Drag it so it is on top of all other clips in the timeline.
  • Apply Effects > Masks > Draw Mask to the adjustment layer.
  • Create the shape and effect you want.

In both software, once the mask is applied to the adjustment layer, all clips under it will be masked. If you need to make changes, you only need to change the adjustment layer.

This is a huge timesaver.


Please rate the helpfulness of this tip.

Click on a star to rate it!